
Skylark L4-144 2.4L DOHC VIN T SFI (1997)
workbench is best for this.
c.
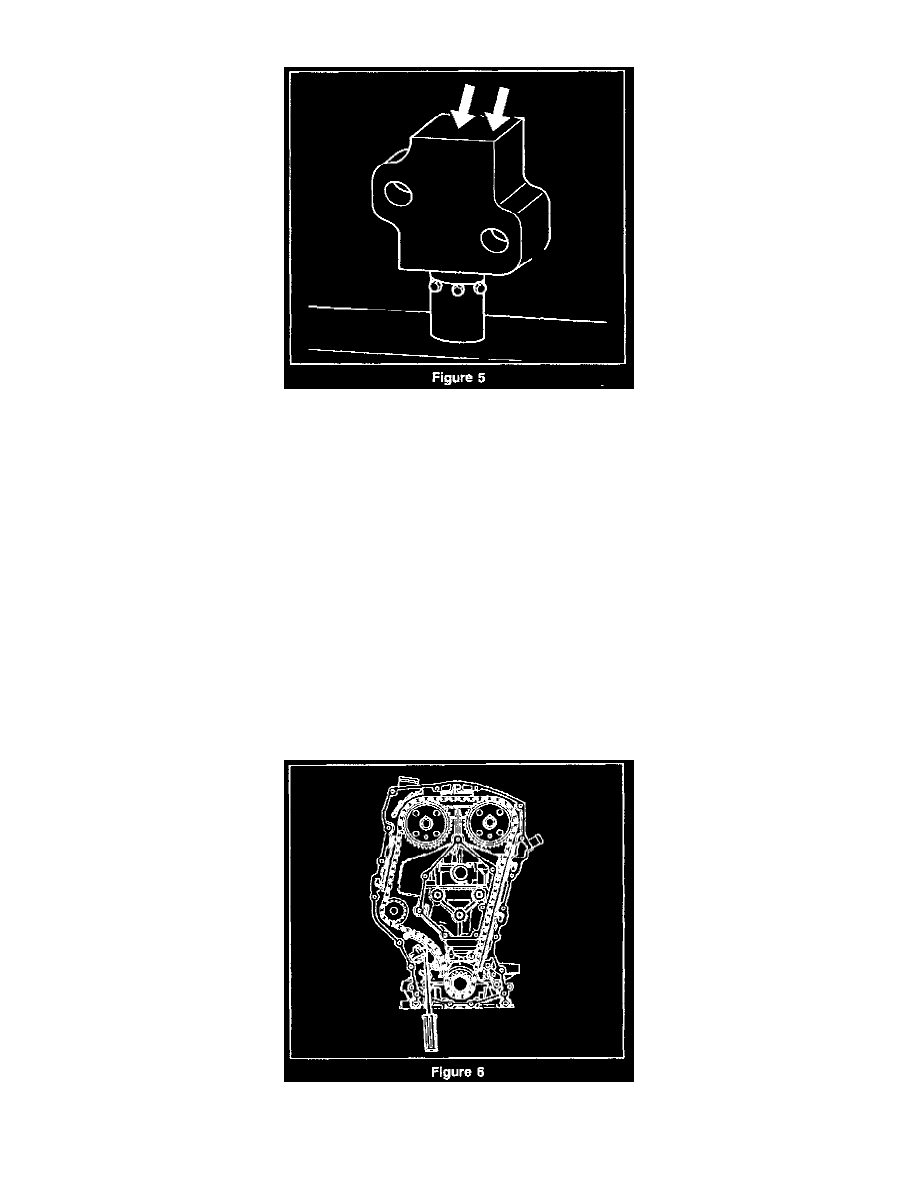
With the plunger face against the workbench, press firmly on the bottom of the tensioner body, compress the tensioner plunger until it is
seated flush in the tensioner. See Figure 5.
10. Install the tensioner body and plunger to the chain housing.
11. Install the timing chain tensioner shoe on the stud. Apply hand pressure to the timing chain tensioner shoe until the locking tab seats in the groove
in the stud.
12. Tighten the timing chain tensioner body bolts. Do not over-tighten.
TIGHTEN
Bolts to 10 Nm (89 lb in.)
13. Release the timing chain tensioner plunger. Press down until the plunger releases against the back of the timing chain tensioner shoe.
NOTICE: If the timing chain tensioner is not released from the installation position, engine damage will occur when the engine is started.
14. Using a flat-blade screwdriver, cotter pin remover, or a similar tool, press firmly against the face of timing chain tensioner plunger.
15. Depress the timing chain tensioner plunger until it is bottomed out in the bore of the timing chain tensioner. If the timing chain tensioner cannot be
depressed, it is not properly loaded and the procedure for loading the timing chain tensioner must be repeated.
16. Release the tensioner plunger, the plunger will press firmly against the back of the timing chain tensioner shoe.
17. Remove J 36008-A from the camshaft sprockets. See Figure 6.
NOTICE: The timing chain on the LD9 (VIN T) Twin Cam Engine is not to be replaced with the timing chain from any other model year. The