
Skylark L4-144 2.4L DOHC VIN T SFI (1997)
Fuel Injector: Service and Repair
Fuel Rail Assembly
REMOVE OR DISCONNECT
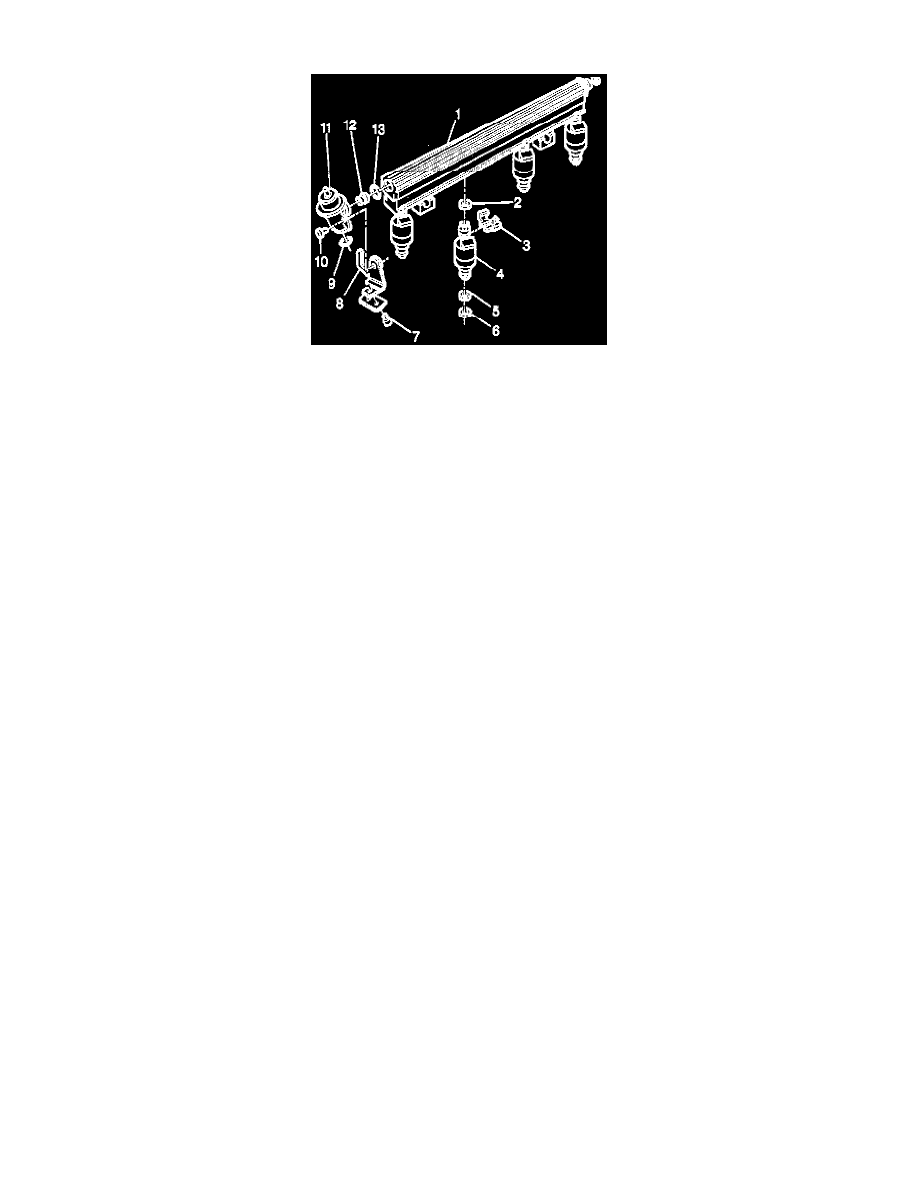
Notice: Numbers in text correspond to numbered components in image.
1. Relieve fuel system pressure. Refer to Fuel Pressure Release.
2. Remove the negative battery cable.
3. Remove the fuel rail assembly (1) from cylinder head. Refer to Fuel Rail.
4. Spread fuel injector retainer clip (3) to release fuel injector from rail extrusion flange.
Notice: Use care in removing the fuel injectors to prevent damage to the fuel injector electrical connector pins or the fuel injector nozzles. The
fuel injector is an electrical component and should not be immersed in any type of cleaner as damage to the fuel injector may result.
5. Remove the fuel injector assembly (4).
6. Discard fuel injector retainer clip.
7. Remove the injector O-Ring seals (2) (6) from both ends of fuel injector, and discard.
INSTALL OR CONNECT
Caution: In order to reduce the risk of fire and personal injury that may result from a fuel leak, always install the fuel injector O-Rings
in the proper position. If the upper and lower O-Rings are different colors (black and brown), be sure to install the black O-Ring in the
upper position and the brown O-Ring in the lower position on the fuel injector. The O-Rings are the same size but are made of different
materials.
Notice: Different fuel injectors are calibrated for different flow rates. When ordering new fuel injectors, be sure to order the identical part number
that is inscribed on the old fuel injector.
1. Lubricate new fuel injector O-Ring seals (2) (5) (6) with clean engine oil and install on fuel injector assembly.
2. Install the new fuel injector retainer clip (3) on fuel injector assembly.
Notice: Position clip on right side of the fuel injector electrical connector.
3. Install the fuel injector assembly (4) into fuel rail injector socket with electrical connector facing outward.
Notice: Push in far enough to engage retainer clip over rail extrusion flange.
4. Install the fuel rail assembly (1).
5. lnstall the negative battery cable.