
Skylark V6-173 2.8L VIN W FI (1985)
DISASSEMBLY
1.
Mount compressor J-26584 in suitable vise.
2.
Mount strut in compressor using bottom adapter J-26584-400 or equivalent.
3.
Ensure that strut is fully contained by bottom adapter and that locating pins are fully engaged.
4.
Rotate strut to align lip of top mount with notch in compressor support.
5.
On 1982---83 models, install both J-26584-40 top adapters ensuring that split lines are at 9 o'clock and 3 o'clock positions, Fig. 10.
6.
On 1984---88, install top adapter J-26584-430, aligning studs with properly marked holes on adapter.
7.
Rotate compressor screw clockwise until top support contacts strut/adapter assembly, then keep turning screw until spring is compressed to
approximately 1/2 of its height on 1984---88 models or 4 turns on 1982---83 models.
8.
Remove nut from damper shaft and install suitable alignment rod.
9.
Gradually release spring tension, then remove and disassemble strut noting position of components for reassembly, Fig. 11.
Fig. 12 Strut alignment rod installation (Typical)
ASSEMBLY
1.
Perform steps 1 through 3 as outlined in the ``Disassembly'' procedure.
2.
Rotate strut assembly until mounting flange is facing outward opposite compressor forcing screw.
3.
Install spring and related components on strut. Ensure spring is properly seated on bottom spring plate.
4.
Install strut spring seat assembly on top of spring. Ensure flat faces in same direction as lower flange.
5.
Position top adapters over spring seat assembly.
6.
Rotate compressor forcing screw until compressor top support makes contact with top adapters. Do not compress spring at this time.
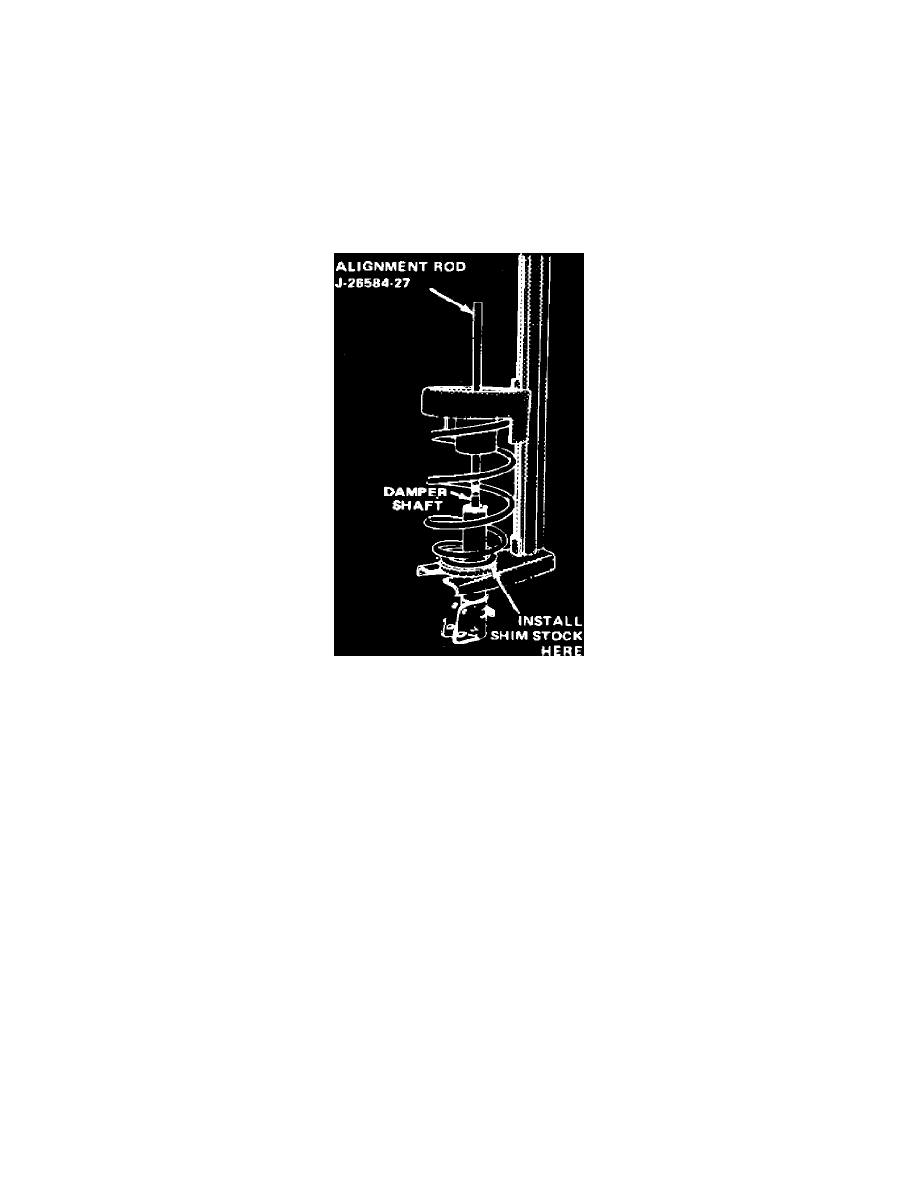
7.
Install suitable strut alignment rod through top spring seat. Thread rod onto damper shaft hand tight, Fig. 12. Install shims between lower spring
seat and bottom adapter to keep alignment rod centered in upper spring seat opening.
8.
Compress spring by slowly rotating forcing screw. While rotating screw, observe position of damper shaft, as it must pass directly through center
of opening in upper spring seat to provide proper operation. If spring is off-center, back off screw and proceed as follows:
a. Reposition both top adapters in support fixture to provide proper spring seat-to-damper position.
b. Install thin shim stock between lower spring seat and bottom adapter to tilt strut assembly into proper position.
c. When damper shaft can be held in proper position, rotate screw until approximately 1 1/2 inch of shaft can be pulled through upper spring
seat. Do not compress spring beyond this point.
9.
Remove alignment rod, place strut mounting assembly over damper shaft and install nut. Torque nut to 65 ft.lbs.
10.
Rotate forcing screw counterclockwise and remove strut assembly from compressor.