
Skylark V6-173 2.8L VIN X 2-bbl (1984)
4.
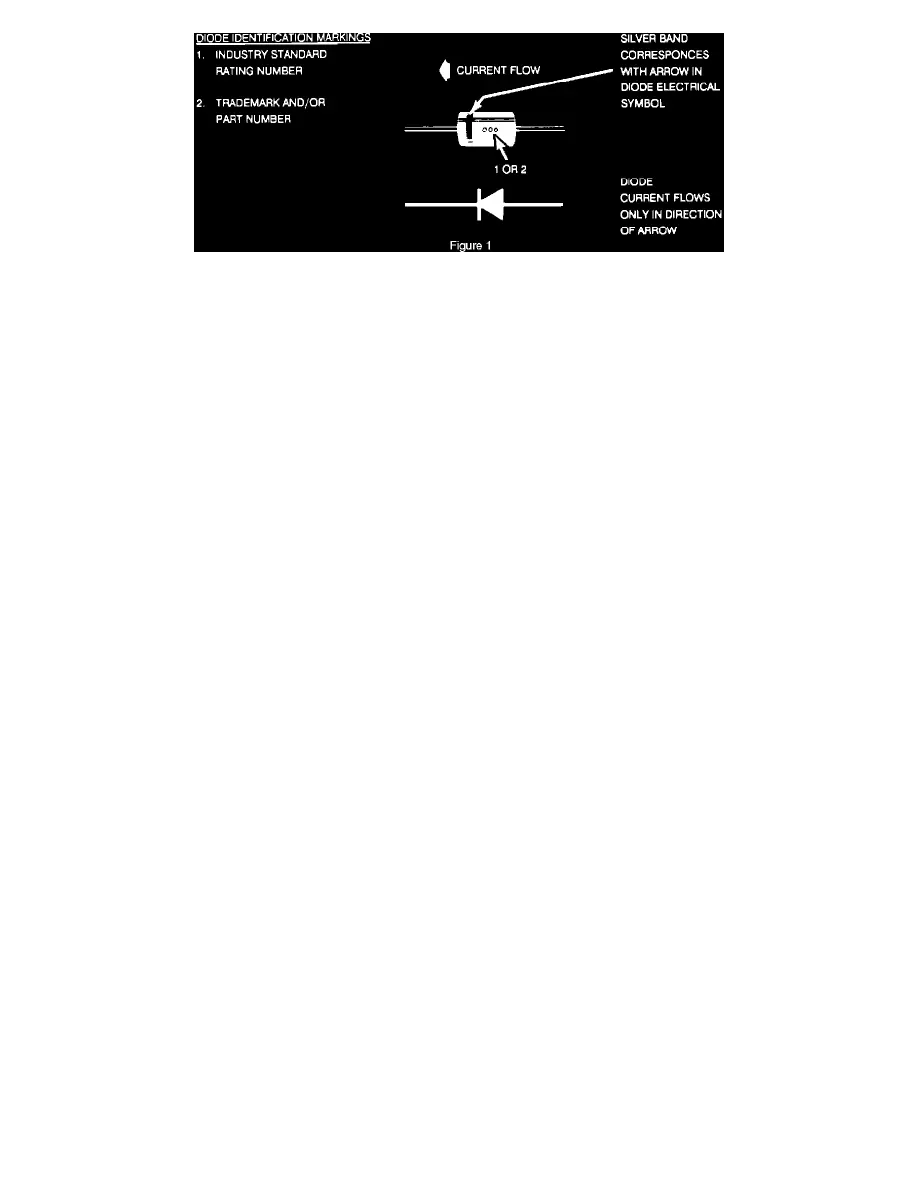
Check current flow direction of the new diode, being sure to install the diode with correct bias. Reference the appropriate service manual wiring
schematic to obtain the correct diode installation position. Reference Figure 1 for replacement diode symbols and current flow explanations.
Attach the new diode to the wire(s) using 60/40 rosin core solder. Use a heat sink (aluminum alligator clip) attached across the diode wire ends to
protect the diode from excess heat. Follow the manufacturer's instructions for the soldering equipment you are using.
5.
Install terminal(s) into the connector body if previously removed in step number 2.
6.
Tape the diode to the harness or connector using electrical tape. To prevent shorts to ground and water intrusion completely cover all exposed wire
and diode attachment points.
NOTE:
A universal diode with a 3 amp, 400 PIV (Peak Inverse Voltage) rating can be used in all of the previously mentioned applications.
GM parts are currently available from GMSPO.
The following 1993 Service Manuals will need to be updated with the correct part numbers and rating changes.
Car Line
Page
All Century, Skylark and
8A-5-12
Regal
Heat sink, part number 276-1567, can be obtained from Radio Shack.
We believe the diodes and heat sink listed in this article as well as their manufacturer to be reliable. There may be additional manufacturers or equivalent
products. General Motors does not endorse, indicate any preference for or assume any responsibility for the products from these firms or for any such
items which may be available from other sources.