
Skylark V6-173 2.8L VIN X 2-bbl (1984)
5. Remove paint and primer from the area surrounding the 10 mm (0.40 in) until bare metal is visible.
Important
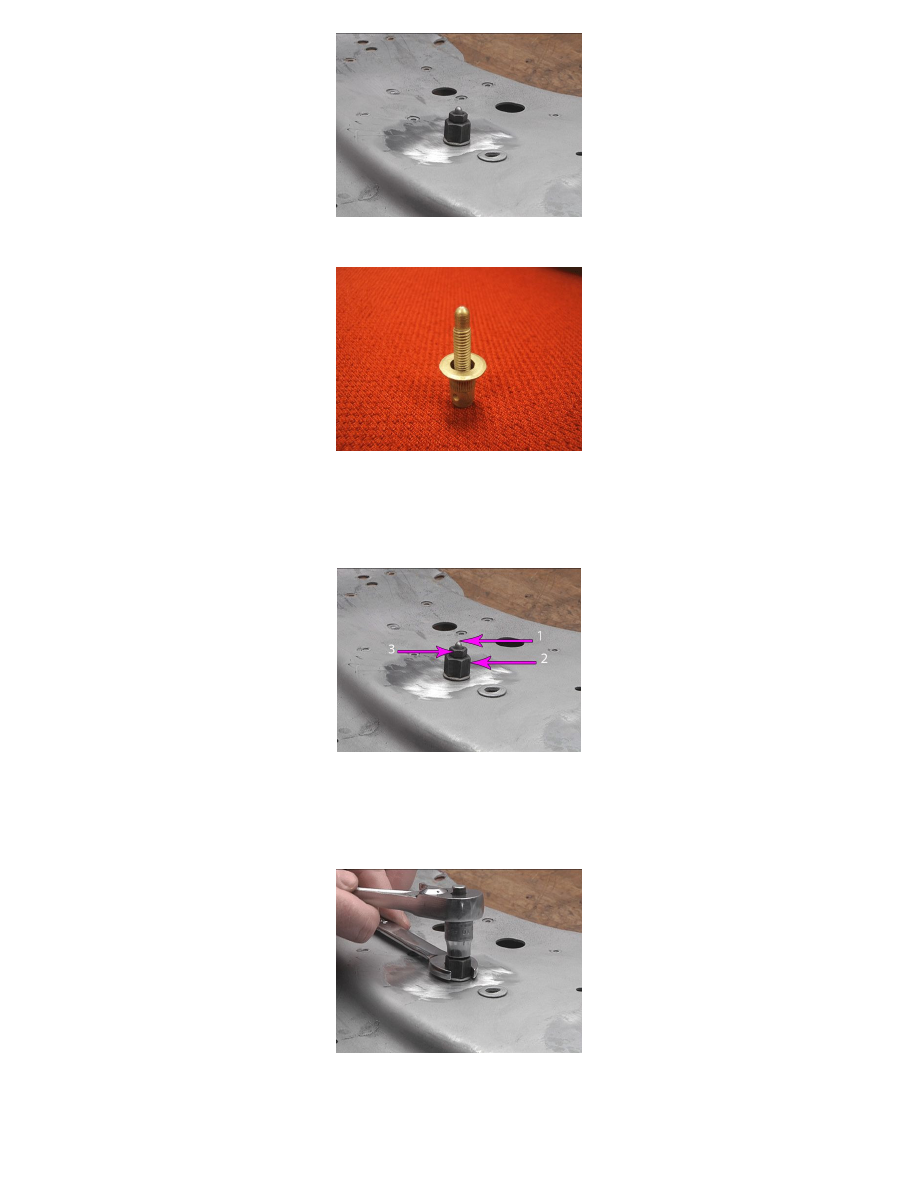
The M6 conductive rivet stud as shown, can accommodate a panel thickness range of 0.7-4.2 mm (0.03-0.17 in). If there are layers of sheet
metal, they should be touching without any air gaps to ensure a good ground.
6. Select a M6 conductive rivet stud. Refer to the Parts Information section of this bulletin.
Note
Use the GE-50317 rivet stud tool kit.
7. Place the M6 conductive rivet stud (1) in the 10 mm (0.40 in) hole. Assemble the rivet stud tool (2) with the groove and flare side facing the rivet
stud, then the washer and the M6 nut (3).
8. Using a wrench on the rivet stud tool, and a socket on the M6 nut, secure the M6 conductive rivet stud.
9. Ensure the new rivet stud is securely fastened, WITHOUT ANY detectable movement.
10. Completely wrap the threads of the rivet stud with painters tape or equivalent.