
Skylark V6-191 3.1L VIN M SFI (1994)
Control Arm Bushing: Service and Repair
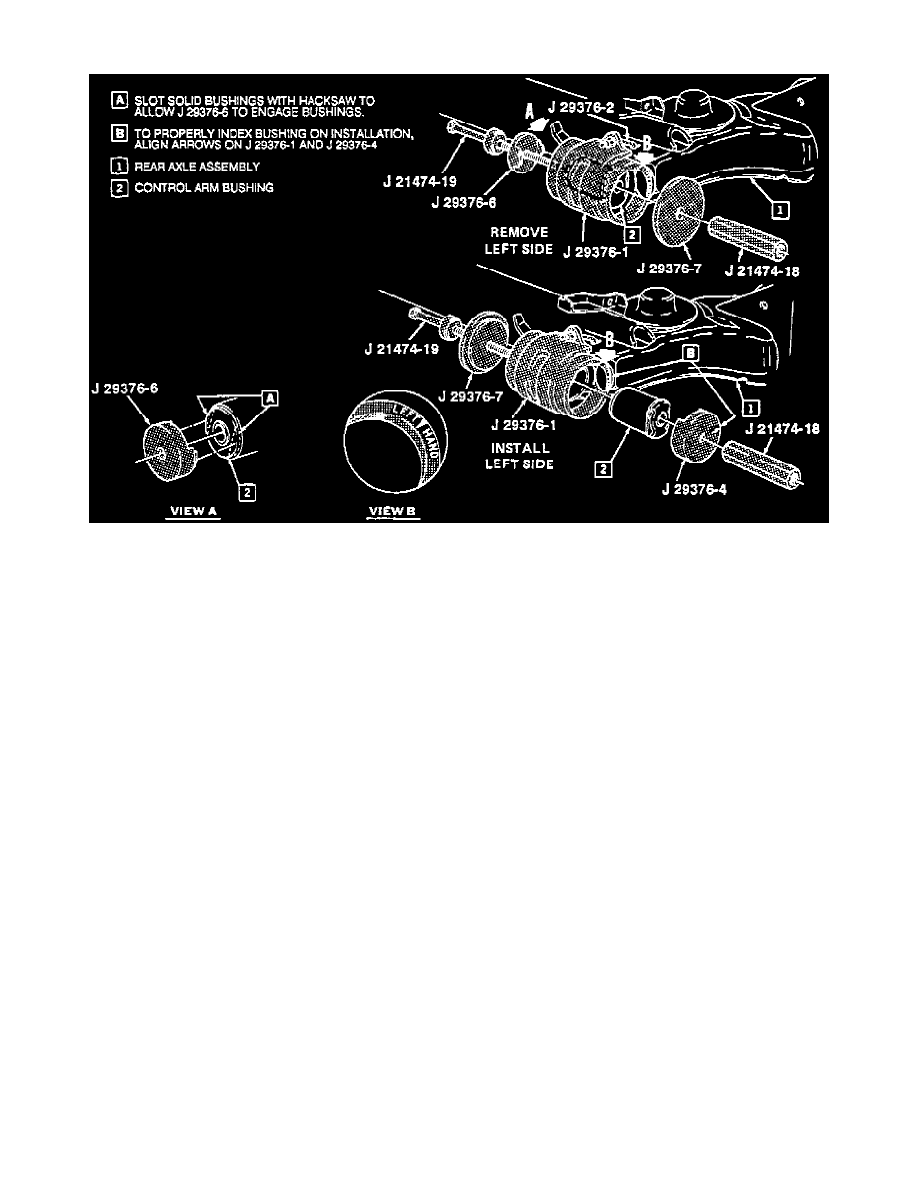
Fig. 4 Control Arm Bushing Installation
1. Raise rear of vehicle and support rear axle under front side of spring seat using a suitable jack.
2. Remove stabilizer bar from axle.
3. Remove wheel and tire assembly.
4. If right hand side bushing is to be replaced, disconnect brake line bracket from body. If left hand side bushing is to be replaced, disconnect brake
line bracket from body and parking brake cable at hook guide.
5. Remove control arm to mounting bracket attaching nut, bolt and washer, then allow control arm to rotate downward.
6. The bushing can now be replaced using tools shown in Fig.4 . When installing bushing, arrow on the installer must align with arrow on receiver,
Fig.4 .
7. Reverse procedure to complete installation. The control arm attaching bolt must be torqued after vehicle is lowered to floor and is in its
standing height position.Tighten attaching bolt to specifications.