
Skylark V6-3100 3.1L VIN M SFI (1996)
3.
Remove actuator from HVAC module.
4.
Drill 5/32 in. hole, 5 mm up the actuator link (closer to the actuator housing).
5.
Install actuator to HVAC module.
6.
Install mode door shaft to new hole on actuator link with retaining clip.
7.
Install vacuum lines to actuator.
Verify that there is no air coming through the I/P vents in "Heater" modes with blower on "High." If leakage is still present through I/P vents, then
diagnose HVAC module. Refer to Section 1B in applicable Service Manual.
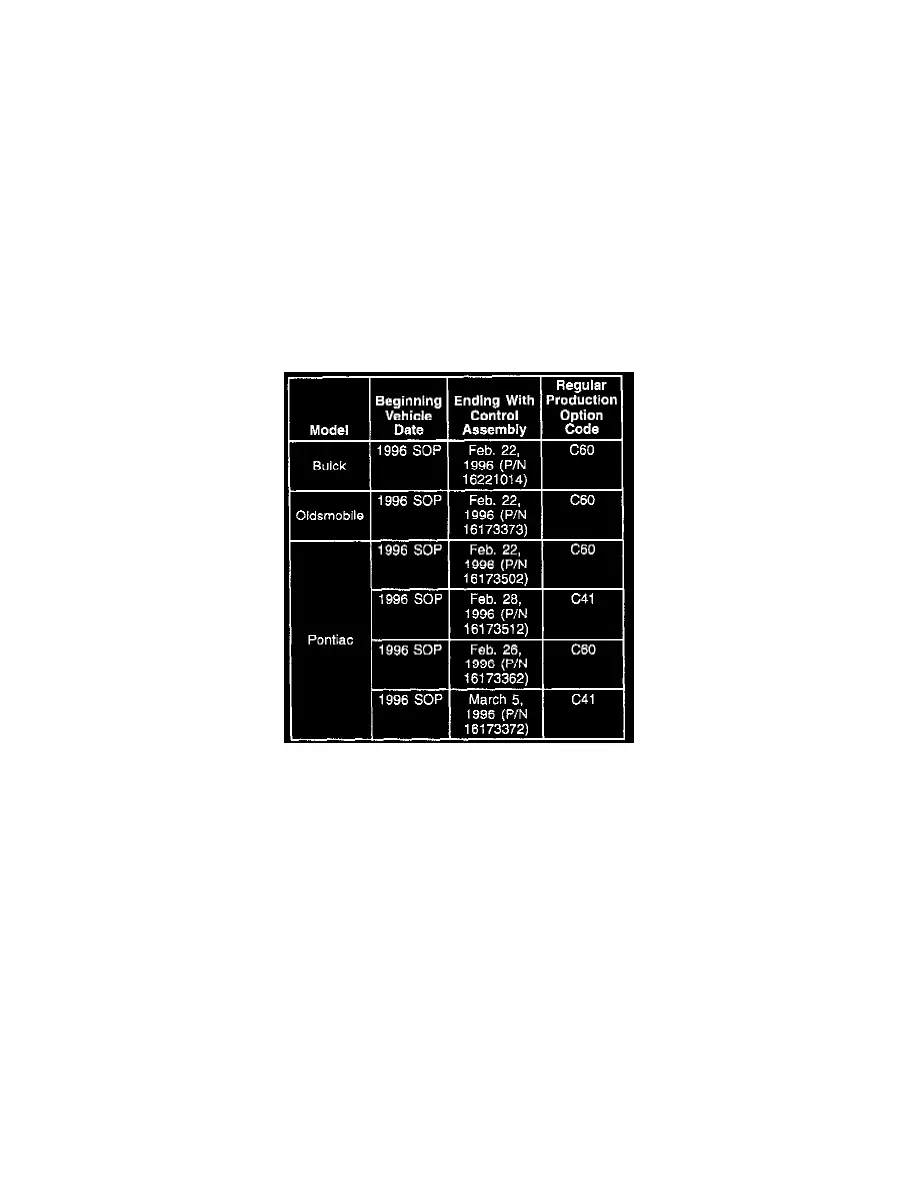
Condition B
VIN Breakpoints
Diagnose
Control Assembly Check
While operating the HVAC system, a delay occurs when changing to a new mode setting. The mode change is typically accompanied by a hissing sound.
This could occur in any one or more modes. It could be an intermittent event (possibly subject to ambient temperatures generally below 35° F (1° C).
Therefore, the control assembly could operate correctly when it is checked.
1.
Does air come out the correct ducts based on the mode setting? If "YES," perform the service procedure listed below. If "NO," go to Step 2.
2.
Remove I/P compartment. Refer to Section 8C2 in the Service Manual. Verify vacuum at the source (purple hose) and at the vacuum actuators.
Verify mode and defrost door operation. Make corrections if necessary. If condition was found, corrected, and air now comes out of the correct
ducts based on the mode setting, reinstall the I/P compartment and STOP. If NOT, perform the service procedure listed below, then STOP. DO
NOT perform the diagnosis for Condition A.
Service Procedure
Replace the mode switch/valve assembly.
1.
Remove the control assembly from the vehicle. Refer to Section 1B of the applicable Service Manual.