
Somerset V6-181 3.0L (1986)
2.
Install J 28467 engine support fixture.
3.
Raise car and suitably support. See Section OA in service manual.
4.
Remove right-hand drive axle assembly
5.
Remove right rear engine mount (No. 7)
6.
Remove speed sensor heat shield (No. 2) and transaxle brace (No. 3).
7.
Remove right rear engine mount to engine bracket (No. 6)
8.
Remove bolt from lower mounting hole of drive belt tensioner assembly (No. 4).
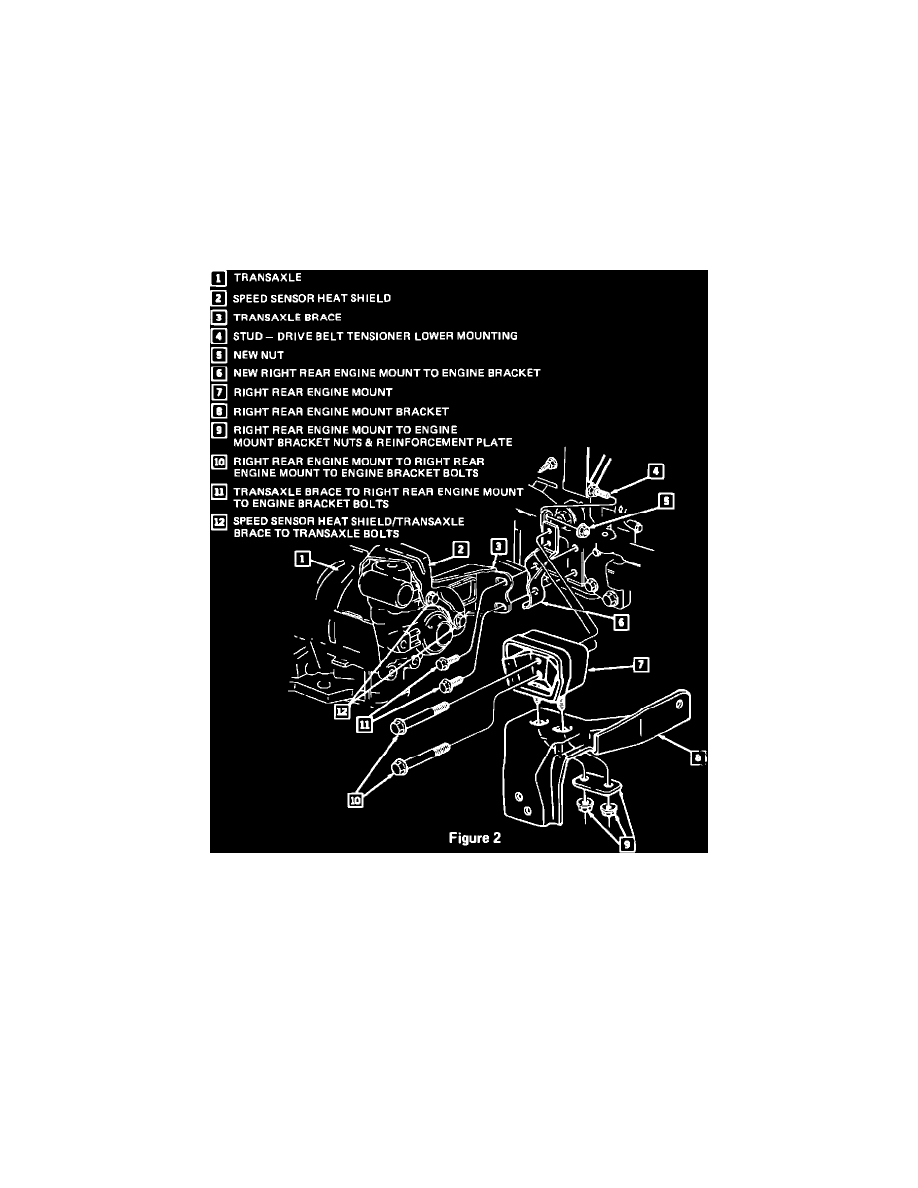
FIGURE 2
INSTALL NEW RIGHT REAR ENGINE MOUNT TO ENGINE BRACKET KIT (Figure 2)
1.
Install long end of new stud (No. 4) in lower mounting hole of drive belt tensioner assembly. Tighten stud to 50 N-m (38 ft.lbs.).
2.
Install new right rear engine mount to engine bracket (No. 6) into position.
3.
Install new nut (No. 5) on drive belt tensioner assembly stud. Tighten nut to 45 N-m (34 ft.lbs.).
4.
Install right rear engine mount (No. 7). Hand start two bolts (No. 10) and two nuts and reinforcement plate (No. 9). DO NOT TIGHTEN YET.
5.
Install transaxle brace (No. 3) and speed sensor heat shield (No. 2) to transaxle. Hand start bolts (No. 12). DO NOT TIGHTEN.
6.
Install transaxle brace to right rear engine mount to engine bracket bolts (No. 11). Tighten to 95 N-m (70 ft.lbs.).