
Radiator Air Baffle Assemblies & Deflectors | Service & Repair
15. Tilt the radiator and condenser inwards toward the engine and remove the radiator.
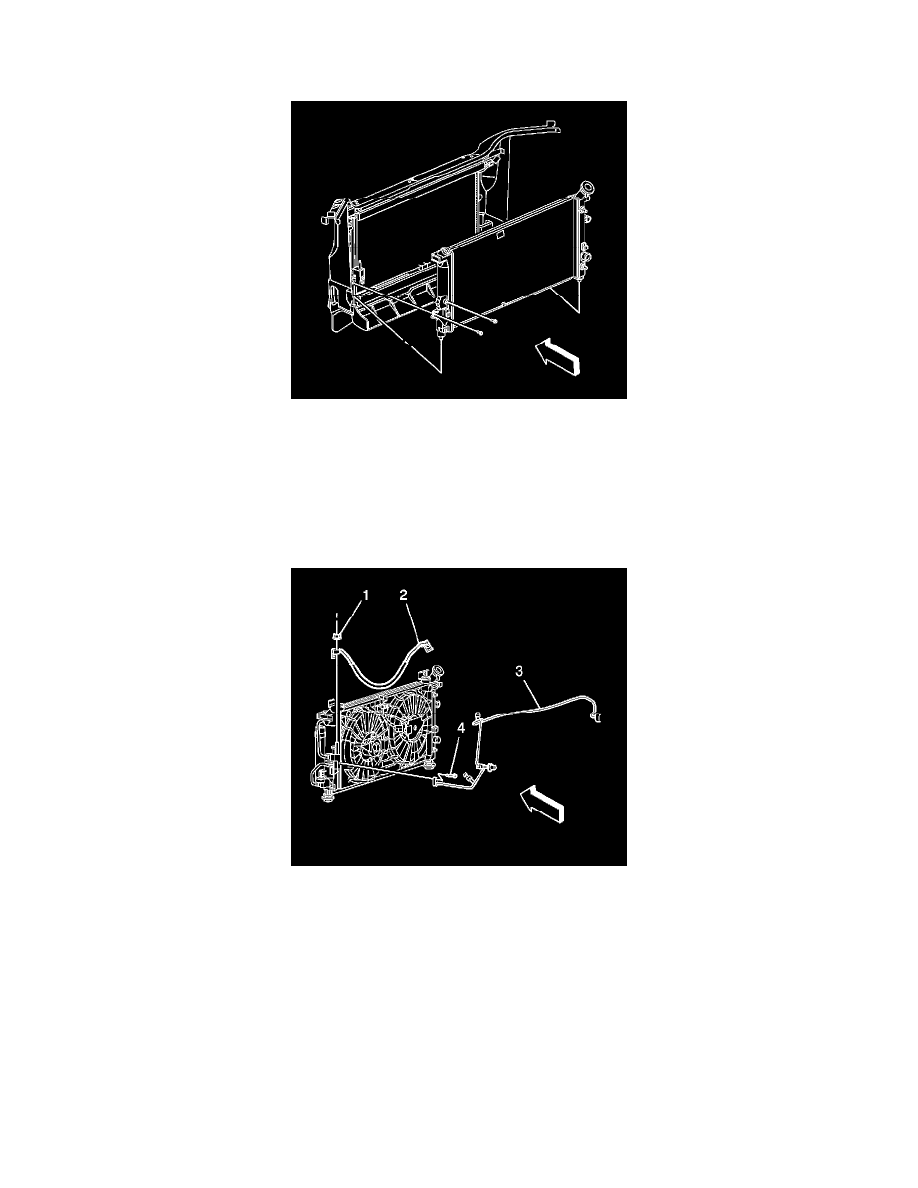
Installation Procedure
1. Install the radiator.
Notice: Refer to Fastener Notice in Service Precautions.
2. Install the condenser tube clip screw.
^
Tighten the bolts to 6 Nm (53 inch lbs.).
3. Install the bolt that secures the radiator to the condenser.
^
Tighten the bolt to 2.5 Nm (22 inch lbs.).
4. Remove the cap or tape from the evaporator inlet tube.
5. Install a NEW sealing washer.
6. Connect the evaporator inlet tube (3) to the condenser block.
7. Install the evaporator inlet tube to condenser bolt (4).
^
Tighten bolt to 16 Nm (12 ft. lbs.).
8. Remove the cap or tape off the A/C discharge hose.
9. Install a NEW sealing washer.
10. Connect the A/C discharge hose (2) to the condenser block.
11. Install the A/C discharge hose to condenser block nut (1).
^
Tighten the nut to 16 Nm (12 ft. lbs.).
12. Install the radiator outlet hose.
13. Install radiator inlet hose.
14. Install the cooling fans and shroud.
15. Connect the lower transmission oil cooler (TOC) line to the radiator.
16. Recharge the A/C system. Refer to Refrigerant Recovery and Recharging.