
Terraza FWD V6-3.5L VIN 8 (2005)
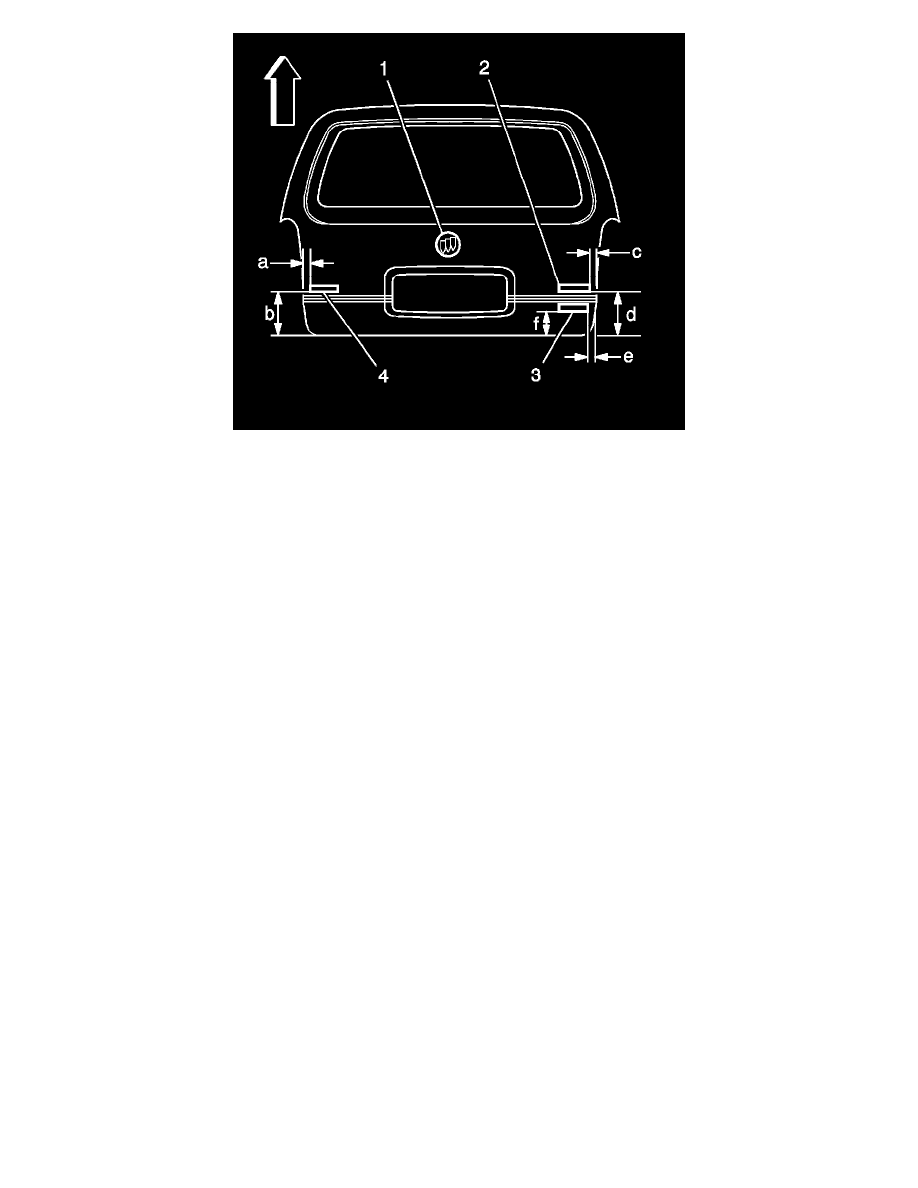
4. For the TERRAZA (3) emblem/nameplate, install as shown.
*
Dimension (a) is 31 mm (1.30 in) from the outer edge of the liftgate to the left side of the TERRAZA (4) emblem/nameplate edge.
*
Dimension (b) is 209 mm (8.23 in) from the bottom edge of the liftgate to the bottom of the TERRAZA (4) emblem/nameplate.
*
For the CXL emblem/nameplate, dimension (c) is 31 mm (1.30 in) from the right edge of the liftgate to the edge of the CXL (2)
emblem/nameplate.
*
Dimension (d) is 209 mm (8.23 in) from the bottom edge of the liftgate to the bottom edge of the CXL (2) emblem/nameplate.
*
Dimension (e) is 37 mm (1.46 in) from the right edge of the liftgate to the right edge of the VERSATRAK (3) emblem/nameplate.
*
Dimension (f) is 53 mm (2.09 in) from the bottom edge of the liftgate to the bottom edge of the VERSATRAK (3) emblem/nameplate.
5. The Buick (1) emblem is centered and indexed above the license plate pocket of the liftgate.
6. Heat the mounting surface to approximately 27-41°C (80-105°F) using theJ 25070 , if necessary.
7. Ensure that the temperature of the emblem/nameplate is approximately 29-32°C (85-90°F).
Important: Do not touch the adhesive backing on the emblem/nameplate.
8. Remove the protective liner from the back of the emblem/nameplate.
9. Position the emblem/nameplate to the location marks and press the emblem/nameplate to the mounting surface.
10. Apply equal pressure along the emblem/nameplate to uniformly bond the item to the mounting surface.
11. Remove the protective tape from the body panel.