
Allante V8-273 4.5L (1991)
Hydraulic Assembly: Service and Repair
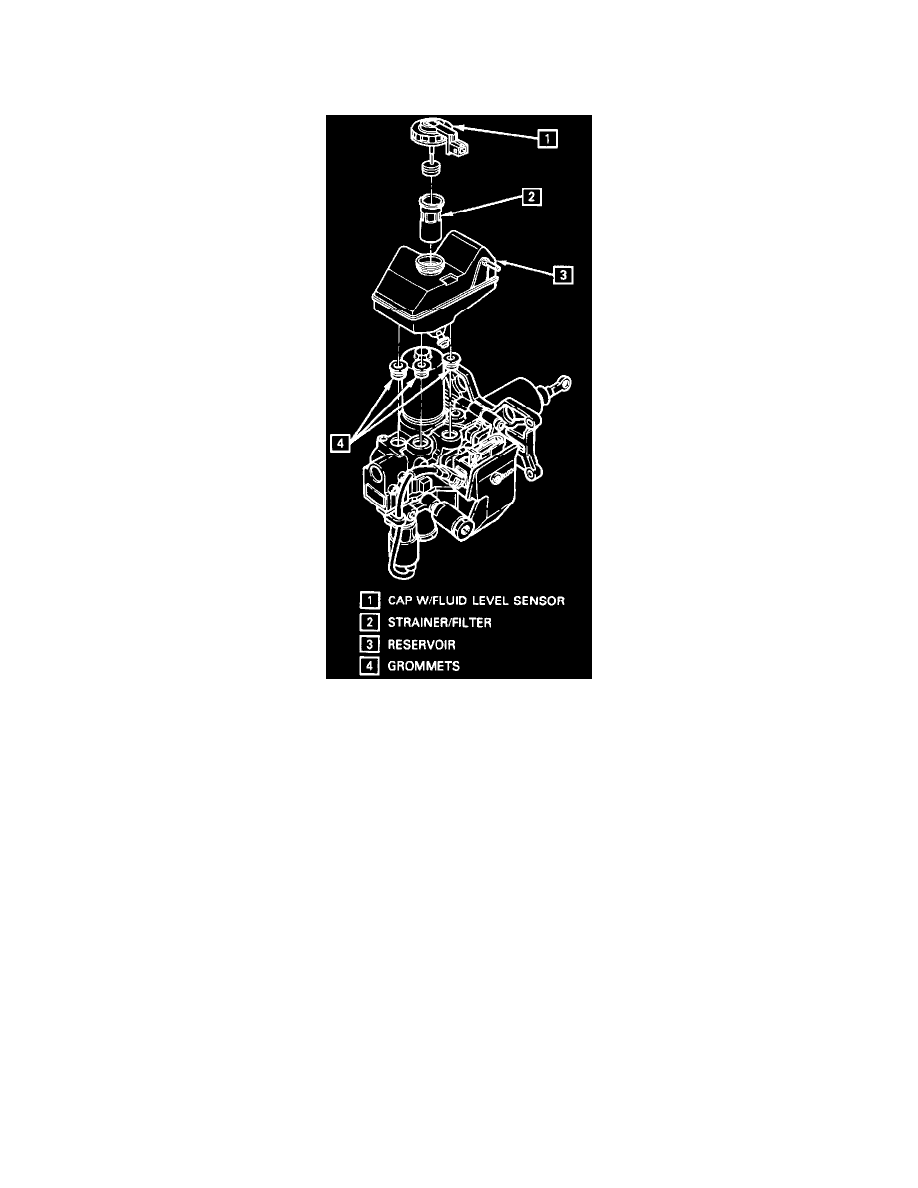
Reservoir and Grommets
RESERVOIR AND GROMMETS
Hydraulic Unit Reservoir
REMOVE OR DISCONNECT
1. Depressurize hydraulic accumulator by pumping brake pedal a minimum of 25 times.
2. Disconnect sensor block connector and fluid level sensor connectors from hydraulic unit.
3. Remove as much brake fluid as possible from the reservoir using a syringe or equivalent method.
4. Disconnect return hoses from reservoir ports.
5. Remove reservoir from hydraulic unit by CAREFULLY prying between reservoir and booster/master cylinder assembly with a blunt prying tool.
Use a rocking motion to help disengage reservoir from grommets while prying. BE EXTREMELY CAREFUL TO AVOID DAMAGING OR
PUNCTURING RESERVOIR DURING REMOVAL.
6. Using fingers, remove reservoir grommets from booster/master cylinder assembly.
INSPECT
^
Reservoir grommets for cuts, deterioration or other damage. Replace any cut or damaged grommets.
^
Reservoir for damage, cuts or gouging. Replace reservoir if damaged.
INSTALL OR CONNECT
IMPORTANT
^
New reservoirs are shipped with a sealed low pressure fluid return port (from the traction control plunger).
^
To modify the port for traction control equipped vehicles, cut off the sealed portion of the reservoir tube inlet and discard. Verify that the area
is clean from loose particles and dirt before connecting the return hose to the reservoir.
1. Thoroughly lubricate reservoir grommets with clean brake fluid and install on booster/master cylinder assembly.
2. Press reservoir into grommets BY HAND, using a rocking motion to help seat reservoir into booster/master cylinder assembly. Be sure that
reservoir is fully seated in all three grommets. DO NOT ATTEMPT TO POUND RESERVOIR INTO GROMMETS USING A HAMMER.