
Catera V6-3.0L VIN R (1997)
Brake Light Switch: Service and Repair
REMOVAL PROCEDURE
1. Remove the driver side instrument panel sound insulator. Refer to Instrument Panel, Gages and Console.
2. Remove the driver side front floor air outlet duct. Refer to Heater, Ventilation and Air Conditioning.
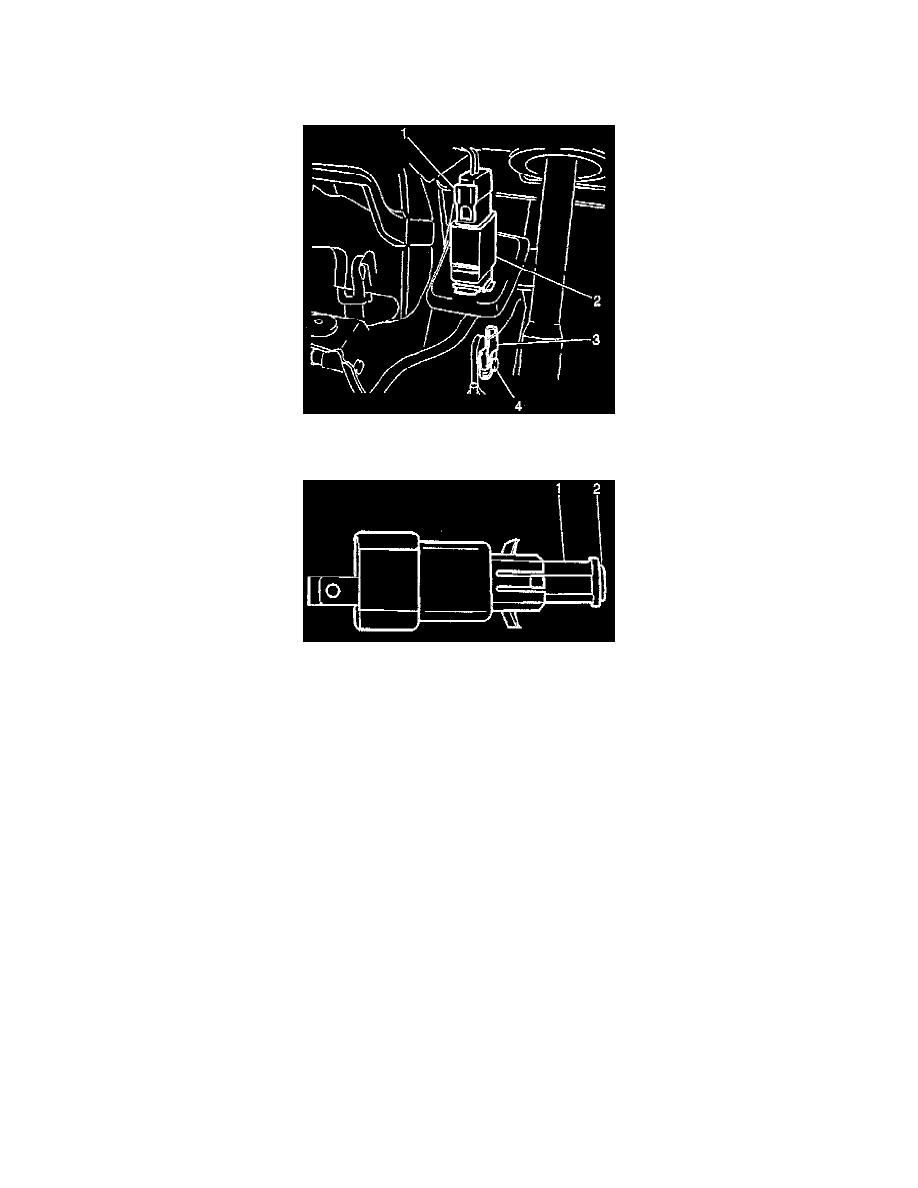
3. Remove the wiring harness connector (1) from the stoplamp switch (2).
4. Use angled pointed pliers to compress both the locking tabs to remove the stoplamp switch.
INSTALLATION PROCEDURE
1. Pull both the actuating pin (2) and the retaining collar (1) out of the stoplamp switch to the full extended position of about 17 mm (2/3 inch).
2. Engage the tangs on the stoplamp switch with the brake pedal bracket to install the stoplamp switch to the brake pedal bracket.
Important: Do not push the actuating pin into the stoplamp switch. The actuating pin self-adjusts to the brake pedal position when the brake
pedal returns to the at-rest position.
3. Install the wiring harness connector (1) to the switch (2).
4. Install the driver side front floor air outlet duct. Refer to Heater, Ventilation and Air Conditioning.
5. Install the driver side instrument panel sound insulator. Refer to Instrument Panel, Gages and Console.