
CTS-V V8-6.0L VIN U (2006)
Using J44765 install the new transmission case extension seal (1).
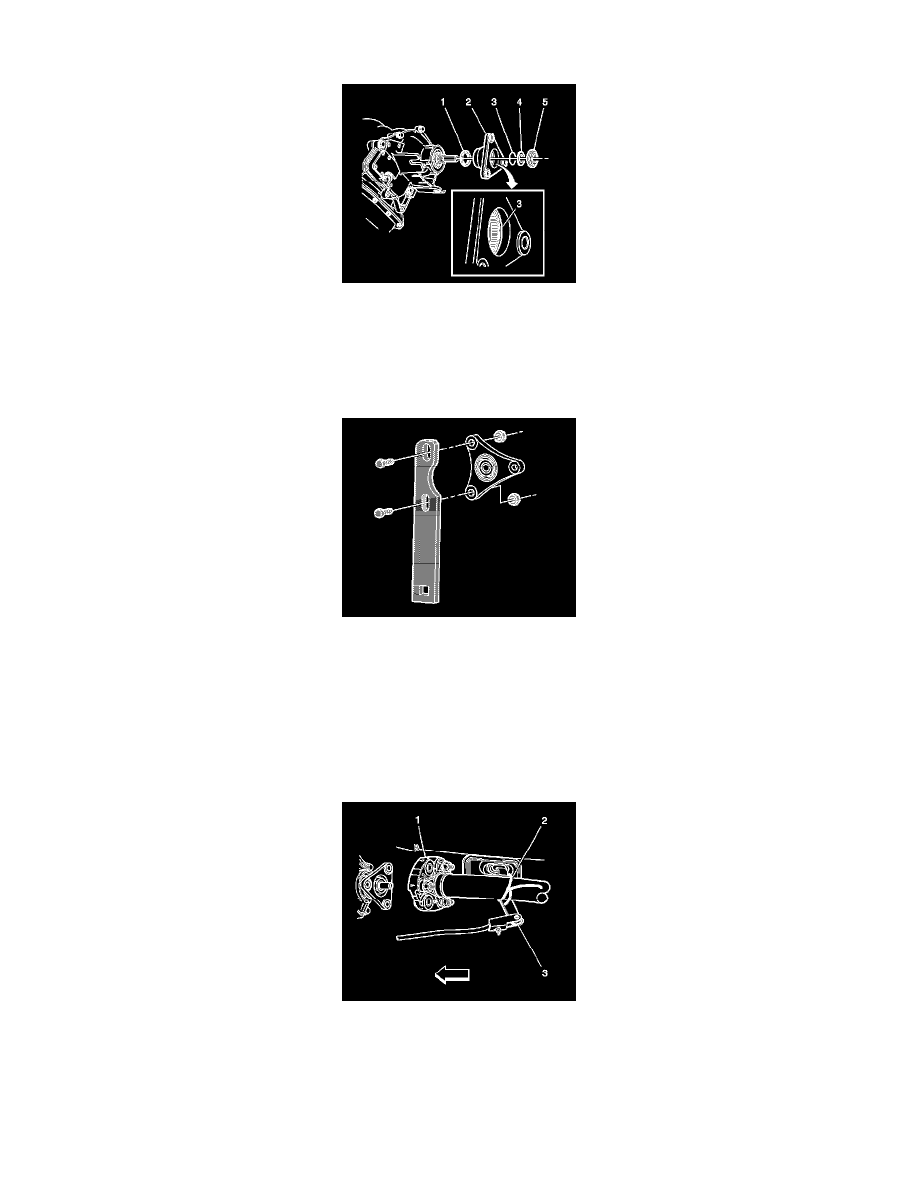
2. Install a NEW output shaft assembly retainer (1). Position the retainer on end of the output shaft splines. The retainer will be pushed to the proper
depth as the drive flange is installed onto the output shaft.
3. Install a NEW drive flange O-ring seal (3) into the drive flange.
4. Install the drive flange (2) to the transmission output shaft.
5. Install a NEW drive flange thrust washer (4).
6. Apply Loctite 272 (GM P/N 89021297) to the NEW drive flange nut threads.
7. Install the J45012 to the drive flange.
8. Notice: Refer to Fastener Notice in Service Precautions.
While holding J45012 Install a NEW drive flange nut using J29873.
Tighten the drive flange nut to 60 Nm (44 ft. lbs.).
9. Remove J45012 from the drive flange.
10. Remove the mechanics wire (2) securing front propeller shaft (1) to the shift control lever (3).