
CTS V6-2.8L (2006)
Brake Pad: Service and Repair
Brake Pads Replacement - Front (J56-Brembo)
Brake Pads Replacement - Front (J56-Brembo)
Caution: Refer to Brake Dust Caution in Service Precautions.
Removal Procedure
1. Inspect the fluid level in the brake master cylinder reservoir.
2. If the brake fluid level is midway between the maximum-full point and the minimum allowable level, no brake fluid needs to be removed from the
reservoir before proceeding.
3. If the brake fluid level is higher than midway between the maximum-full point and the minimum allowable level, remove brake fluid to the
midway point before proceeding.
4. Raise and support the vehicle. Refer to Lifting and Jacking the Vehicle.
5. Remove the tire and wheel assembly.
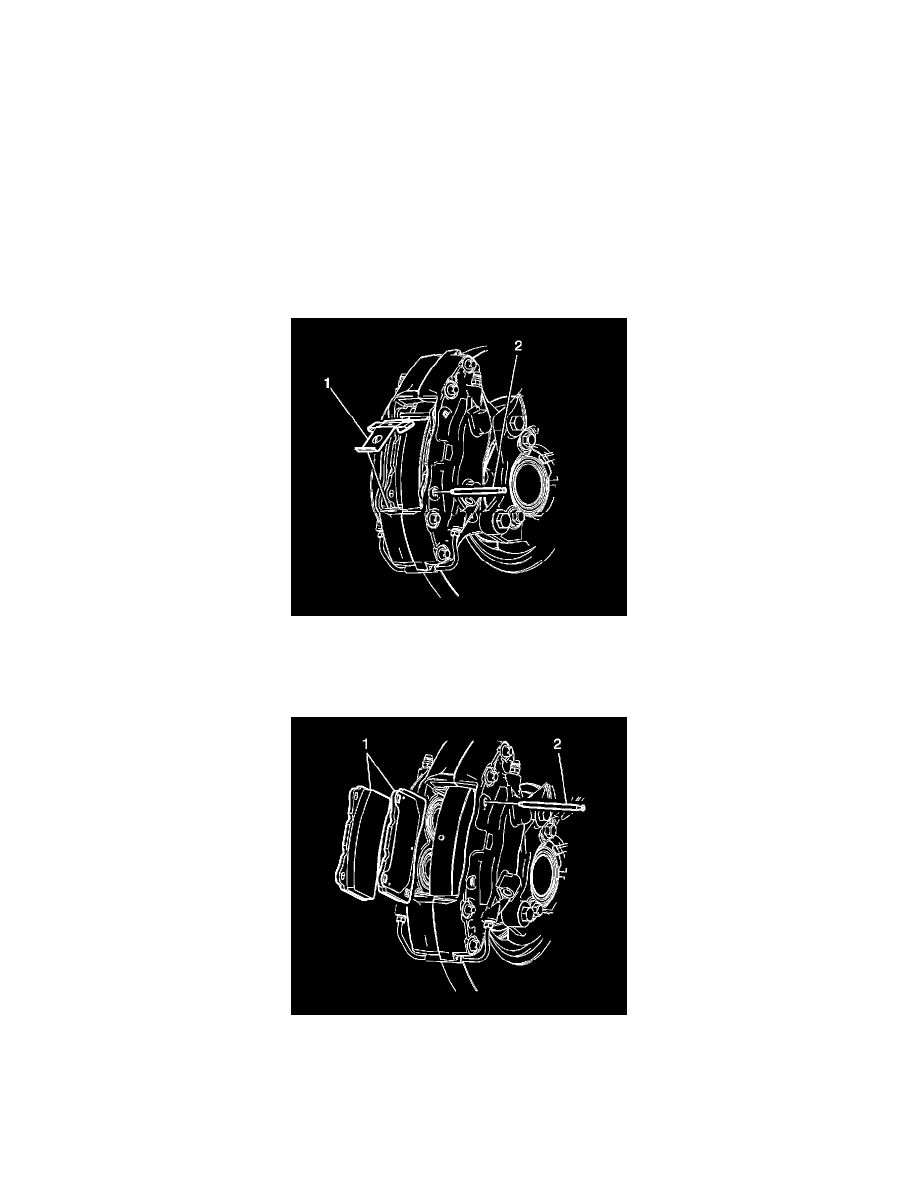
6. Holding the lower end of the retainer (1) down and using a hammer and punch carefully tap the lower caliper guide pin (2) inward out of the
caliper.
7. Carefully rotate the brake pad retainer (1) upward.
8. Remove the brake pad retainer (1).
9. Using a hammer and punch tap the upper caliper to brake pad mounting pin (2) inward out of the caliper.
10. Important: Use ONLY a plastic flat-bladed trim tool and/or another suitable soft tool when compressing the caliper pistons into the caliper piston
bores. Never use any type of metal tool between the brake rotor and brake pads to compress the caliper pistons into the bores.
Carefully insert a plastic flat-bladed trim tool between the rotor and inboard brake pad.
11. Carefully apply pressure to the inboard brake pad until both caliper inner pistons are fully compressed into the caliper piston bores.