
CTS V6-2.8L (2006)
8. Move the fabricated 51 mm (2 inch) long block of wood over the emptied piston bore and secure it in place with a non-marring C-clamp.
9. Move the clean cloths or the other fabricated 127 mm (5 inch) long block of wood to pad the interior of caliper housing during the removal of the
piston.
10. Carefully remove the brake caliper piston by directing low pressure compressed air into the brake caliper inlet hole. If the dust boot seal slides out
with the piston, remove the dust boot seal from piston and reinstall the seal into the caliper.
11. Repeat steps 4 through 10 for the opposite side of the caliper.
12. Using care to not scratch or mar the painted surfaces or piston bore, remove all the dust boot seals using a flat-bladed tool. Discard the dust boot
seals.
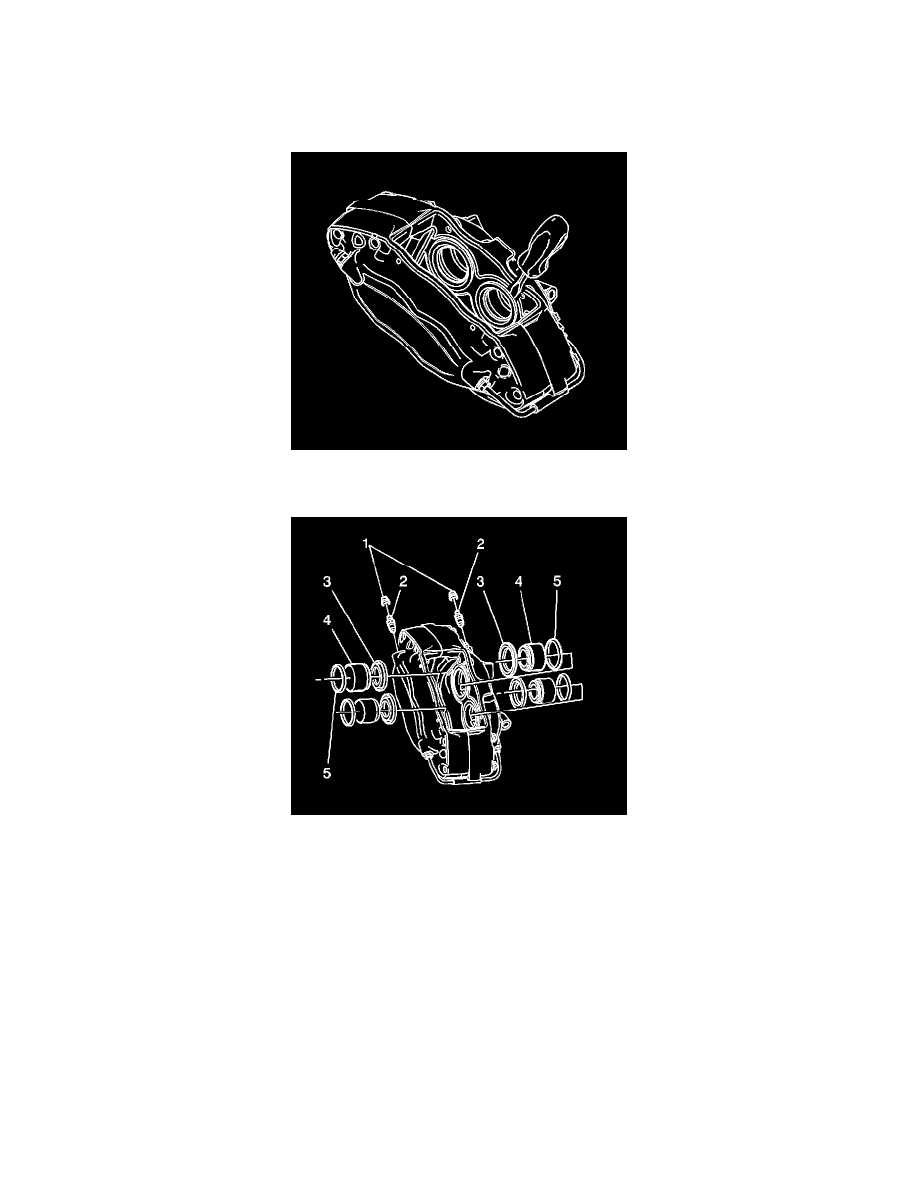
13. Using wooden or plastic tool, remove the piston seals (5) from the piston bores. Discard the piston seals.
14. Remove both brake caliper bleeder caps and valves (1, 2).
15. Remove the caliper from the vise and clean the entire caliper with denatured alcohol, or equivalent.
16. Dry the caliper piston bores with non-lubricated filtered air. Make sure the external crossover pipe and the internal fluid ports are clean and free of
obstructions.
17. Inspect the caliper cylinder bores and piston seal counter-bores for scratches, cracks, pitting, and/or corrosion.
18. Important: Do NOT clean the caliper piston bores by honing or cleaning with abrasives.
If the caliper piston bores are scratched, cracked, or pitted, or if corrosion cannot be cleaned with denatured alcohol, replace the caliper assembly.
Assembly Procedure