
CTS V6-3.2L VIN N (2003)
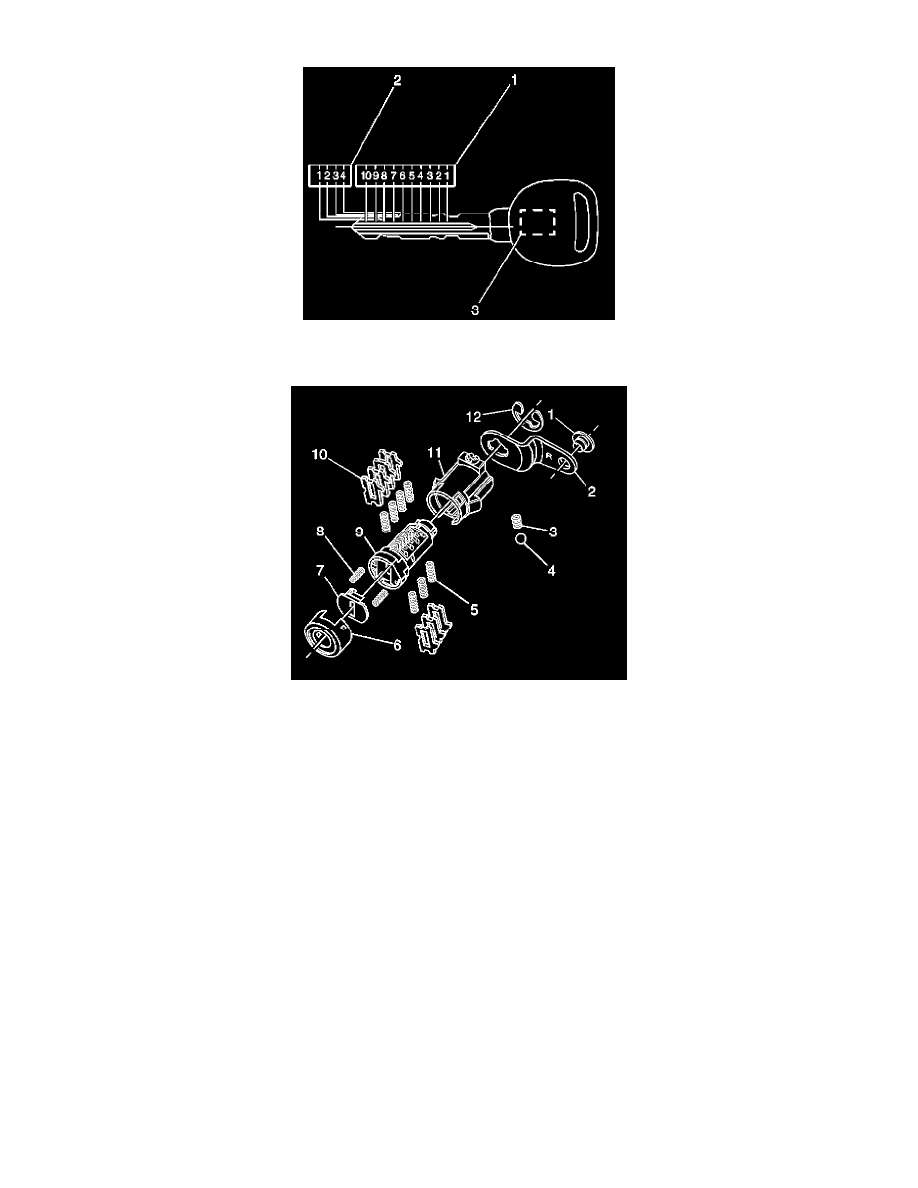
7. Insert the tumbler springs (5) into the three spring wells.
8. Install the tumbler for key cut position 5 into the slot nearest the front of the lock cylinder (1).
9. Install the two remaining tumblers for key cut positions 7 and 9 on this side of the lock cylinder.
10. Inspect for correct loading of the tumblers (10) by inserting the key into cylinder (9). All of the tumblers should be flush with the outside diameter
of the lock cylinder.
11. Lightly lubricate the tumbler (10) surfaces using the provided lubrication.
12. Hold the case assembly (11) with the pre-staked detent spring retainer facing downward.
13. Insert one detent spring (3) and one detent ball (4) into the hole located to the rear and inside of the case assembly (11).
CAUTION: Wear safety glasses in order to avoid eye damage.
14. Insert the key into the lock cylinder.
15. Ensure the detent spring (3) and ball (4) are held in place until the cylinder is fully installed. Install the cylinder into the case assembly (11). The
detent ball (4) will line up with the V-shaped groove on the rear of the cylinder.
16. Carefully remove the key, keeping the lock cylinder (9) inserted into the case assembly (11).
17. Insert one shutter spring (8) into each hole located on the front of the cylinder (9).
18. Install the shutter assembly (7) into the recessed area in the front of the cylinder (9). Ensure the ends of the pin on the shutter assembly (7) are
positioned in the pin cavities located on the front face of the cylinder (9).
19. Install the lock cylinder cap (6) by aligning the two notches in the cap with the drain hole located on the bottom of the case assembly (11) and the
corresponding feature on the top of the case assembly (11). Press the cap into place with light hand pressure.
20. Install the appropriate lever (2).
21. Install the retaining ring (12).
22. Snap the appropriate rod retainer (1) into the hole in the lever (2).
ASSEMBLING AND CODING THE IP COMPARTMENT DOOR LOCK CYLINDER
The IP compartment door lock cylinder uses four of the ten cut positions 7-10. The retainer tumbler position is adjacent locations with all four
tumblers (1) located on the same side. A stainless steel retaining tumbler is used in the IP compartment door lock cylinder to retain the lock cylinder in
the latch assembly and does not move when the key is inserted. The retainer tumbler occupies the slot closest to the head of the cylinder assembly (3)
and comes pre-installed in the cylinder.