
CTS V6-3.2L VIN N (2003)
3. Install the tumbler (1) for key cut position 7 into the slot nearest to the front of the lock cylinder.
4. Install the three remaining tumblers, key cut positions 8, 9 and 10, into the cylinder.
5. Snap the tumblers into place with light hand pressure.
6. Inspect for the correct loading of the tumblers (1) by inserting the key into cylinder (3). All of the tumblers should be flush with the lock cylinder.
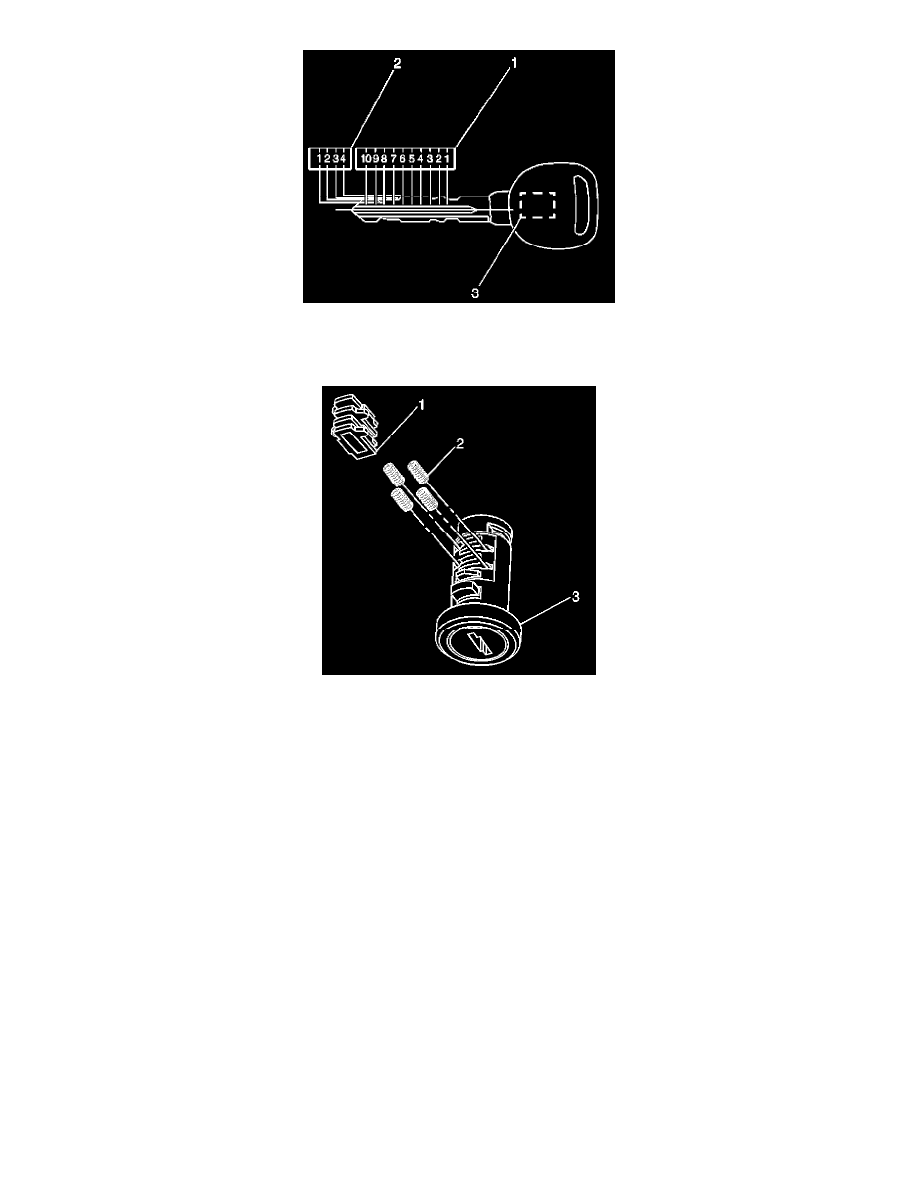
ASSEMBLING AND CODING THE FRONT SIDE DOOR LOCK CYLINDER
The front side door lock cylinder only uses seven of the ten cut positions, 4 through 10. The tumbler positions are staggered from side to side with four
on one side and three on the other. The left and right door lock cylinders are identical except for the lever (2) and rod retainer (1). The right lever is
color-coded, yellow and stamped with the letter R and the left lever is color-coded olive drab and stamped with the letter L. The right rod retainer is
color coded yellow and the left rod retainer is color-coded green. The lock pawl determines which side of the vehicle the lock cylinder will be
installed.