
CTS V6-3.2L VIN N (2003)
Fluid Filter - A/T: Service and Repair
Automatic Transmission Fluid and Filter Replacement
Tools Required
-
J 6125-1B Slide Hammer Adapter
-
J 23129 Universal Seal Remover
-
J 36850 Transjel Lubricant
Removal Procedure
1. Raise and support the vehicle. Refer to Lifting and Jacking the Vehicle.
2. Place a suitable drain pan under the transmission fluid drain plug.
3. Remove and discard the transmission fluid drain plug.
4. Allow the transmission fluid to drain.
5. Inspect the transmission fluid for discoloration and contamination while draining.
Notice: Replacement components must be the correct part number for the application. Components requiring the use of the thread locking compound,
lubricants, corrosion inhibitors, or sealants are identified in the service procedure. Some replacement components may come with these coatings
already applied. Do not use these coatings on components unless specified. These coatings can affect the final torque, which may affect the operation
of the component. Use the correct torque specification when installing components in order to avoid damage.
6. After the transmission fluid has finished draining, Install a NEW transmission fluid drain plug. Tighten the fluid drain plug to 20 Nm (15 lb ft).
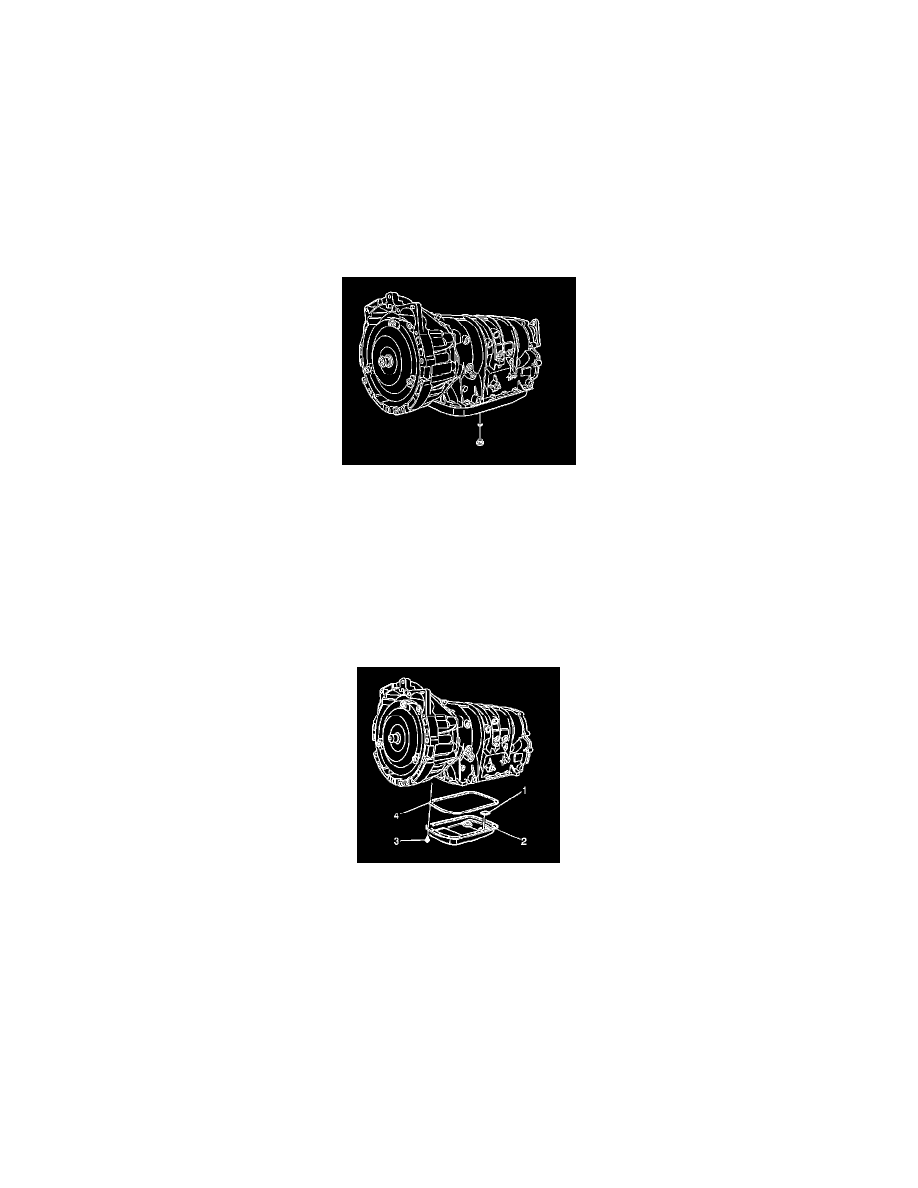
7. Remove the fluid pan bolts (3).
8. Lightly tap the fluid pan (2) with a rubber mallet if necessary in order to loosen.
9. Remove the fluid pan (2) and the gasket (4).
10. Clean and inspect the following for damage or wear.
-
magnet (1)
-
pan (2)
-
bolts (3)
-
gasket (4)