
CTS V6-3.2L VIN N (2003)
7.
Locate a suitable location from which a mechanic's wire support may be attached to support the front portion of the propshaft after you disconnect
it from the transmission drive flange.
Important:
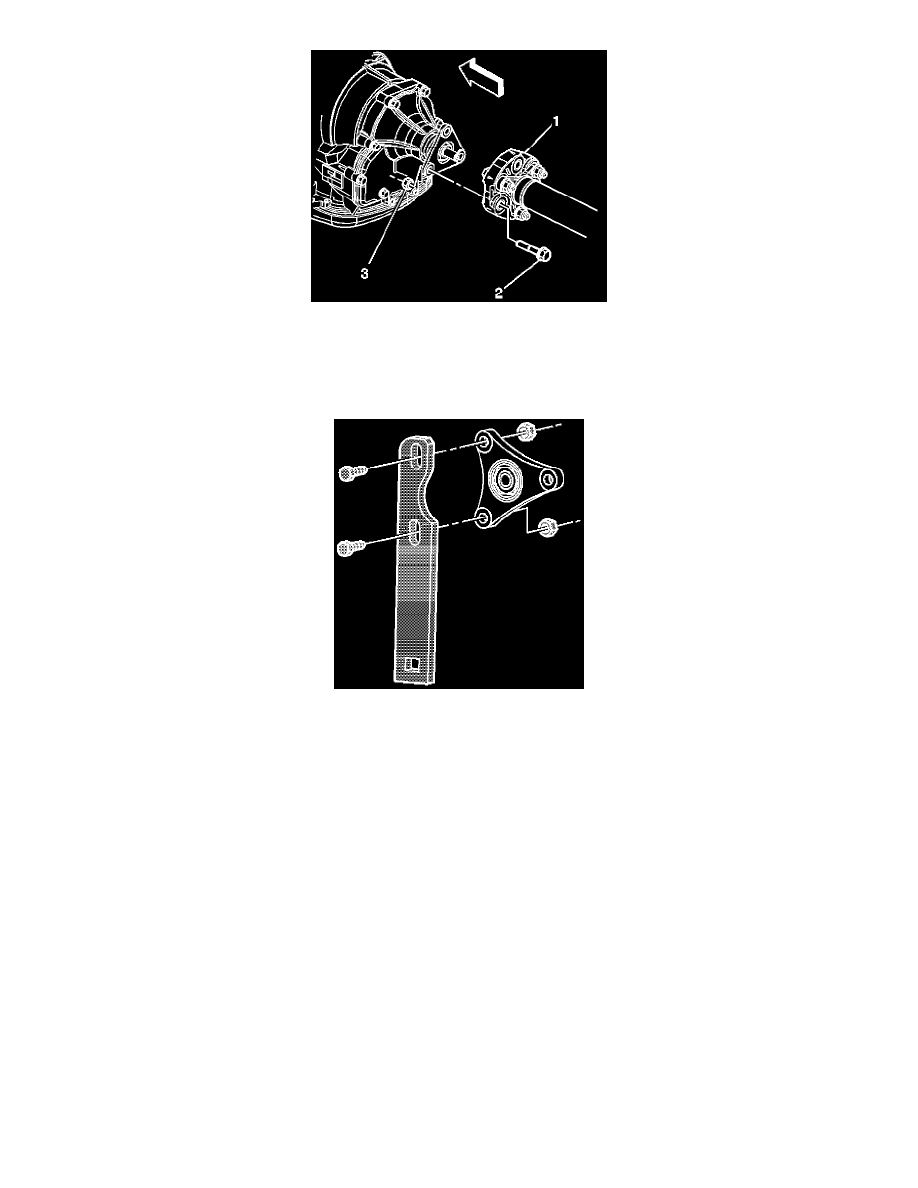
Remove only the propeller shaft coupler-to-transmission flange bolts. Do NOT remove the coupler from the propeller shaft.
8.
Remove the propeller shaft coupler-to-transmission flange bolts (2) and nuts (3). Slide the propshaft slightly rearward to clear the transmission
output drive flange and attach the propshaft to the mechanic's wire.
9.
Install the J 45012 to the transmission drive flange.
Important:
DO NOT REUSE the drive flange nut.
10.
While holding the J 45012, remove the drive flange nut using the J 29873, a 30 mm socket or the equivalent.
11.
Remove the drive flange thrust washer.
Important:
^
The NEW nut included with the kit has pinkish/red compound on the treads. It is extremely important that this compound be left on the
threads. In addition, a strip of Loctite(TM) 609 General Purpose Retaining Compound, or equivalent, should be applied across the threads.
^
To ensure proper adhesion and fastener retention of the out put shaft to the drive flange nut, the output shaft threads must be free of debris
and/or oil residue prior to the application of threadlocker. Thoroughly clean the threads using Brake Clean, denatured alcohol, or the
equivalent (DO NOT USE CARB CLEANER. CARB CLEANER LEAVES AN OILY RESIDUE) and allow to dry.
12.
Install the NEW drive flange thrust (wave) washer from kit P/N 96041805.
13.
While holding the J 45012, install a NEW drive flange nut from kit P/N 96041805.
Tighten