
CTS V6-3.2L VIN N (2003)
5.
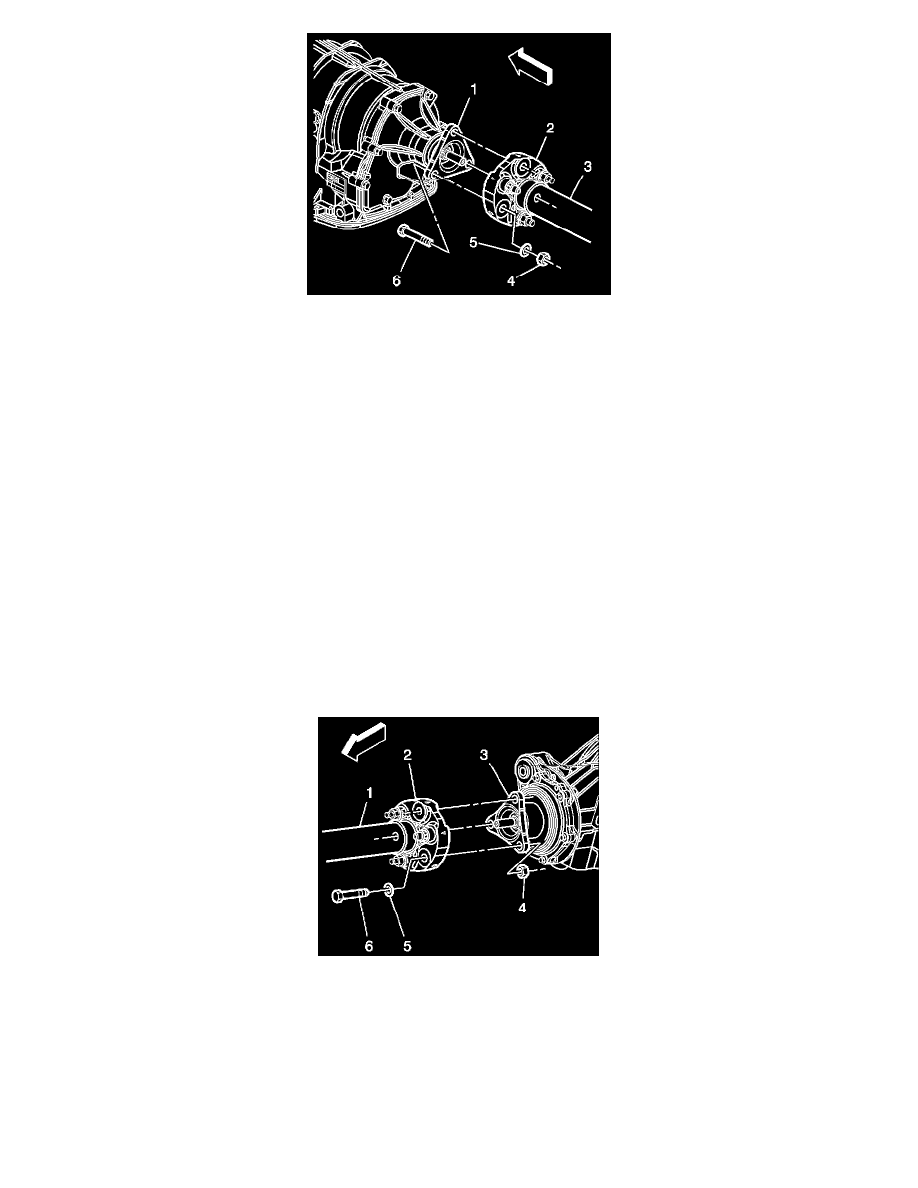
Install a new bolt (6), P/N 11588658, with the bolt head to the forward side of the AUTOMATIC transmission output shaft flange (1).
6.
Install a new washer(s), P/N 11588689, and new nut (4), P/N 11516073, to the rearward side of the front propeller shaft coupler (2).
7.
Repeat Steps 4 - 6 for the two remaining bolts.
8.
Tighten the new nuts.
Tighten
Tighten the nuts on the propeller shaft to AUTOMATIC transmission flange bolts to 85 N.m (63 lb ft).
9.
Verify that the nuts on the propeller shaft coupler to differential flange bolts are tightened to 85 N.m (63 lb ft).
^
If the nuts are loose, replace the bolts, washers and nuts. Go to Step 10.
^
If the torque on the nuts is to specification, go to Step 15.
Important:
DO NOT REMOVE all three propeller shaft to differential flange bolts at the same time. DO NOT REMOVE the coupler from the propeller
shaft.
10.
Remove one rear prop shaft to differential flange bolt.
11.
Install a new bolt (6), P/N 11588658, and washer (5), P/N 11588689, with the washer and bolt head to the forward side of the rear propeller shaft
coupler (2).
12.
Install a new nut (4), P/N 11516073, to the rearward side of the DIFFERENTIAL output shaft flange (3).
13.
Repeat Steps 10 - 12 for the two remaining bolts.
14.
Tighten the new nuts.
Tighten