
CTS RWD V8-6.2L SC (2009)
Intercooler: Procedures
Charge Air Cooling System Draining and Filling (Static)
Charge Air Cooling System Draining and Filling (Static)
Special Tools
*
7000081 - Tech 2 Kit
*
J 26568 - Coolant and Battery Fluid Tester
Draining Procedure
Warning
To avoid being burned, do not remove the charge air coolant cap while the system is hot. The cooling system will release scalding fluid and steam under
pressure if charge air coolant cap is removed while the system is still hot.
Note: Make sure the intercooler system is cool and the pump is not running.
1. Remove the cap from the charge air cooler reservoir.
2. Raise and support the vehicle. Refer to Lifting and Jacking the Vehicle (See: Maintenance/Vehicle Lifting/Service and Repair)
3. Remove the front air deflector. Refer to Front Air Deflector Replacement (See: Body and Frame/Spoilers, Flaps, and Air Dams/Air Dam/Service
and Repair/Front Air Deflector Replacement)
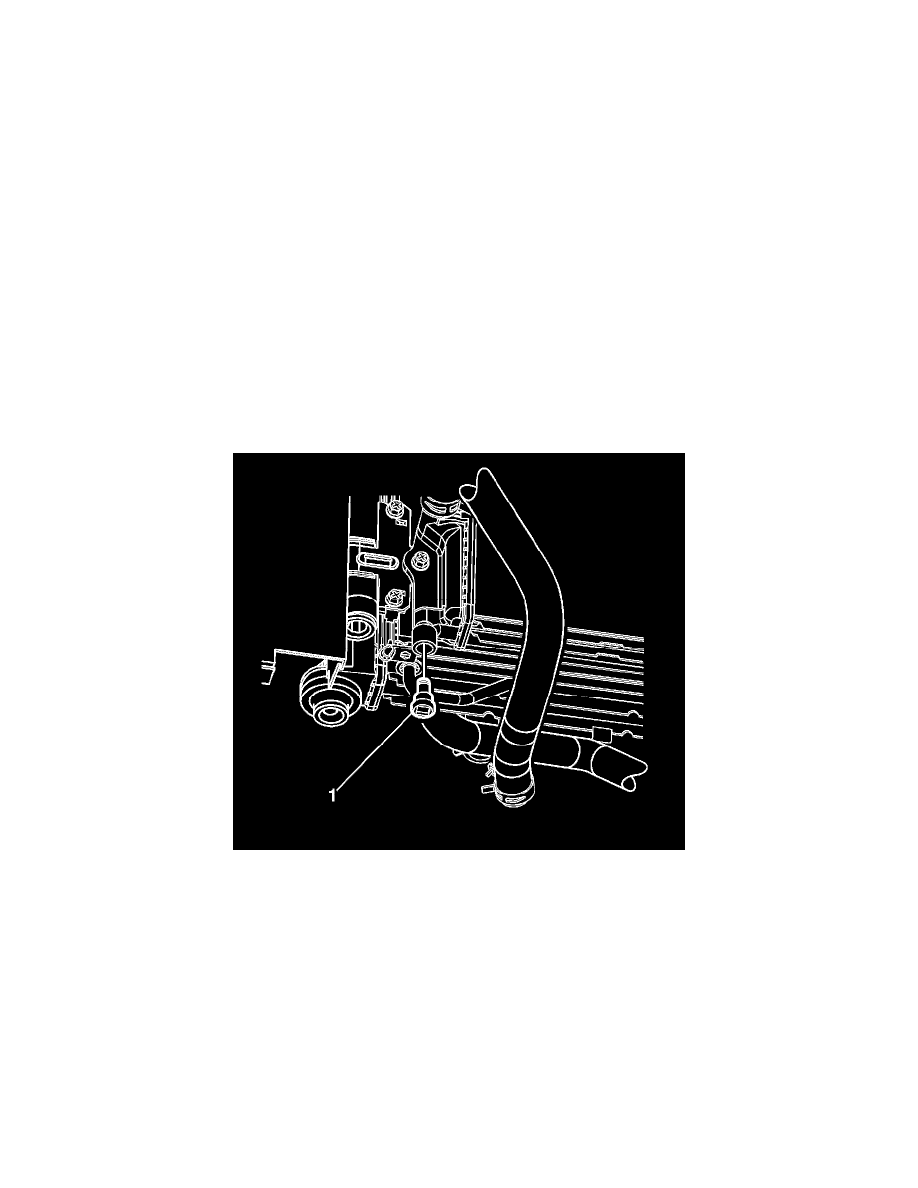
4. Place a drain pan under the charge air cooler radiator.
5. Remove the charge air cooler radiator drain plug (1) from the bottom passenger side of the charge air cooler.
6. Drain the charge air cooling system.
7. Inspect the coolant.
8. Follow the appropriate procedure based on the condition of the coolant.
*
Normal in appearance -- follow the filling procedure
*
Discolored - follow the flush procedure. Refer to Flushing (Powertrain) (See: Engine, Cooling and Exhaust/Cooling System/Service and
Repair)Flushing (Charge Air Cooling) (See: Flushing (Charge Air Cooling))