
CTS RWD V8-6.2L SC (2009)
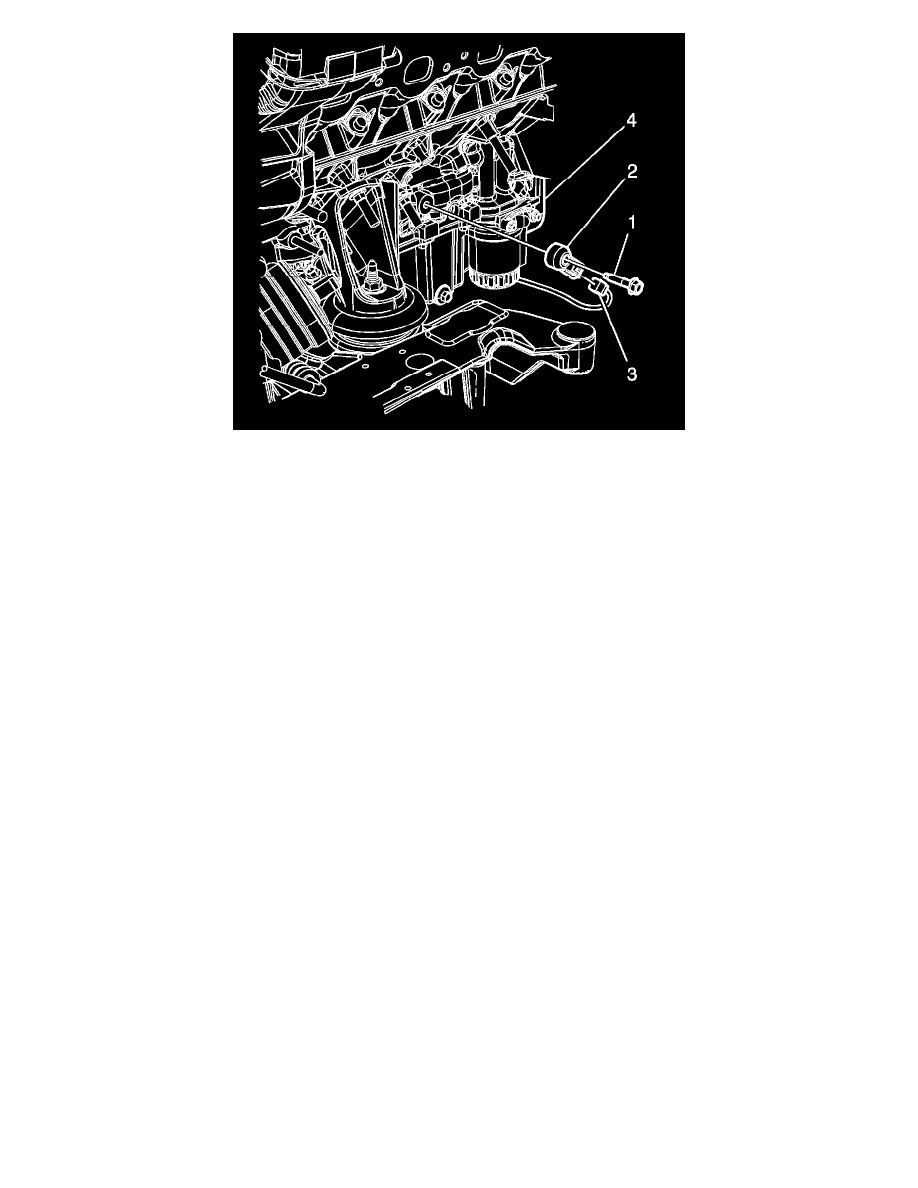
1. Reconnect the engine harness (3) and the knock sensor (2) electrical connectors.
2. Position the knock sensor 2 on the engine block (4).
3. Install the mounting bolt (1) for the knock sensor 2.
Caution: Refer to Fastener Caution (See: Service Precautions/Vehicle Damage Warnings/Fastener Caution).
4. Tighten the knock sensor mounting bolt (1) and tighten to 20 Nm (15 lb ft).
5. Install the left exhaust manifold. Refer to Exhaust Manifold Replacement - Left Side (V6) (See: Engine, Cooling and Exhaust/Exhaust
System/Exhaust Manifold/Service and Repair/Exhaust Manifold Replacement - Left Side)Exhaust Manifold Replacement - Left Side (V8) (See:
Engine, Cooling and Exhaust/Exhaust System/Exhaust Manifold/Service and Repair/Exhaust Manifold Replacement - Left Side).
6. Install the left catalytic convertor. Refer to Catalytic Converter Replacement - Left Side (V6) (See: Emission Control Systems/Catalytic
Converter/Service and Repair)Catalytic Converter Replacement - Left Side (V8) (See: Emission Control Systems/Catalytic Converter/Service
and Repair).
7. Connect the negative battery cable. Refer to Battery Negative Cable Disconnection and Connection (See: Starting and Charging/Battery/Battery
Cable/Service and Repair).
8. Program the transmitters. Refer to Transmitter Programming (without RPO Y41) (See: Testing and Inspection/Programming and Relearning
)Transmitter Programming (with RPO Y41 - North America and Asia) (See: Testing and Inspection/Programming and Relearning)Transmitter
Programming (with RPO Y41 - Canada and Europe) (See: Testing and Inspection/Programming and Relearning).