
CTS RWD V8-6.2L SC (2009)
4. Install the clutch driven plate and clutch pressure plate to the engine flywheel with the clutch alignment tool still installed in the clutch assembly.
5. Align the match marks on the pressure plate and flywheel, if reusing the pressure plate assembly.
6. Install the clutch pressure plate bolts finger tight.
Caution: Refer to Fastener Caution (See: Service Precautions/Vehicle Damage Warnings/Fastener Caution).
7. Install J 42386-A and bolts. Use one M10 1.5 X 25 mm and one M10 1.5 X 45 mm bolt for proper tool operation.
Tighten the J 42386-A bolts to 50 Nm (37 lb ft).
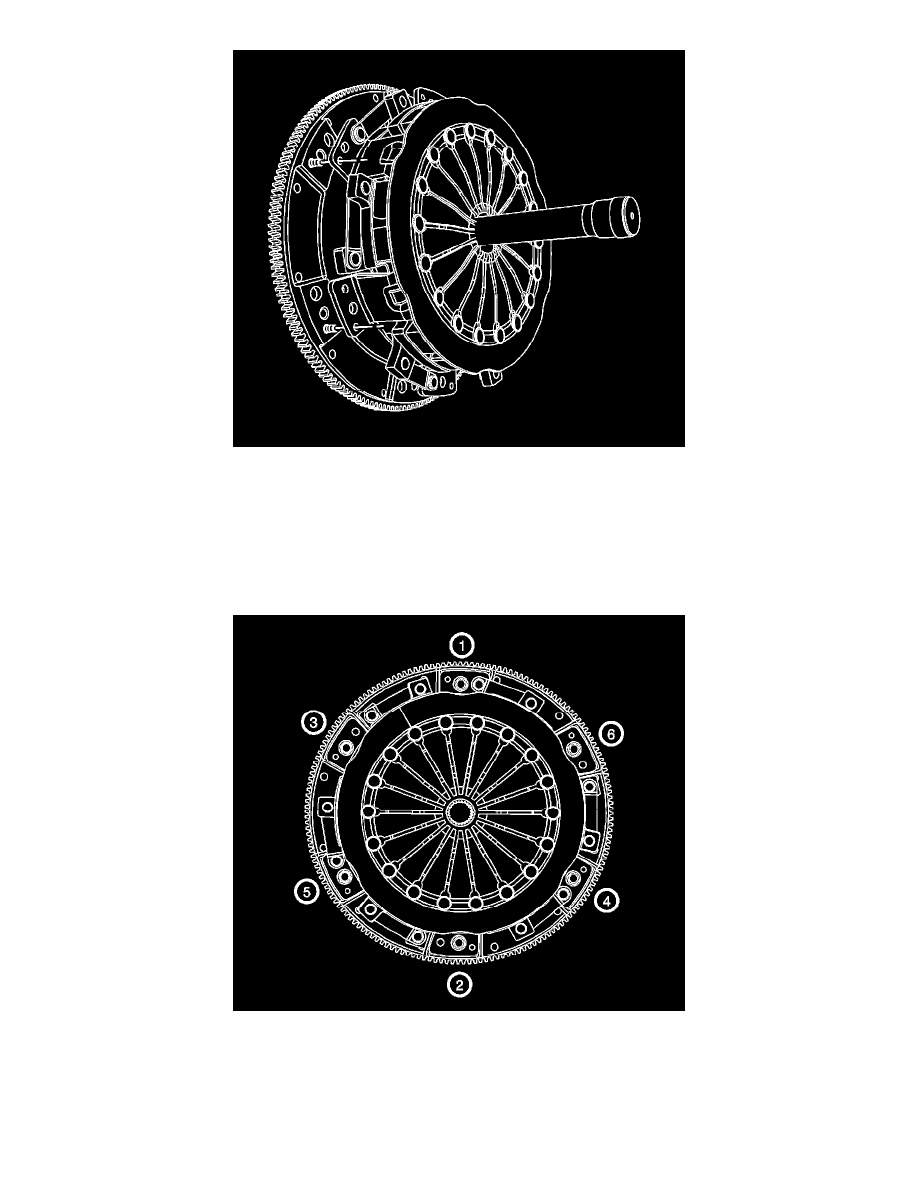
8. Tighten the clutch pressure plate bolts using the following sequence:
1. Finger tighten bolts 1 and 2.
2. Using a socket wrench, turn bolts 1 and 2 360 degrees.
3. Finger tighten bolts 3 and 4.
4. Using a socket wrench, turn bolts 3 and 4 360 degrees.
5. Finger tighten bolts 5 and 6.