
CTS Sedan AWD V6-3.0L (2010)
7. With the handle in the open position, the resistance should be less than 20 ohms on pin 2 circuit 450 and pin 12 circuit 5879. If the values are
correct, at the X605 continue with Step 8. If the values are incorrect, proceed to Step 14.
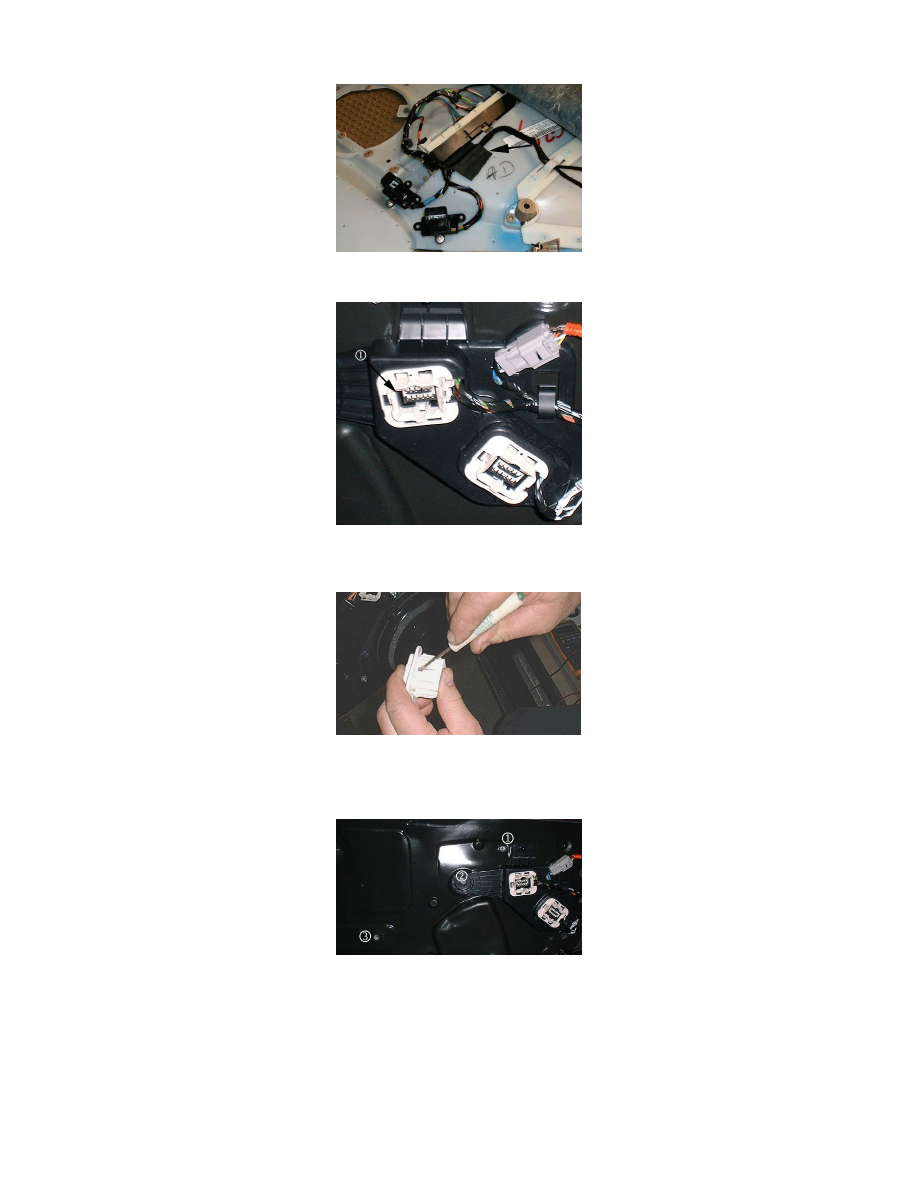
8. Relocate the wiring harness by moving it away for the doc-n-loc on the trim panel and apply duct tape to the harness.
9. The doc-n-loc is out of position, remove the upper doc-n-loc connector from the bracket. The white connector housing has six tabs that have to be
released.
10. Slide the white housing off the connector and adjust the locking tab on the connector and reinstall.
11. Remove the doc-n-loc bracket from the door and connect to the door trim. A click noise will be heard.
12. Install the door trim.
13. When installing the trim screws, start with number one the closest to the doc-n-loc and check the operation.
14. Unplug the door switch connector.
15. Check the wiring harness from the door switch connector pin C and pin F to the doc-n-loc connector pin 2 (female).
16. Check the wiring harness from the door switch connector pin D to the doc-n-loc connector pin 11. Check the wiring harness from the door switch
connector pin E to the doc-n-loc connector pin 12. Resistance should be less than 20 ohms. If not, check for an open in the harness and make the
repair as necessary. If the values are correct, continue with Step 17.
17. Replace the door handle housing assembly. (The switch is part of the assembly.)
18. Remove the outside handle lock cylinder cap bolt plug (located on the inside upper door frame).
19. Remove the bolt that retains the lock cylinder cap.
20. With the door handle in the open position, remove the door lock cap.