
CTS Sedan AWD V6-3.0L (2010)
5. Clamp the bezel into position on the trim panel as shown.
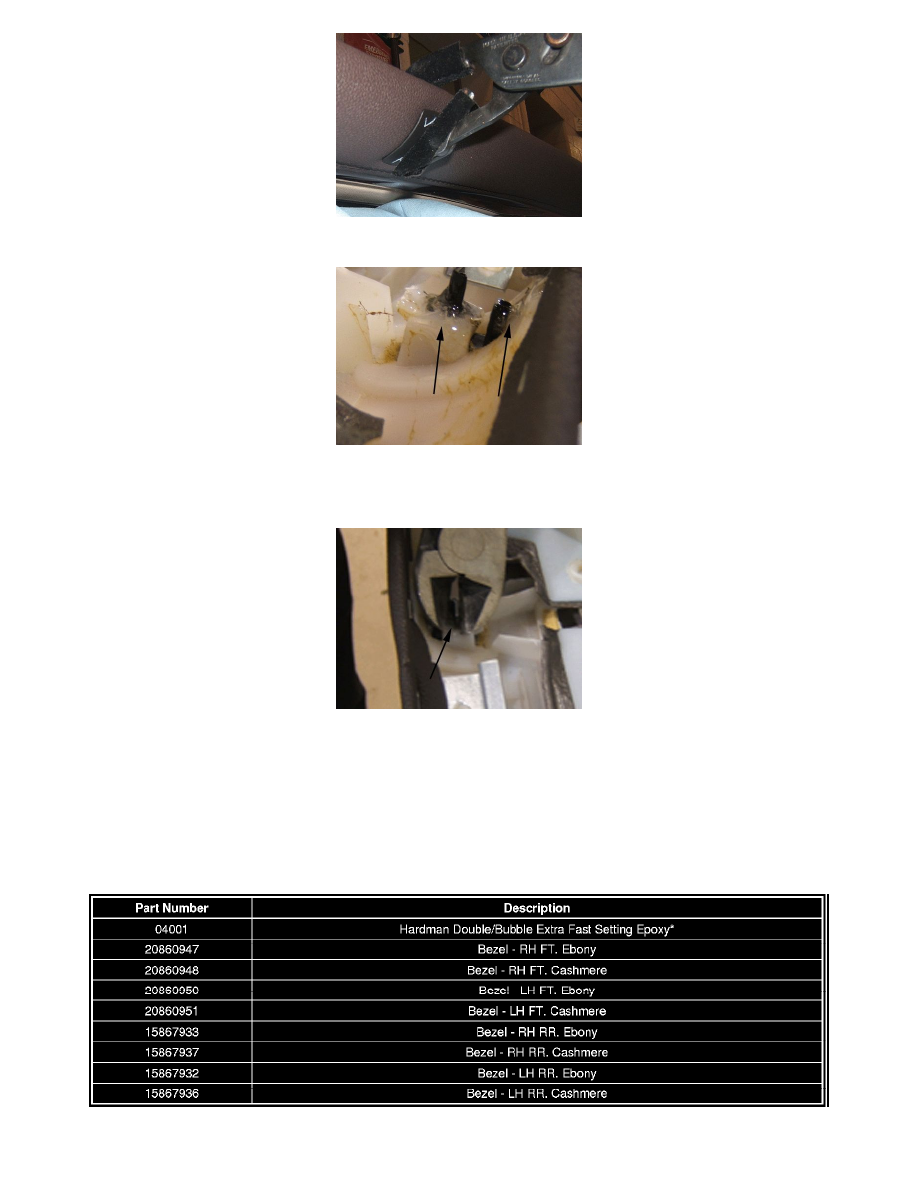
6. Apply the adhesive to the area where the bezel mounting tab protrudes through the opening in the trim panel. For this application, use a two-part
extra-fast setting epoxy, such as Hardman Double/Bubble Extra Fast Setting Epoxy*, or the equivalent.
7. Allow the adhesive to fully cure per the manufacturers instructions.
8. Trim the excess mounting tab material to prevent interference when reinstalling the trim panel.
9. Reinstall the affected door trim panel. Refer to Front Side Door Trim Panel Replacement or Rear Side Door Trim Panel Replacement in SI.
10. With the trim panel reinstalled, verify the operation of the lock lever.
* We believe this source and their products to be reliable. There may be additional manufacturers of such products/materials. General Motors does not
endorse, indicate any preference for, or assume any responsibility for the products or material from this firm or for any such items that may be available
from other sources.
Parts Information
Warranty Information