
CTS Sedan AWD V6-3.0L (2010)
Caution
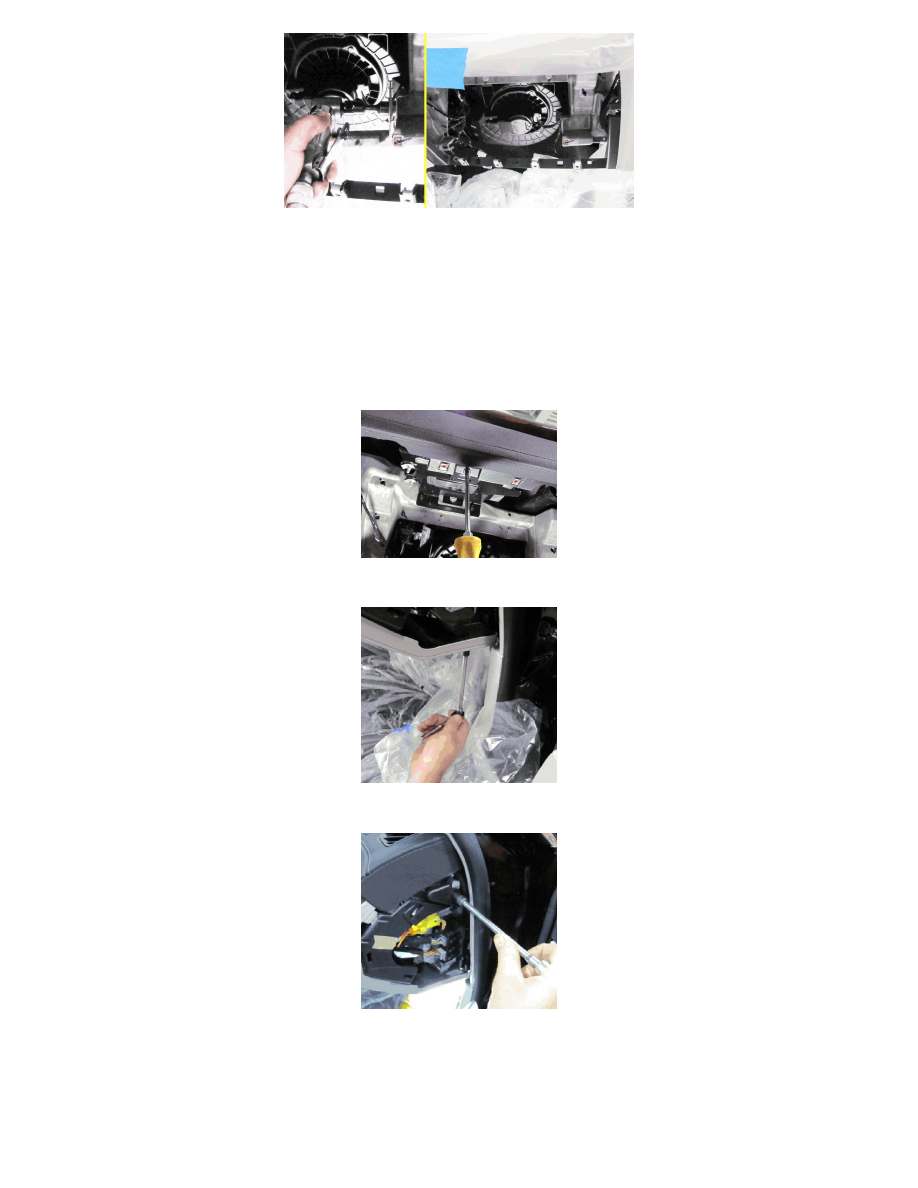
Do NOT damage the end cinch nuts (1) while cutting the center section of the magnesium beam. The end cinch nuts are required to secure the
instrument panel compartment assembly.
5. Cut and remove the center portion of the lower magnesium beam (3) using a cut-off wheel, Dremel tool, or equivalent. A picture after the
removal of the center portion of the lower magnesium beam is shown above.
10. Pull up on the instrument panel plastic retainer to locate the instrument panel plastic retainer screw holes to the end cinch nuts on the magnesium
beam.
11. Install the two end screws into the cinch nuts on the magnesium beam.
12. Install the screw on the upper end of OnStar module.
13. Install the screw on the lower outboard instrument panel plastic retainer.
14. Install the screw on the outboard instrument panel plastic retainer.
Outboard Passenger Side Lower Magnesium Beam Cut Completed in Step 9.5