
CTS Sedan AWD V6-3.0L (2010)
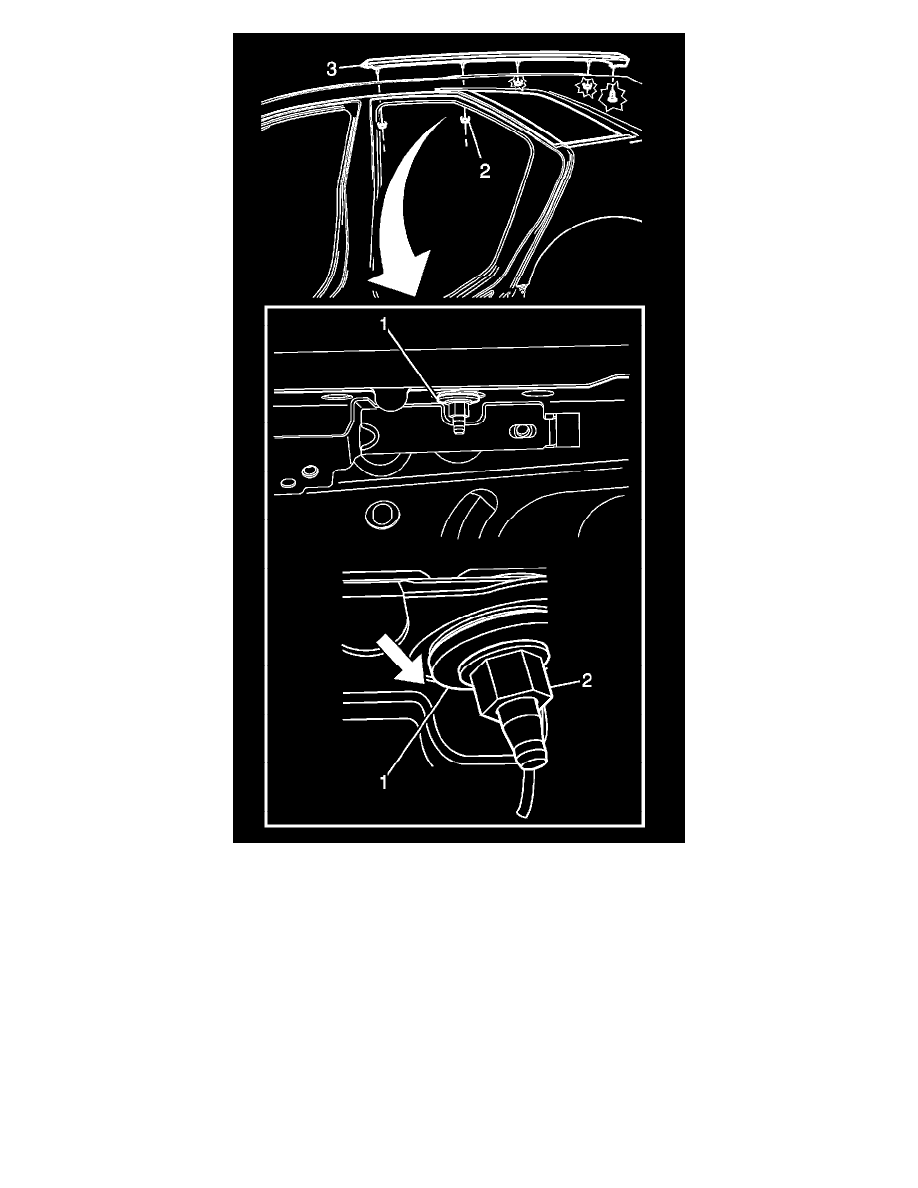
Note: If the nut (1) separated from the washer (2) during removal, it cannot be reinstalled. A new nut would be required. If the nut is separated
and not replaced it may create a creak in the roof area.
2. Install the side rail to the vehicle, Do the following:
1. Clean all traces of the old gasket sealer (2) from all the fastener hole. Use a 50/50 mixture of isopropyl alcohol and water.
2. Ensure that the new side rail bolts (1) have a gasket seal. This will prevent water leaks.
Notice: Refer to Fastener Caution (See: Service Precautions/Vehicle Damage Warnings/Fastener Caution).
3. Install the fasteners (1) to the underside of the side rail (2).
Tighten the fasteners to 10 Nm (89 lb in).
4. Water test the vehicle for leaks on the side rail (2) that was replaced.
5. Install the headliner. Refer to Headlining Trim Panel Replacement (Wagon) (See: Interior Moulding / Trim/Headliner/Service and Repair
)Headlining Trim Panel Replacement (Sedan) (See: Interior Moulding / Trim/Headliner/Service and Repair).