
CTS Sedan AWD V6-3.0L (2010)
10. With the clutch fluid reservoir connection at 2 o'clock position. Insert the clutch master cylinder (2) into the cowl.
11. Align the keys of the clutch master cylinder housing with the tabs on the clutch pedal bracket.
12. Rotate the clutch master cylinder (2) counter clockwise approximately 1/8 turn until fully seated. The clutch fluid reservoir hose connection will be
at vertical 12 o'clock position when the clutch master cylinder is properly installed.
13. Install the vacuum brake booster. Refer to Power Vacuum Brake Booster Replacement (LHD) (See: Brakes and Traction Control/Power Brake
Assist/Vacuum Brake Booster/Service and Repair)Power Vacuum Brake Booster Replacement (RHD) (See: Application and ID).
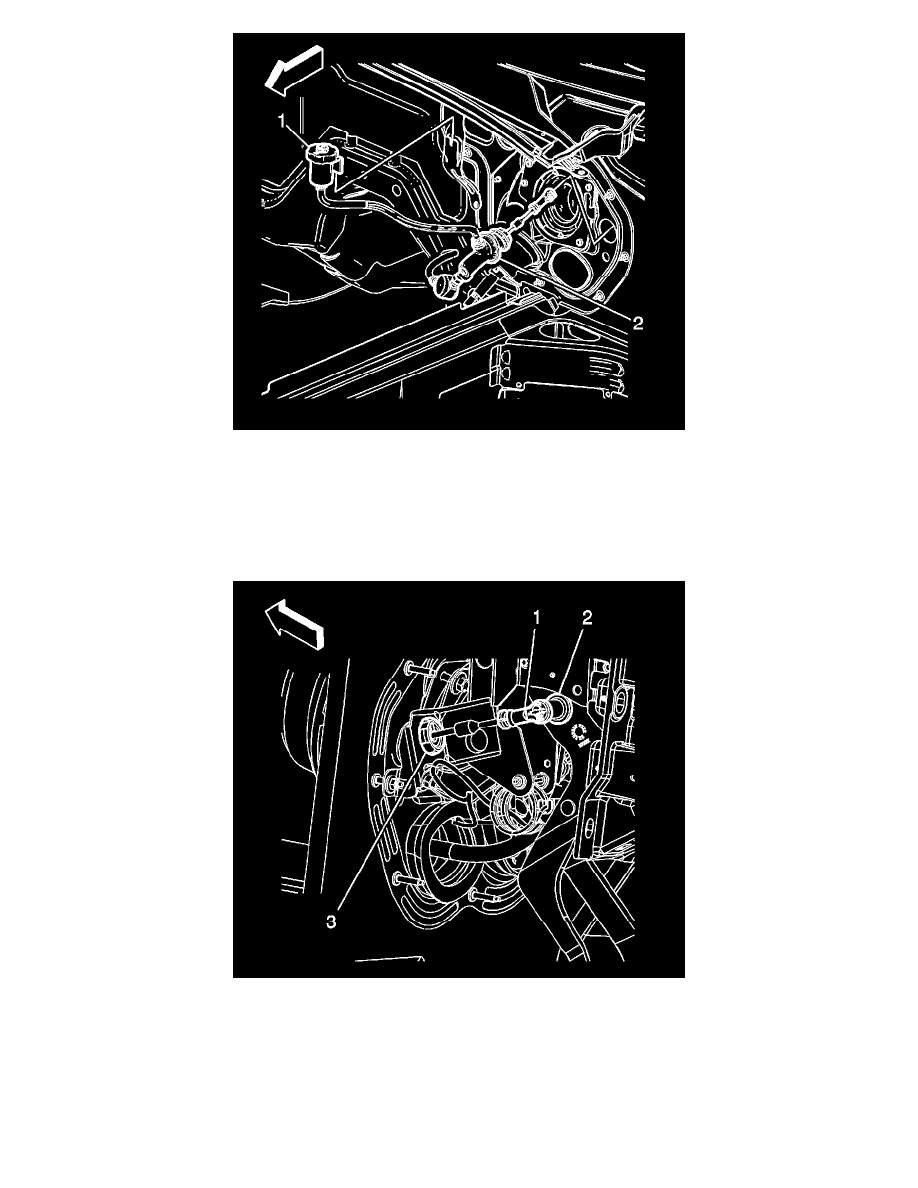
14. Install the clutch fluid reservoir (1) to the cowl.
15. Position the clutch master cylinder push rod (1) to the clutch pedal pin (2).
16. Push the clutch master cylinder push rod (1) onto the clutch pedal pin (2) to secure.
17. Check for proper clutch pedal movement and operation.
18. Install the parking brake pedal assembly. Refer to Parking Brake Lever Pedal Assembly Replacement (See: Brakes and Traction Control/Parking
Brake System/Parking Brake Lever/Service and Repair/Parking Brake Lever Pedal Assembly Replacement).
19. Install the driver side I/P insulator. Refer to Instrument Panel Insulator Replacement - Left Side (Left Hand Drive) (See: Body and Frame/Interior
Moulding / Trim/Dashboard / Instrument Panel/Service and Repair/Instrument Panel Insulator Replacement - Left Side)Instrument Panel Insulator
Replacement - Left Side (Right Hand Drive) (See: Application and ID).