
CTS Sedan RWD V6-3.0L (2010)
Ball Joint: Testing and Inspection
Upper Control Arm Ball Joint Inspection
Special Tools
J-8001 - Dial Indicator
For equivalent regional tools, refer to Special Tools (See: Tools and Equipment/Front Suspension).
Note:
*
The vehicle must rest on a level surface
*
The vehicle must be stable. DO NOT rock the vehicle on the floor stand.
1. Raise and support the vehicle. Refer to Lifting and Jacking the Vehicle (See: Wheels and Tires/Vehicle Lifting/Service and Repair).
2. Clean and inspect the ball joint seal for cuts or tears. If the ball joint seal is damaged, replace the ball joint or upper control arm as applicable for
this vehicle.
3. Support the lower control arm with a floor stand as far outboard as possible and raise the suspension until the lower control arm moves 25 mm (1
in).
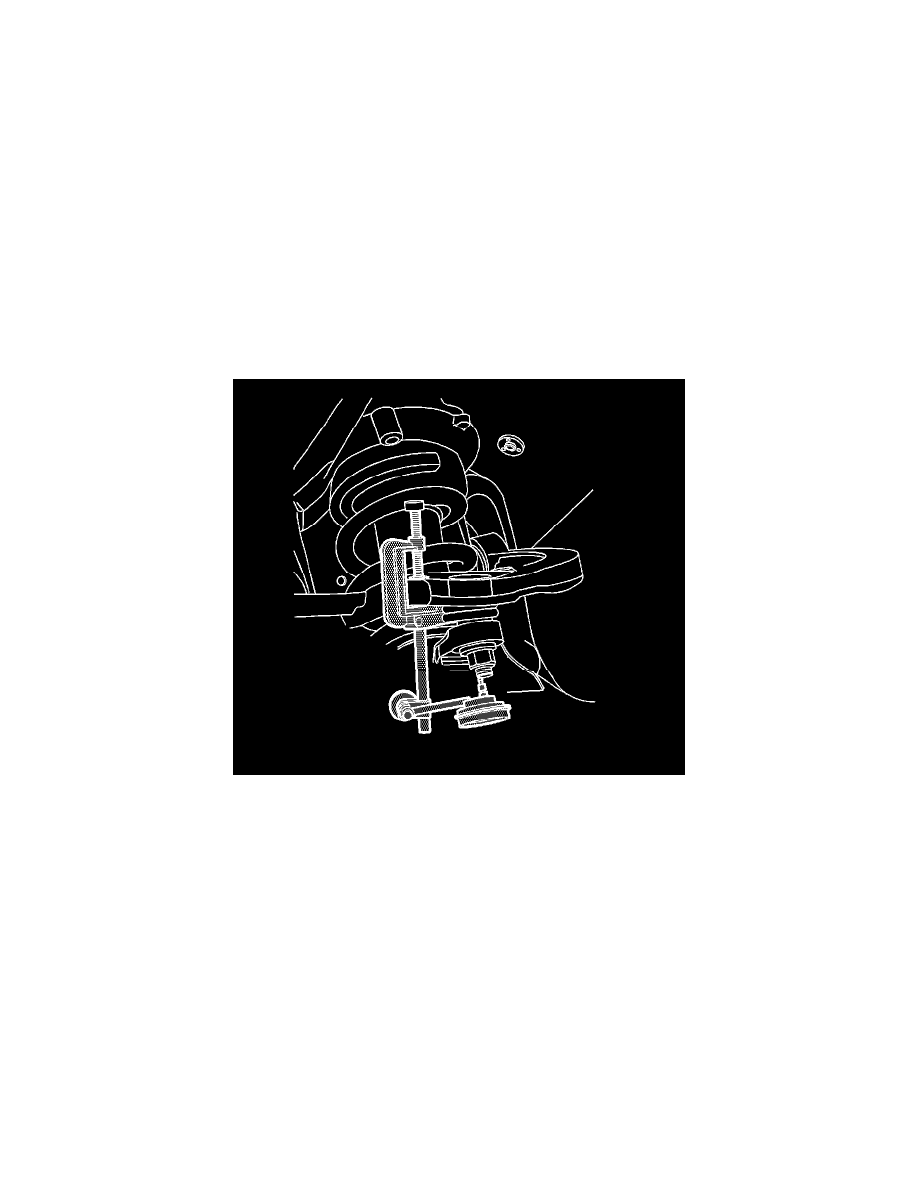
4. Install J-8001 - dial indicator , to measure the vertical lash in the ball joint.
Caution: Do not pry in such a way that the ball joint seal is contacted. Damage to the seal may result.
5. Apply downward force to the upper control arm and zero the dial indicator.
6. Apply upward force to the upper control arm and check the dial indicator. Record the measurement
7. If dial indicator reading is more than 0.5 mm (0.02 in) , replace the ball joint or upper control arm as applicable for this vehicle.