
CTS Sedan RWD V6-3.0L (2010)
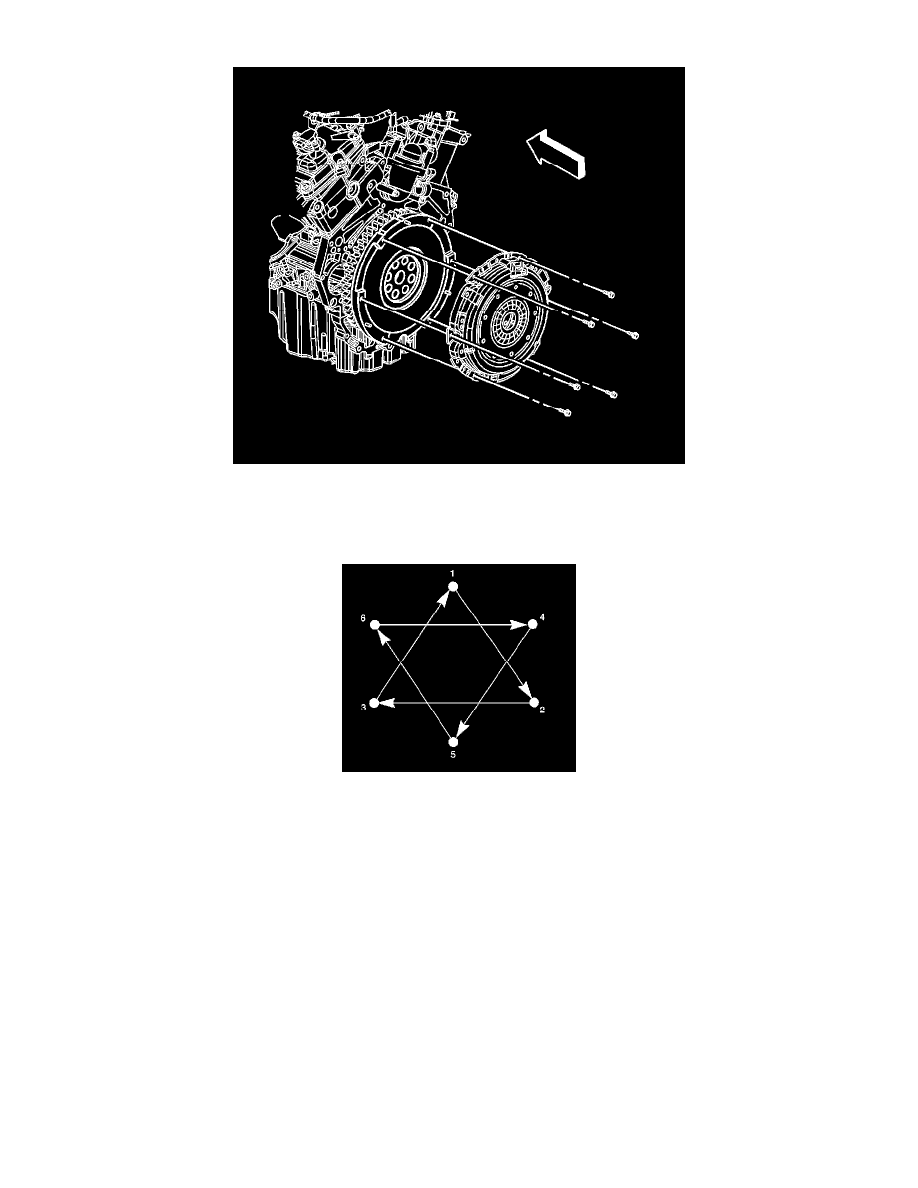
transmission side. The arrow in the graphic indicates the front of the vehicle, or flywheel side of the driven plate.
2. Install the clutch pressure plate and driven plate to the dowel pins on the flywheel.
Tip: Use NEW clutch pressure plate bolts in order to maintain proper torque.
3. Install the clutch pressure plate bolts finger tight.
4. Using a commercially available universal clutch alignment tool, align the clutch driven plate to the clutch pilot bearing.
Caution: Refer to Fastener Caution (See: Service Precautions/Vehicle Damage Warnings/Fastener Caution).
Note: New bolts must be installed to maintain proper torque.
5. Tighten the clutch pressure plate bolts in the sequence shown, starting with the number one and following in numerical order.
1. Tighten all the clutch pressure plate bolts in sequence and evenly to 15 Nm (11 lb ft).
2. Tighten all the clutch pressure plate bolts in sequence and evenly to 30 Nm (22 lb ft).
3. Loosen bolts (1, 2, 3) 180 degrees. Re-torque bolts (1, 2, 3) in sequence and evenly 30 Nm (22 lb ft) plus 20 degrees.
4. Loosen bolts (4, 5, 6) 180 degrees. Re-torque bolts (4, 5, 6) in sequence and evenly 30 Nm (22 lb ft) plus 20 degrees..
6. Install the manual transmission. Refer to Transmission Replacement (See: Manual Transmission/Transaxle/Service and Repair/Removal and
Replacement/Aisin AY6 - Manual Transmission/Transmission Replacement).