
CTS Sedan RWD V8-6.2L SC (2010)
Note
The inner jam nut and adjustment link may have to be adjusted to the end of the inboard threads of the link rod.
5. Remove the outside toe link rod from the adjustment link by holding the adjustment link and backing out the threaded outside toe link rod end.
6. Remove the outside jam nut from the outside toe link rod.
7. Discard the jam nut. Do not reuse this nut.
8. Place the outside toe link rod on a work bench.
9. Remove the rear suspension adjustment link from the inside rod.
10. Place the adjustment link on a work bench.
11. Remove the inside jam nut from the inside rod.
12. Discard the jam nut. Do not reuse this nut.
13. Do NOT remove the inside toe link rod from the vehicle.
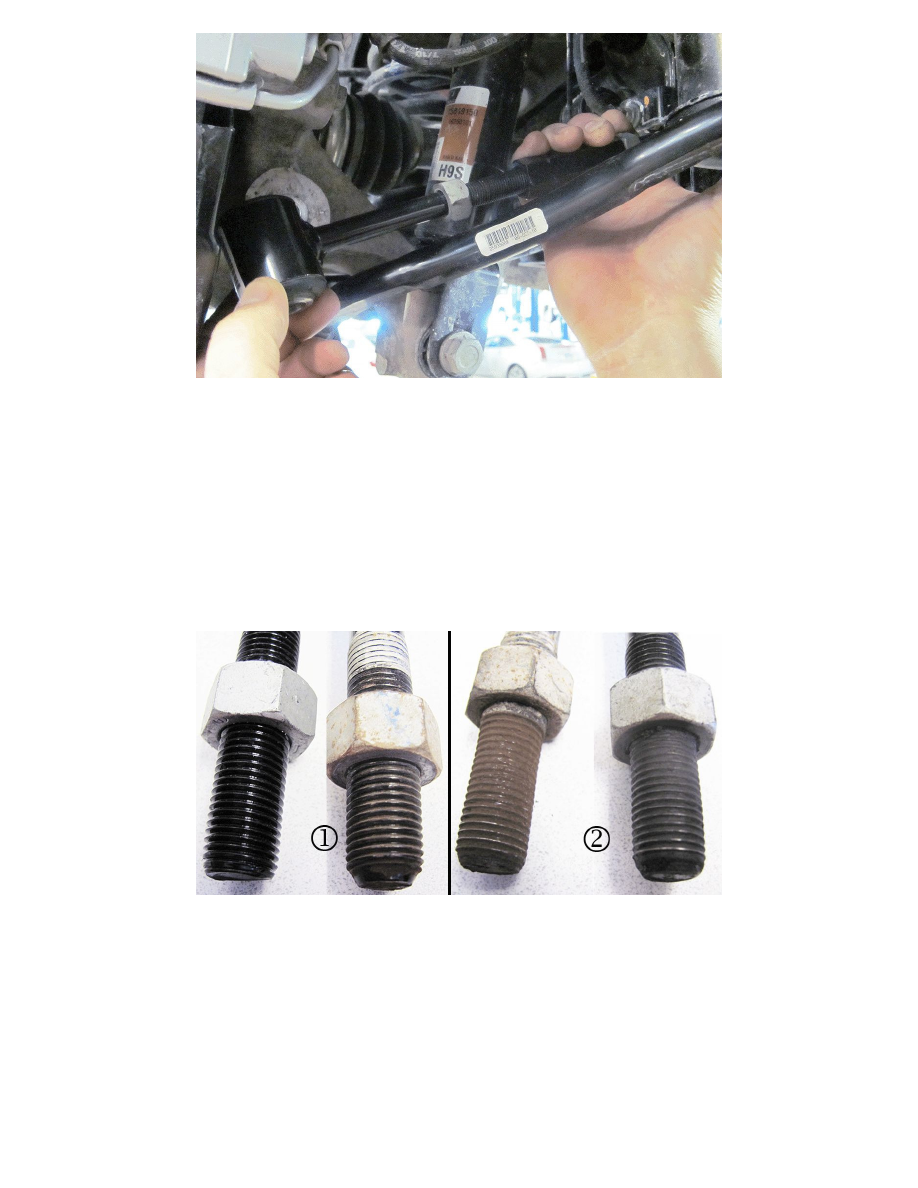
14. Inspect the threads on both the inside and outside rods for signs of damage such as worn or stripped threads.
15. Inspect the threads inside the rear suspension adjustment link for thread wear, damage or corrosion.
-
If the threads on both the inside and outside rod and adjustment link are NOT damaged or worn and do NOT have excessive corrosion (1),
proceed to Clean and Reassemble Toe Link Assembly in this bulletin.
-
If the threads on one or both rods are worn, damaged or corroded (2), or the adjustment link threads are damaged, replace the toe link
assembly. Refer to Adjust Link Replacement in SI.
Clean and Reassemble Toe Link Assembly
Caution
Do not use a high speed wire brush to clean these components. Do not use any solvents to clean the components. The objective is to melt off a wax
residue from the threads on the toe link rods and adjustment links using a BLAZER MicroTorch or equivalent. Do not use acetylene or propane
torches as these are too hot and will cause component damage.