
CTS Wagon RWD V6-3.6L (2010)
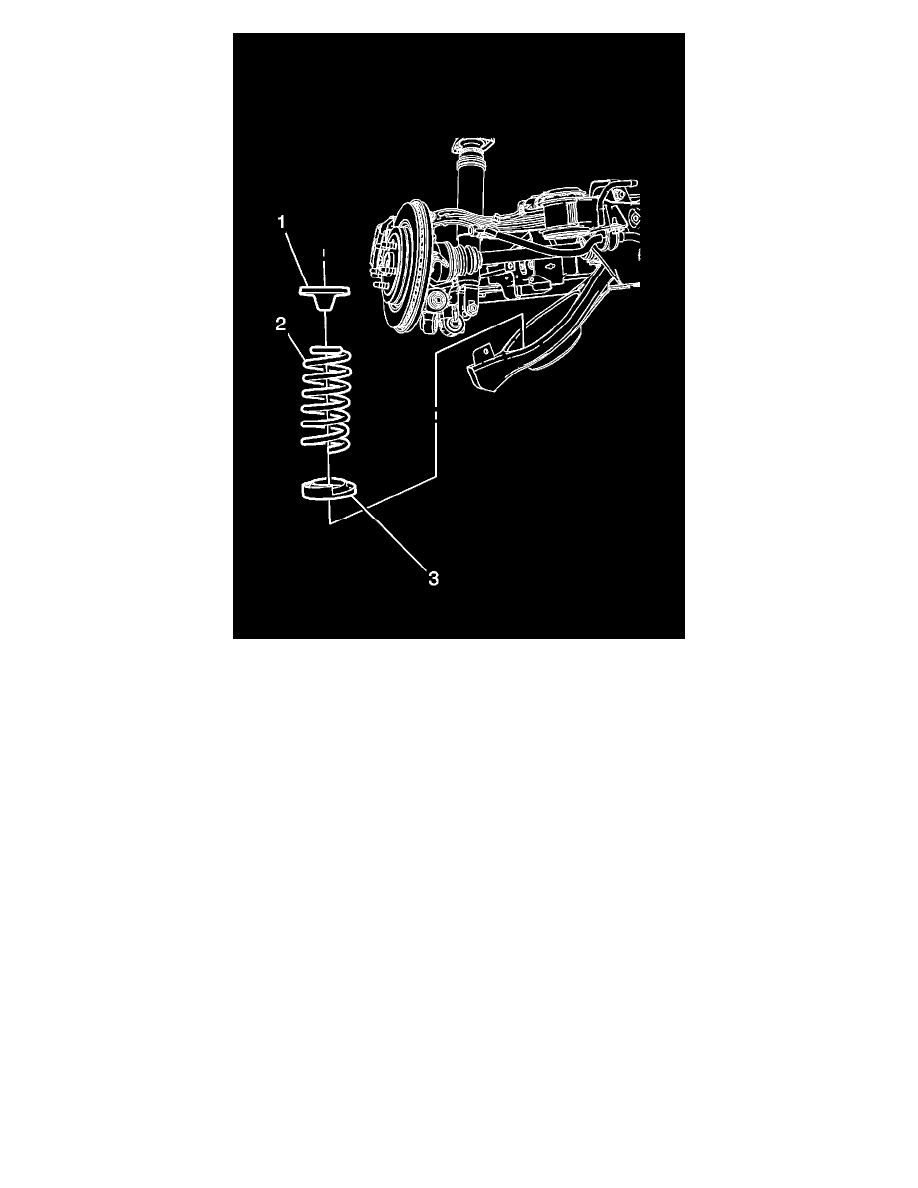
1. Install the coil spring (1), insulator (2) and the jounce bumper (3).
2. Using the transmission jack stand, lift the lower control arm.
Important: In Steps 4 thru 8, leave all the bolts loose to aide in the alignment of all the suspension components prior the to tighten to the
final torque specifications.
3. With the aide of an assistant, install the lower control arm on the knuckle.
4. Install the lower control arm bolt. Refer to Lower Control Arm Replacement (See: Control Arm/Service and Repair/Rear Suspension/Lower
Control Arm Replacement).
5. Install the trailing arm bolt in the knuckle. Refer to Trailing Arm Replacement (See: Trailing Arm/Service and Repair).
6. Install the adjustable link bolt in the knuckle. Refer to Adjust Link Replacement (See: Steering/Tie Rod/Service and Repair/Rear Suspension).
7. Install the lower shock absorber bolt in the knuckle. Refer to Shock Absorber Replacement (See: Suspension Strut / Shock Absorber/Service and
Repair/Rear Suspension Shock Absorber).
8. Install the stabilizer shaft link to the lower control arm. Refer to Stabilizer Shaft Link Replacement (See: Stabilizer Bar/Stabilizer Link/Service
and Repair/Rear Suspension).
9. Tighten the wheel drive shaft nut. Refer to Rear Wheel Drive Shaft Replacement (See: Transmission and Drivetrain/Drive Axles, Bearings and
Joints/Axle Shaft Assembly/Service and Repair).
10. Install the tire and wheel assembly. Refer to Tire and Wheel Removal and Installation (See: Wheels and Tires/Service and Repair).
11. Remove the support and lower the vehicle.
12. Align the rear suspension. Refer to Wheel Alignment Specifications (See: Alignment/Specifications/Wheel Alignment Specifications).