
CTS Wagon RWD V6-3.6L (2010)
Transmission Position Switch/Sensor: Service and Repair
Transmission Output Shaft Seal Replacement
Transmission Output Shaft Seal Replacement (Rear Wheel Drive)
Special Tools
*
J 45012 Holding Fixture
*
J 45000 Seal Remover
*
J 36183 Seal Installer
Removal Procedure
1. Raise and support the vehicle. Refer to Lifting and Jacking the Vehicle (See: Maintenance/Vehicle Lifting/Service and Repair).
2. Remove the exhaust system. Refer to Exhaust System Replacement (LSA) (See: Engine, Cooling and Exhaust/Exhaust System/Service and
Repair/Exhaust System Replacement)Exhaust System Replacement (LF1) (See: Engine, Cooling and Exhaust/Exhaust System/Service and
Repair/Exhaust System Replacement)Exhaust System Replacement (Single) (See: Engine, Cooling and Exhaust/Exhaust System/Service and
Repair/Exhaust System Replacement (Single))Exhaust System Replacement (LLT) (See: Engine, Cooling and Exhaust/Exhaust System/Service
and Repair/Exhaust System Replacement).
3. Remove the drive shaft. Refer to Rear Propeller Shaft Replacement (RPO LSA) (See: Drive/Propeller Shafts, Bearings and Joints/Drive/Propeller
Shaft/Service and Repair)Rear Propeller Shaft Replacement (RPO LLT/LF1with MX7 or MN6) (See: Drive/Propeller Shafts, Bearings and
Joints/Drive/Propeller Shaft/Service and Repair)Rear Propeller Shaft Replacement (RPO LLT, LF1 with MXO) (See: Drive/Propeller Shafts,
Bearings and Joints/Drive/Propeller Shaft/Service and Repair).
4. Support the transmission with a suitable jack.
5. Remove the transmission mount assembly. Refer to Transmission Mount Replacement (Except AWD and CTS-V) (See: Transmission Mount
Replacement)Transmission Mount Replacement (CTS-V) (See: Transmission Mount Replacement)Transmission Mount Replacement (Automatic
AWD) (See: Transmission Mount Replacement).
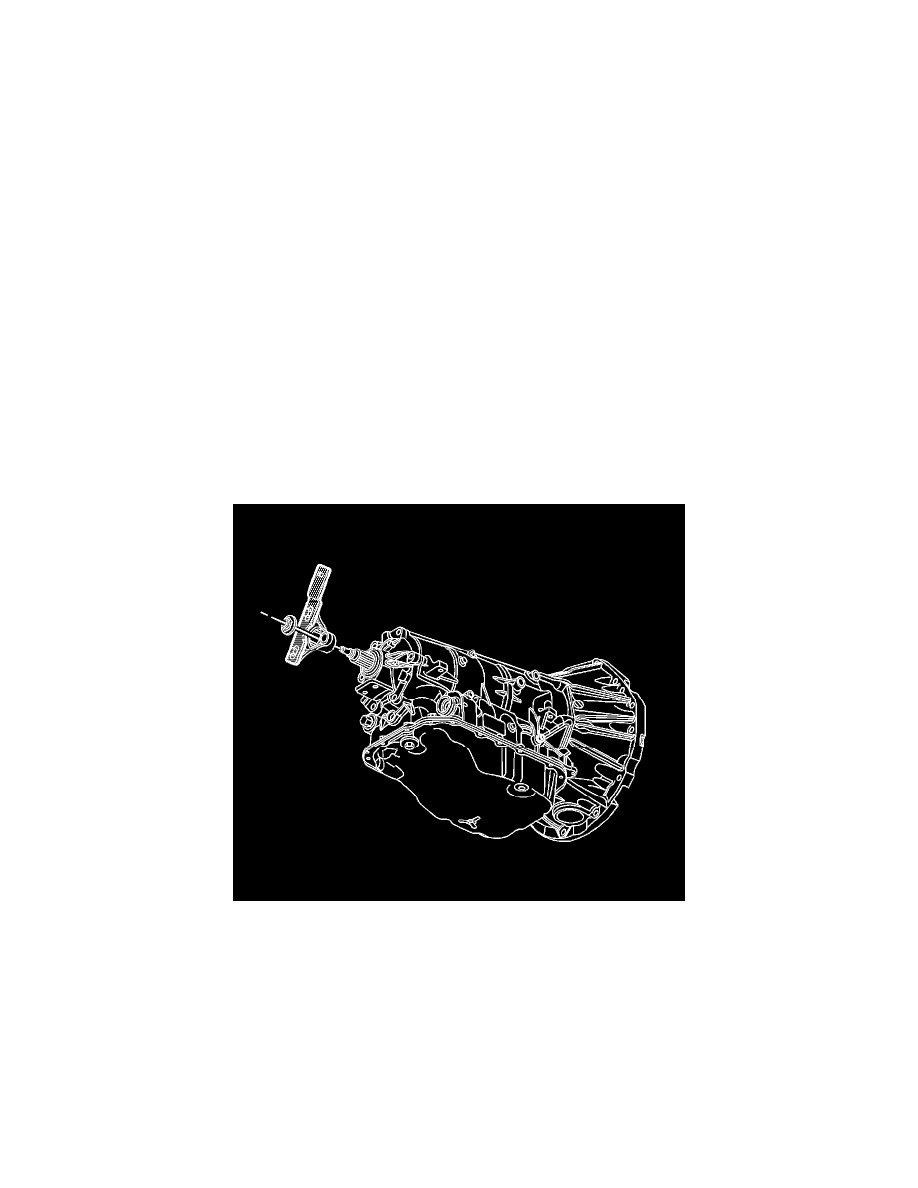
6. Install the propeller shaft flange holding fixture J 45012 using the propeller shaft bolts.
Caution: Do not reuse the flange nut. Reusing the flange nut may cause damage to the transmission.
7. Remove and discard the propeller shaft flange nut.
8. Remove the propeller shaft flange.
Note: Be careful not to scrape or gouge the case extension housing while removing the output shaft seal.