
DeVille V8-252 4.1L VIN 8 FI (1983)
Refrigerant: All Technical Service Bulletins
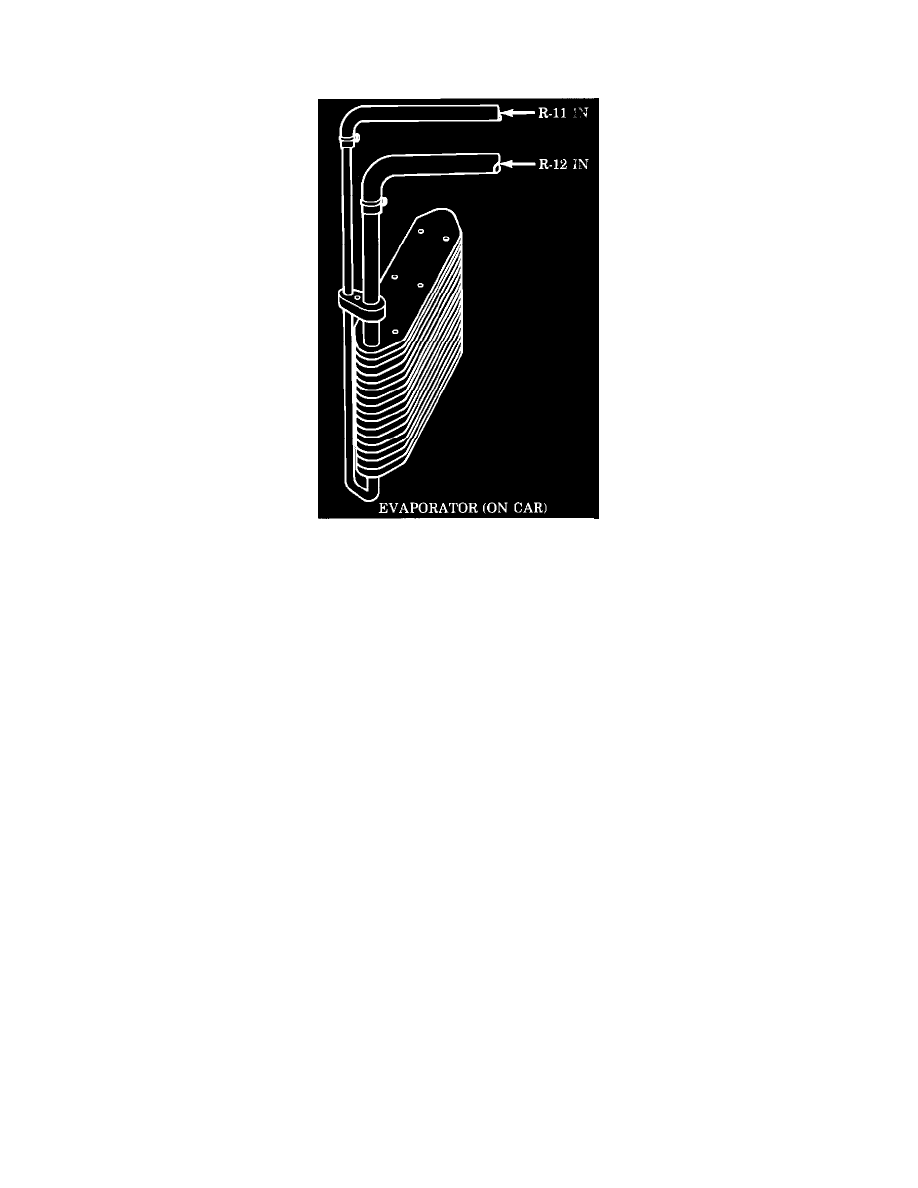
B.Flush Evaporator (On Car) -
FIGURE 2 - EVAPORATOR FLUSHING
a.
Attach extension tubes to the evaporator small opening (inlet) and large opening (outlet/suction side), see Figure 2. The tubes must
extend above the evaporator core and drain into a suitable waste container.
b.
Force liquid R-11 into the evaporator small opening (inlet) extension tube until clean R-11 flows from the evaporator large opening
(outlet/ suction side) extension tube, see Figure 2. Use the large orifice nozzle flush gun J-33883-50 or equivalent.
c.
Cap the tubes with air conditioning hose end caps or appropriate plugs. Wait a minimum of 5 minutes before removing caps and
draining the evaporator.
d.
Force R-12 vapor into the evaporator large opening (outlet/suction side) extension tube to purge the remaining R-11, see Figure 2. Use
the large orifice nozzle flush gun J-33883-50 or equivalent. Continue to blow R-12 vapor until no liquid is observed leaving the
evaporator small opening (inlet) extension tube.
It is mandatory that thge R-12 vapor is blown into the evaporator large opening (outlet/suction side) extension tube or else all of the R-11 will
not be purged. Failure to purge all the R-11 out of the refrigerant system may result in compressor damage and poor performance.