DeVille V8-4.6L VIN 9 (1995)

Fuel Tank Unit: Service and Repair
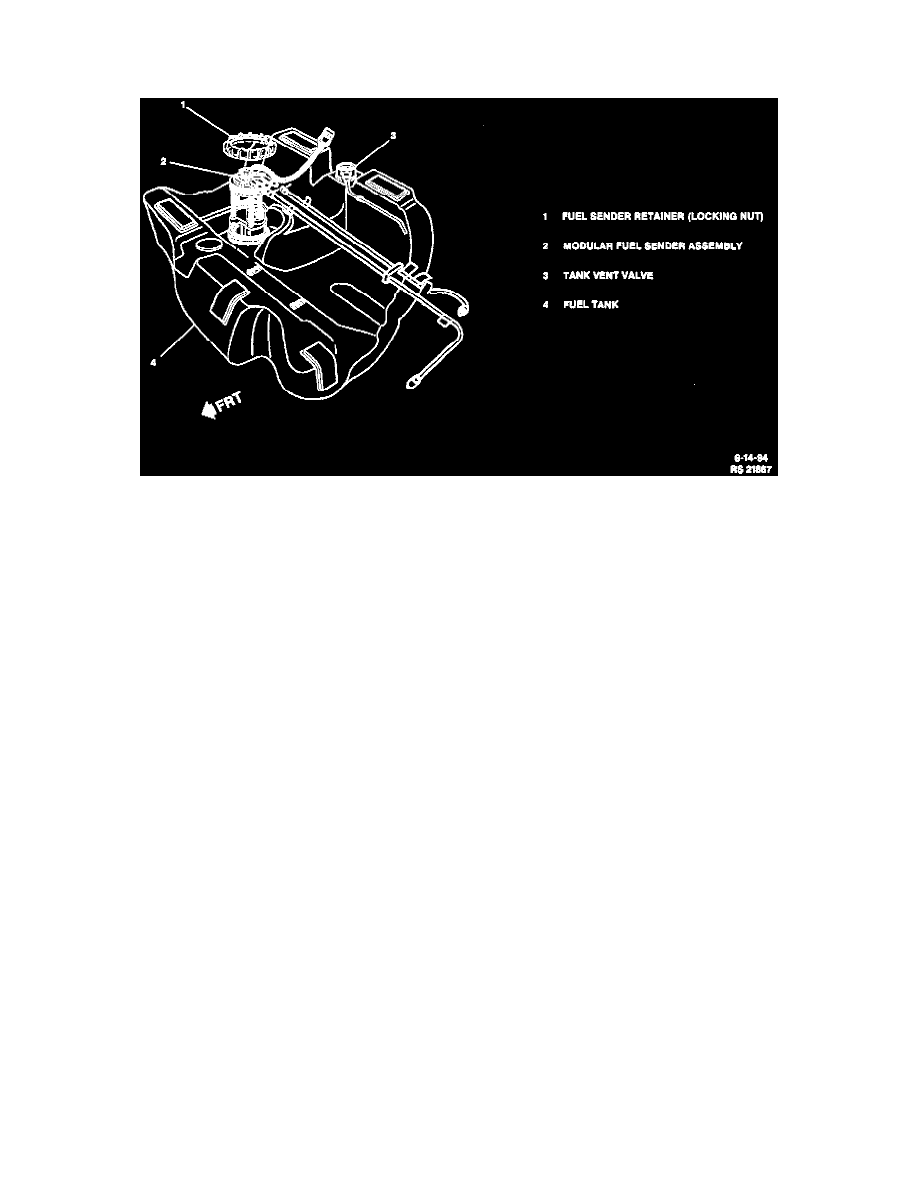
Modular Fuel Sender Assembly Replacement
MODULAR FUEL SENDER ASSEMBLY REPLACEMENT
TOOL REQUIRED
J 39348 Fuel Tank Sender Wrench
PART REQUIRED
Always replace fuel sender assembly lip seal when reinstalling fuel sender assembly.
REMOVE OR DISCONNECT
1. Relieve fuel system pressure. Refer to Fuel System Pressure Relief Procedure. See: Service and Repair
2. Drain fuel tank. Refer to Fuel Tank Draining. See: Fuel Tank/Service and Repair
3. Fuel tank. Refer to Fuel Tank Replacement. See: Fuel Tank/Service and Repair
4. Remove the locking nut using J 39348 by turning counterclockwise.
5. Modular fuel sender assembly from the fuel tank.
IMPORTANT:
^
The modular fuel sender assembly may spring up from its position.
^
When removing the modular assembly from the fuel tank, be aware that the reservoir bucket is full of fuel. Tip the modular assembly slightly
during removal to avoid damage to the float. Have a shop towel ready to absorb any leakage.
6. Fuel sender seal (lip). Slide downward, past the reservoir and carefully over the float arm assembly.
^
Discard the fuel sender lip seal. Carefully discard the reservoir fuel into an approved container.
INSTALL OR CONNECT
1. New lip seal on modular fuel sender assembly. Always use a new lip seal when servicing modular fuel sender unit.
^
Lightly lubricate the inside diameter of the lip seal with engine oil.
^
Lip seal should be carefully positioned over the float arm assembly, moved up over the reservoir and half way up the guide posts.
2. Modular fuel sender assembly into tank.
^
Seat lip seal into tank opening.
3. Align arrow on top of the fuel sender cover to arrow on the fuel tank.
4. Slowly apply pressure to the top of the spring loaded sender until the lip seal is flush between the fuel tank and the fuel sender cover.
5. Attach locking nut. Tighten Locking nut to 50 Nm (37 lb. ft.).
IMPORTANT:
^
Be sure that the lip seal provides a snug seal between the modular unit and the fuel tank.
6. Fuel tank. Refer to Fuel Tank Replacement.
