
DeVille V8-4.6L VIN 9 (1995)
Compressor/Pump: Service and Repair
Air Compressor
CAUTION: When repair or adjustment procedures require that vehicle be raised on a hoist, it is important that the rear axle assembly
remains in the normal trim height position at all times. When a frame contact hoist is used, two additional jack stands should be used to
support the rear axle or control arms in the normal trim height position.
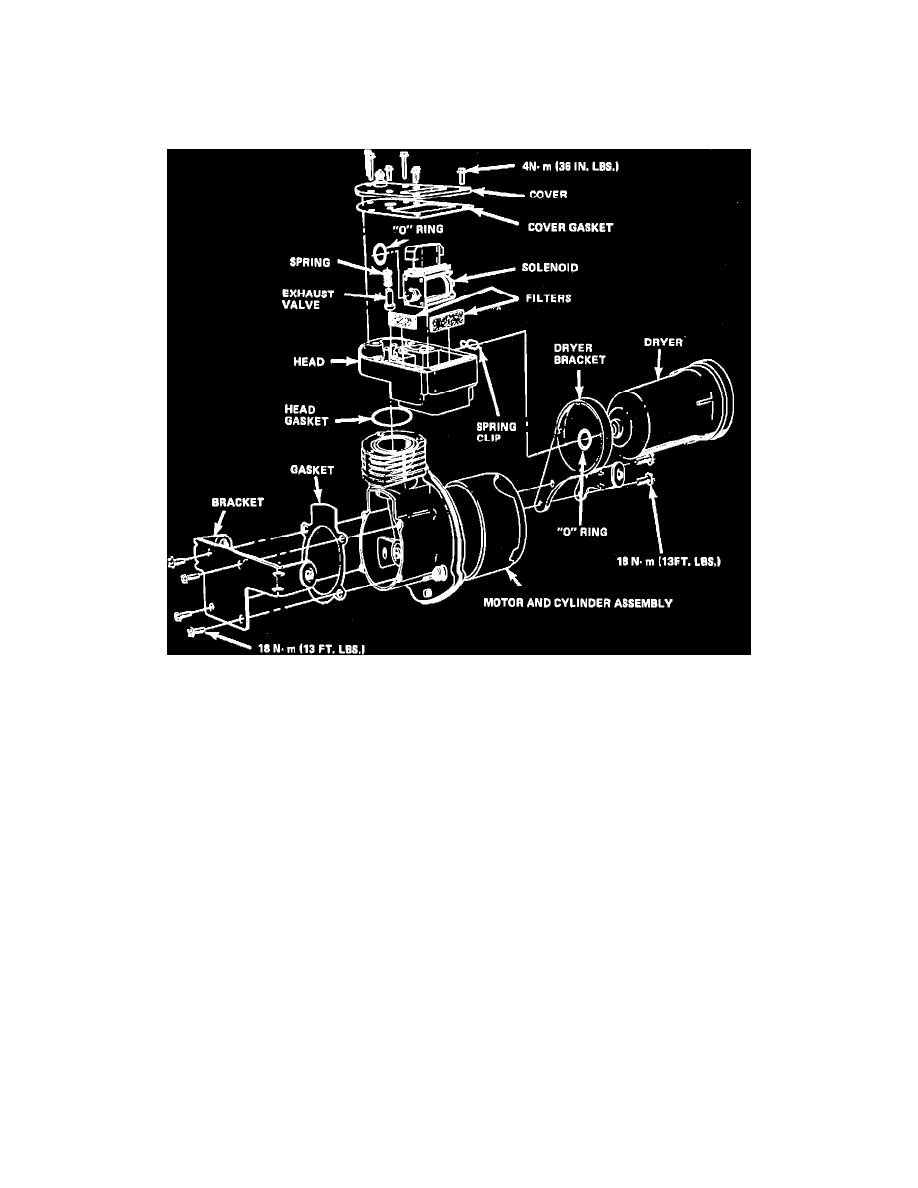
Fig. 25 Air Compressor, Disassembled
Disassembly
1.
Remove the seven compressor cover screws, then the compressor cover and gasket, Fig. 25.
2.
Remove head and solenoid assembly.
3.
Remove two filters, exhaust valve, spring and air dryer O-ring from head assembly.
4.
Remove solenoid from head by lifting slightly and sliding to the dryer outlet side.
5.
Remove O-ring from solenoid assembly.
6.
Remove head gasket from cylinder assembly.
7.
Remove four mounting bracket screws, then the bracket and gasket. Note position of ground wire for installation.