DeVille V8-4.6L VIN Y (1998)

Front Door Panel: Service and Repair
Door Window Switch
POWER WINDOW SWITCH - FRONT DOOR
REMOVAL PROCEDURE
1. Apply a strip of protective tape in front of the switch trim panel.
2. Use a wide, flat-bladed tool in order to pry up on the front edge of the switch plate.
3. Insert the blade under the switch plate in order to disengage the retention clip.
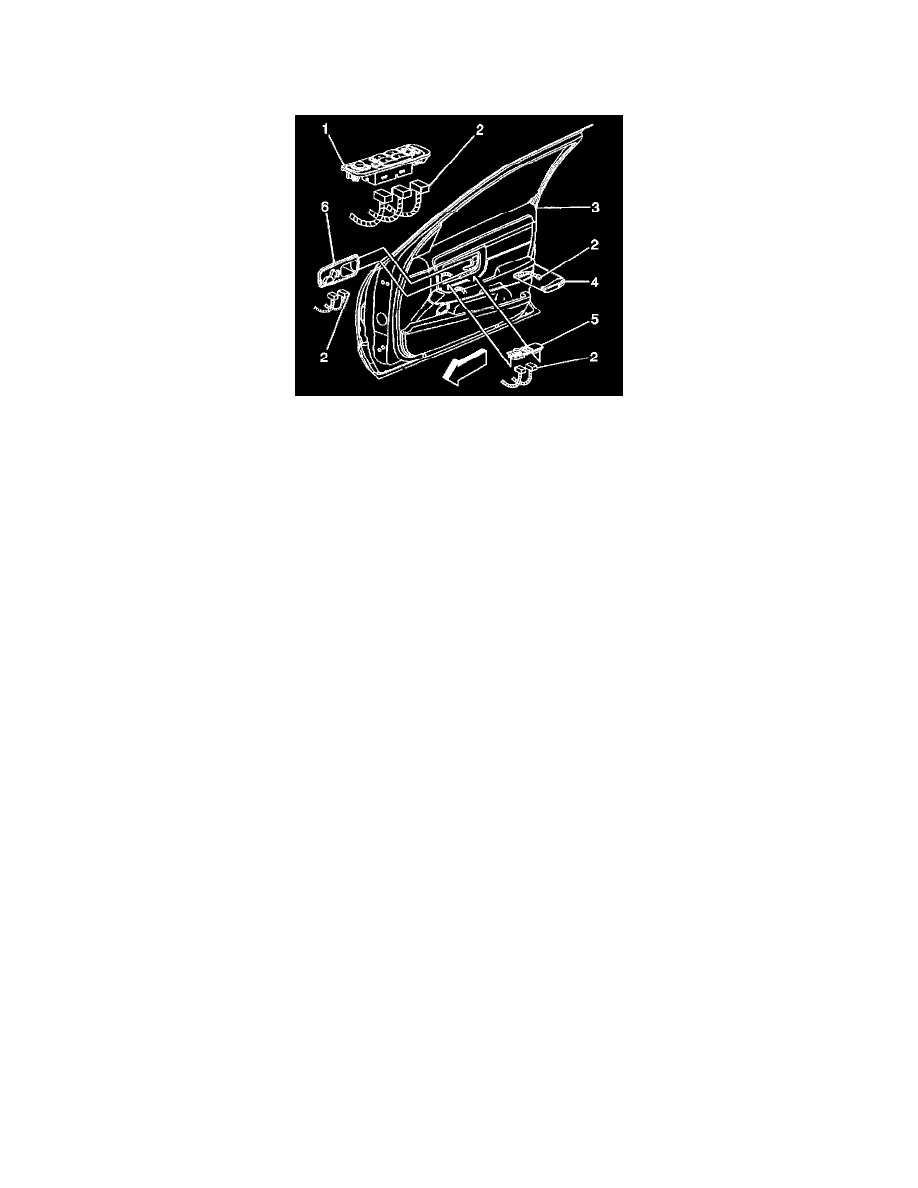
4. Firmly press the blade toward the front of the switch plate (1,5) and disengage the clip.
NOTE: The retainer clip must be fully disengaged before the switch plate is removed. Otherwise, damage to the switch plate could result.
5. Pull the flat-bladed tool upward while pressing firmly toward the plate.
6. Pull the plate from the trim panel.
7. Disconnect the electrical connectors (2) from the driver door switch plate (1). Disconnect the electrical connectors (2) from the passenger door
switch plate (5).
8. Remove the switch plate (1, 5).
9. From the back side of the switch plate, gently pry the tabs in order to release the window switch from the switch plate.
10. Remove the switch.
INSTALLATION PROCEDURE
1. Press the window switch into the switch plate (1,5).
2. Connect the electrical connectors (2) to the switch plate (1,5).
3. Install the switch plate (1,5) by evenly setting the plate into the armrest of the trim panel.
4. Press the plate into position in order to engage the clips on both ends.
5. Remove the strip of protective tape.
