
DeVille V8-4.6L VIN Y (1998)
Glove Compartment Lock: Service and Repair
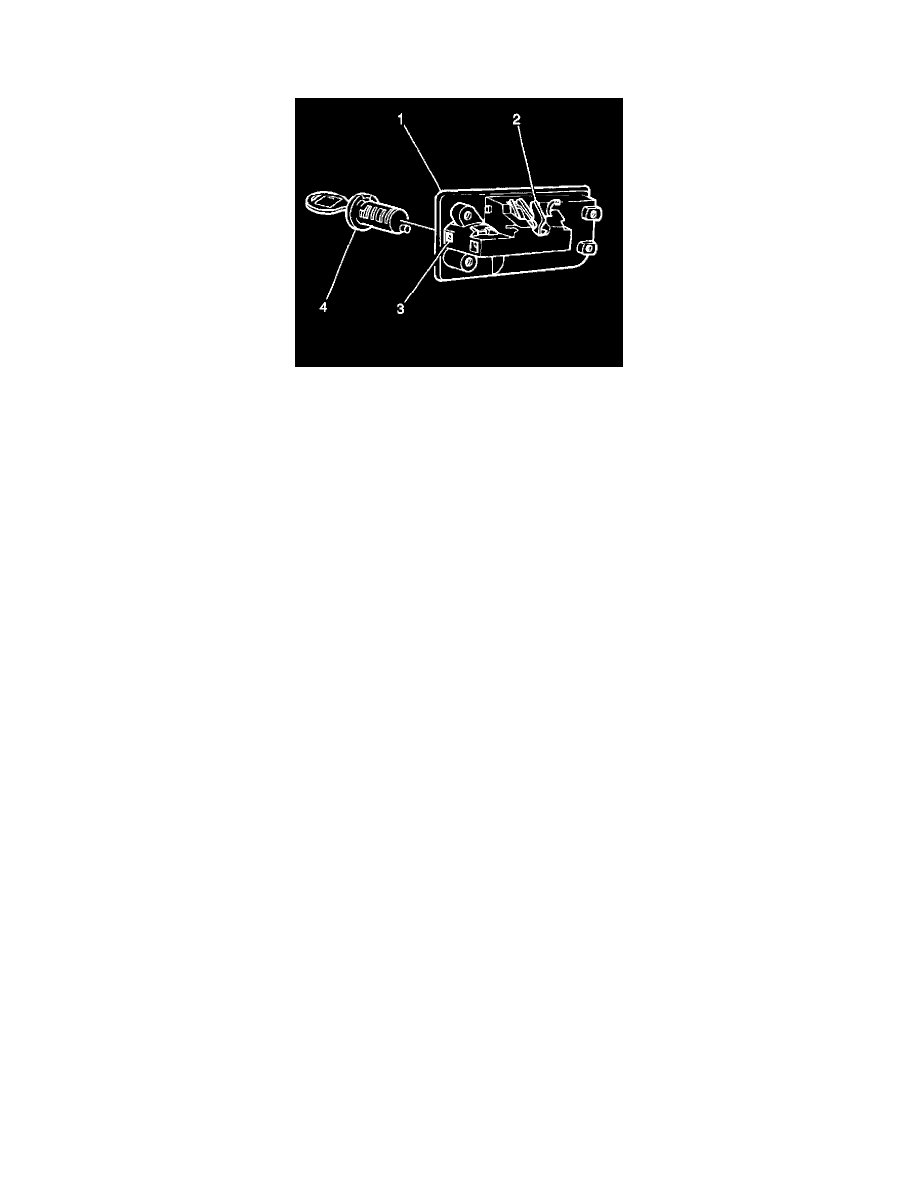
I/P Storage Compartment Lock Cylinder
REMOVAL PROCEDURE
1. Open the storage compartment door.
2. Remove the 7 fasteners that retain the door inner panel.
3. Remove the 4 fasteners retaining the storage compartment lock cylinder assembly (1) to the door.
4. Fold up the latch catch to the locked position.
5. Insert the key.
6. Turn the cylinder (4) to the locked position. Remove the key.
7. Insert a 2 mm (3/32 in) drill bit into the locking tab access hole (3) on the right side of the lock case.
8. Press the locking tab flush with the cylinder.
9. Insert the key.
10. Turn the key clockwise until the tab clears the stop.
11. Pull the cylinder (4) out with the key.
INSTALLATION PROCEDURE
1. Hold down the tumblers using your finger.
2. Insert the key.
3. Install the lock cylinder (4) with the key into the lock case until fully seated.
4. Turn the key to the unlocked position.
5. Remove the key.
6. Install the lock cylinder assembly (1) to the door.
7. Install the 4 fasteners in order to secure the lock cylinder assembly (1).
8. Pull the latch handle in order to release the latch catch to the unlocked position.
9. Position the door inner panel.
10. Install the 7 fasteners in order to secure the panel.