
DeVille Concours V8-4.6L VIN Y (1995)
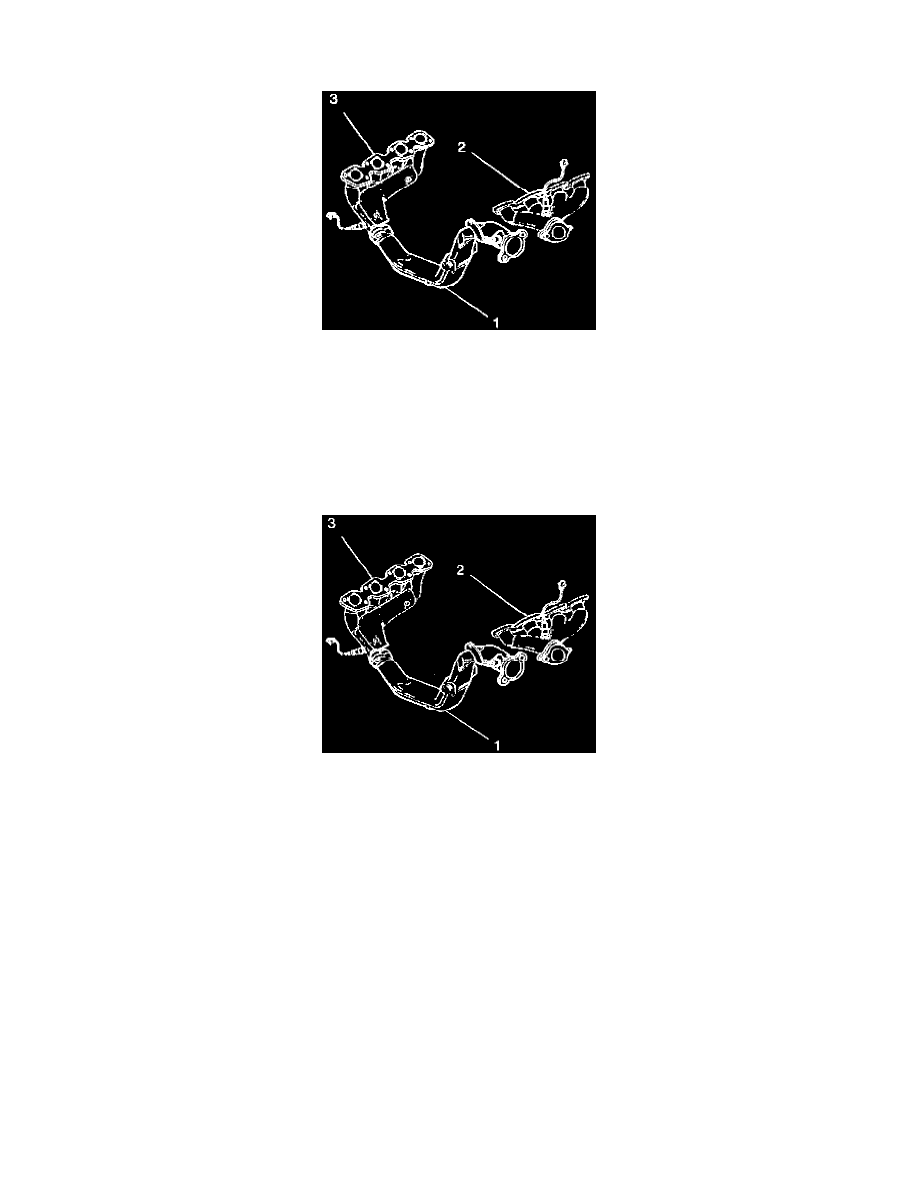
Exhaust Crossover Pipe: Service and Repair
REMOVAL PROCEDURE
1. Remove the transmission assembly.
2. Remove two bolts from the left exhaust manifold (3).
3. Remove the exhaust manifold rear pipe from the right manifold (2).
4. Remove one bolt securing the crossover pipe to the crankcase.
5. Remove one bolt securing the crossover pipe to the cylinder head.
6. Remove the EGR supply tube.
7. Remove the exhaust crossover pipe.
INSTALLATION PROCEDURE
1. Install the exhaust crossover pipe (1).
2. Install the flange and seal to the exhaust manifold rear pipe end of the crossover.
3. Position the crossover pipe securely leaving the left hand exhaust manifold joint loose.
4. Install the bolt securing the crossover pipe to cylinder head.
NOTICE: Refer to Fastener Notice in Service Precautions.
5. Install the bolt securing the crossover pipe to the crankcase. Tighten the crankcase support bolts and cylinder head support bolts to 30 Nm (22 ft.
lbs.).
6. Install the left exhaust manifold to crossover pipe bolts. Tighten the bolts to 25 Nm (18 ft. lbs.).
7. Tighten the exhaust downpipe to exhaust crossover pipe.
8. Install the EGR supply tube. Tighten the EGR tube-to-crossover pipe nut to 60 Nm (44 ft. lbs.).
9. Install the transmission assembly.