
DeVille Concours V8-4.6L VIN Y (1995)
Suspension Strut / Shock Absorber: Service and Repair
Front Suspension
Removal/Installation
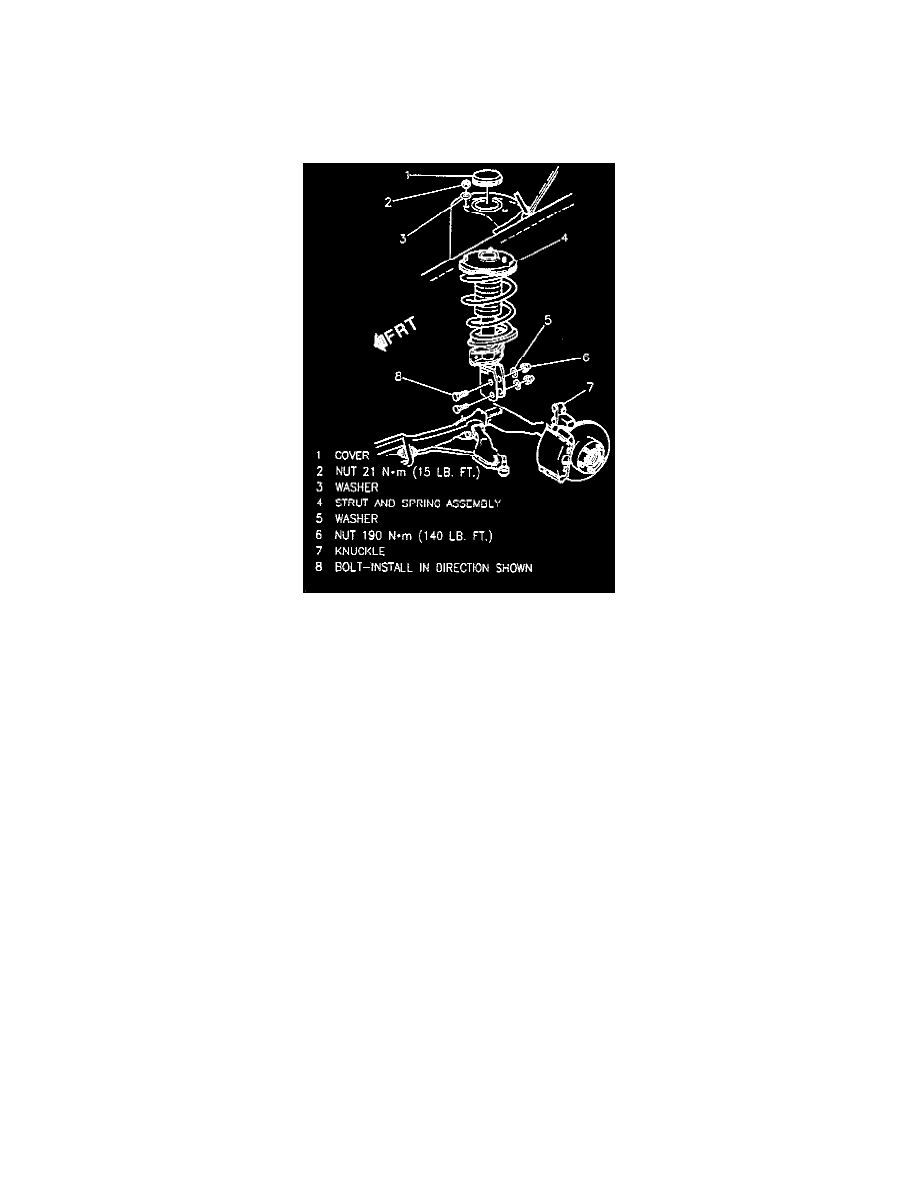
FRONT STRUT ASSEMBLY
REMOVE OR DISCONNECT
1. Nuts attaching top of strut assembly to body.
2. Raise vehicle and support frame with jackstands.
3. Tire and wheel assembly.
4. Road sensing suspension position sensor from lower control arm.
NOTICE: Whenever working near the drive axles, care must be taken to prevent inner tri-pot joints from being overextended. Overextension of
the joint could result in separation of internal components which could go undetected and result in failure of the joint.
NOTICE: Care should be taken to avoid scratching or cracking the spring coating when handling the front suspension coil spring. Damage can
cause premature failure.
5. Scribe knuckle and strut.
6. Brake line bracket from strut.
7. Stabilizer link from strut.
8. Strut electrical connector.
9. Strut-to-knuckle bolts and support knuckle with wire.
10. Strut.
INSTALL OR CONNECT
1. Strut while aligning scribe marks.
2. Strut-to-knuckle bolts.
3. Strut electrical connector.
4. Stabilizer link to strut.
5. Brake line bracket to strut.
6. Road sensing suspension position sensor to lower control arm.
7. Nuts attaching top of strut to body.
8. Tire and wheel assembly.
^
Tighten:
-
Wheel nuts to 140 Nm (100 ft. lbs.).
-
Stabilizer link nuts to 65 Nm (48 ft. lbs.).