
DeVille Concours V8-4.6L VIN Y (1995)
Parking Pawl: Service and Repair
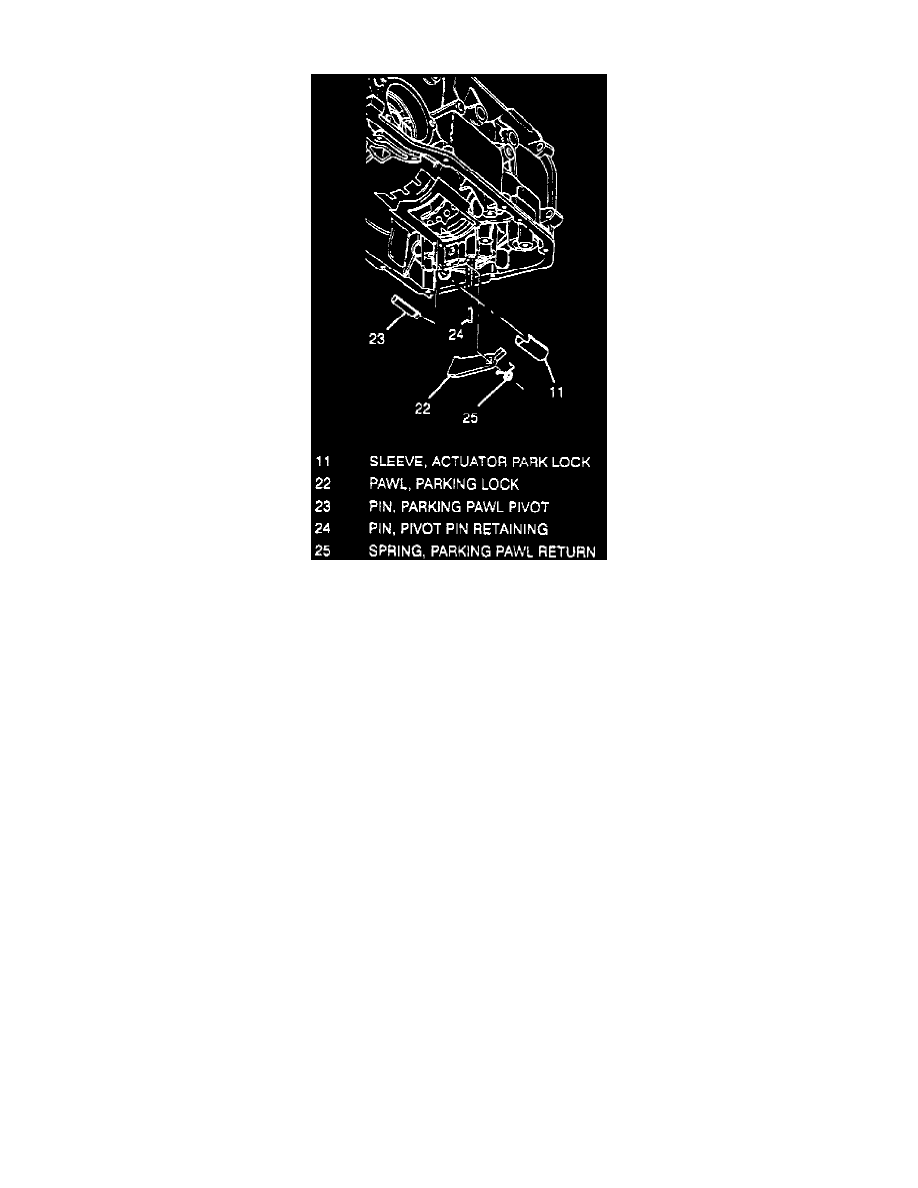
Fig.31 Parking Pawl And Actuator Sleeve Components
REMOVAL
Refer to Fig. 31 when servicing parking pawl assembly.
1. Raise and support vehicle.
2. Remove bottom pan and gasket, scavenger screen and seals as outlined.
3. Remove lower controls assembly as outlined.
4. Remove final drive assembly as outlined.
5. Move manual shaft from Park position.
6. Drive out pivot pin retaining pin.
7. Drive parking pawl pivot pin towards extension housing with pin punch. Push down on spring while driving shaft out.
8. Remove parking pawl and spring.
9. Remove park lock sleeve using a rubber mallet. Drive out towards case extension portion of case.
INSPECTION
1. Inspect parking pawl tooth for damage.
2. Inspect parking pawl spring for overexpansion
3. Inspect pivot pin for scorning and excessive wear.
INSTALLATION
1. Place pawl in case slot, then attach spring to pawl.
2. Insert pivot pin through spring and pawl. The hook end of spring locates on case and square end of top of parking pawl.
3. Install retaining pin using a hammer and pin punch, then install actuator sleeve.
4. Install final drive assembly.
5. Install lower controls assembly.
6. Install bottom pan and gasket, scavenger screens and lip seals.
7. Lower vehicle.
8. Add transmission fluid, then reset transaxle oil life indicator.