DeVille d Elegance V8-4.6L VIN Y (1998)

Console: Service and Repair
Console Replacement
REMOVAL PROCEDURE
1. Remove the console storage compartment.
2. Remove the console trim plate.
3. Remove the ashtray.
4. Remove the driver information switch.
5. Remove the radio and A/C control assembly.
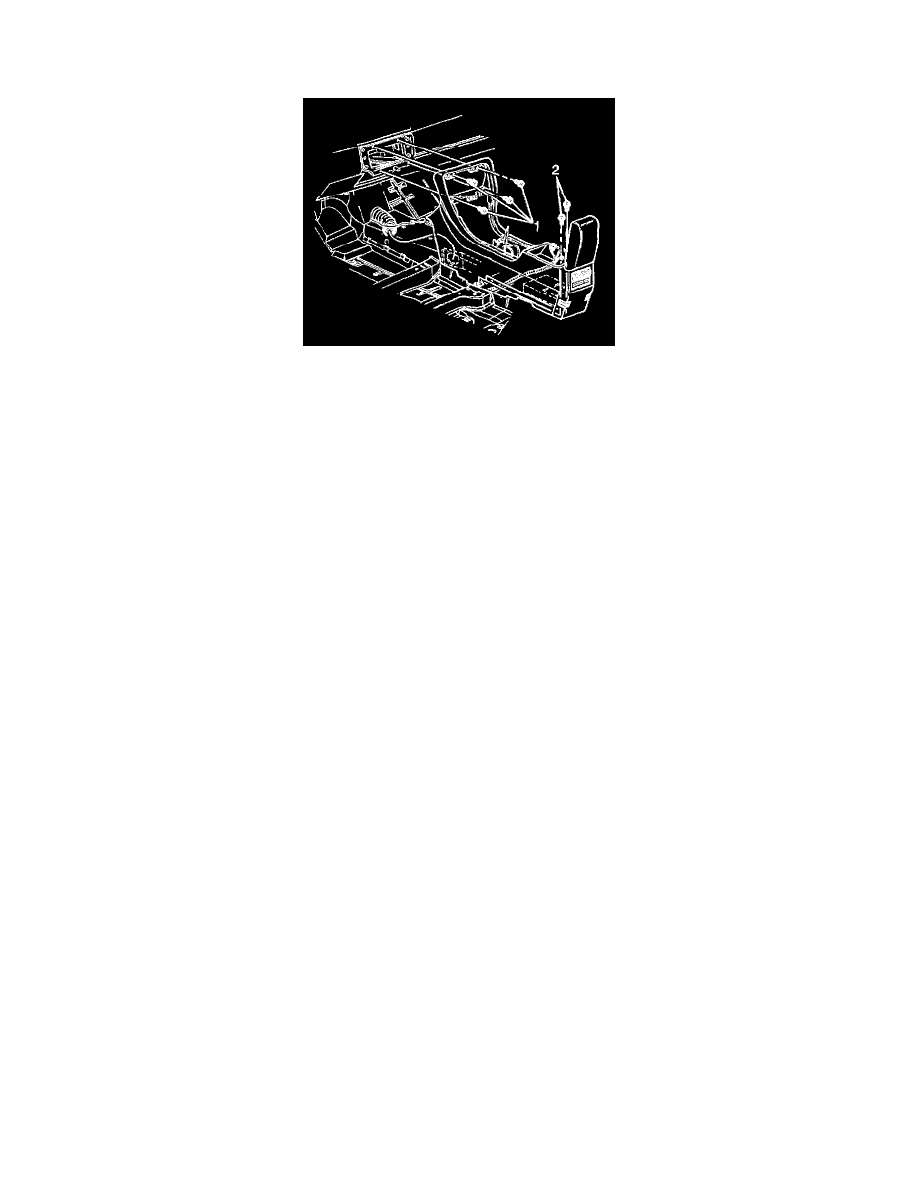
6. Remove the 2 fasteners (2) that retain the console to the floor.
7. Remove the 4 fasteners (1) that retain the console to the instrument panel.
8. Remove the console air supply duct. Turn the duct in order to release the duct.
9. Remove the 2 fasteners that retain the upper shift plate.
10. Remove the shifter.
11. Disconnect the electrical connectors to the console.
12. Remove the console from the vehicle.
INSTALLATION PROCEDURE
1. Install the console to the vehicle.
2. Connect the electrical connectors to the console.
3. Install the shifter.
4. Install the 2 retainers to the upper shift plate.
5. Install the console blower air supply duct. Turn the duct in order to push on the duct.
NOTE: Refer to Fastener Notice in Cautions and Notices.
6. Install the 4 fasteners (1) that retain the console to the IP.
Tighten
Tighten the fasteners to 6 N.m (53 lb in).
7. Install the 2 rear fasteners (2) that retain the console to the floor.
Tighten
Tighten the fasteners to 24 N.m (18 lb ft).
8. Install the radio/heater and A/C control assembly.
9. Install the driver information switch (2) to the console.
10. Install the ashtray (2) to the console.
11. Install the console trim plate.
12. Install the storage compartment.
