
DeVille d Elegance V8-4.6L VIN Y (1998)
Refer to the detail insert in the illustration.
NOTE: Refer to Fastener Notice in Cautions and Notices.
4. Install the fasteners (2).
Tighten
Tighten the fasteners (2) to 1.5 Nm (13 lb in).
5. Install the outside rearview mirror trim cover with the trim fastener.
6. Install the door trim plate.
7. Install the power window switch assembly.
Side Rear Door Trim Panel
REMOVAL PROCEDURE
1. Remove the power window switch assembly.
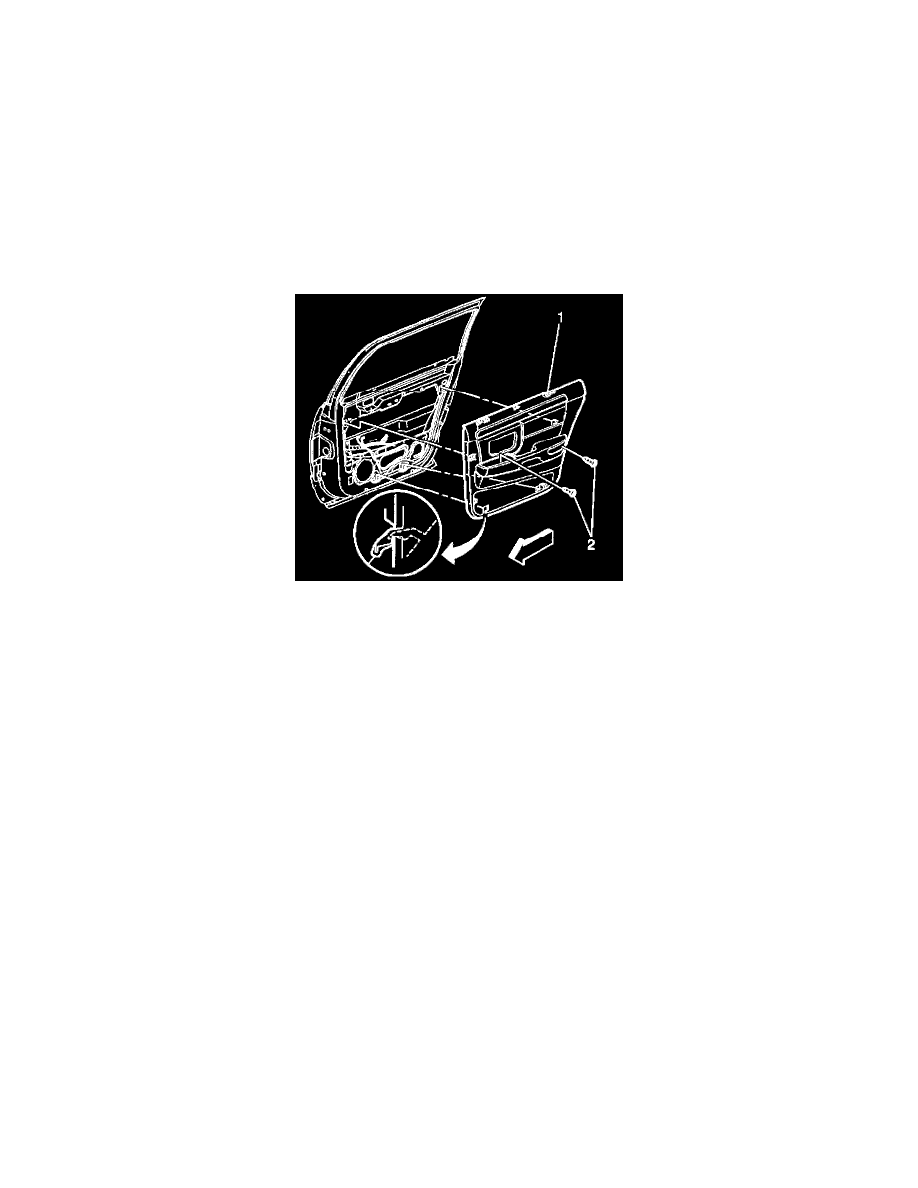
2. Remove the hidden fasteners (2).
3. Remove the door trim plate.
4. Remove the door trim panel (1) by lifting up and out in order to disengage the hooks from the door.
5. Disconnect the electrical connector.
INSTALLATION PROCEDURE
1. Connect the electrical connector.
2. Perform the following steps in order to install the door trim panel (1):
2.1. Align the hooks with the door.
2.2. Push in and down on the trim panel.
NOTE: Refer to Fastener Notice in Cautions and Notices.
2.3. Install the fasteners (2).
Tighten
Tighten the fasteners (2) to 1.5 Nm (13 lb in).
3. Install the door trim plate.
4. Install the power window switch assembly.