
DeVille d Elegance V8-4.6L VIN Y (1998)
Brake Caliper: Service and Repair
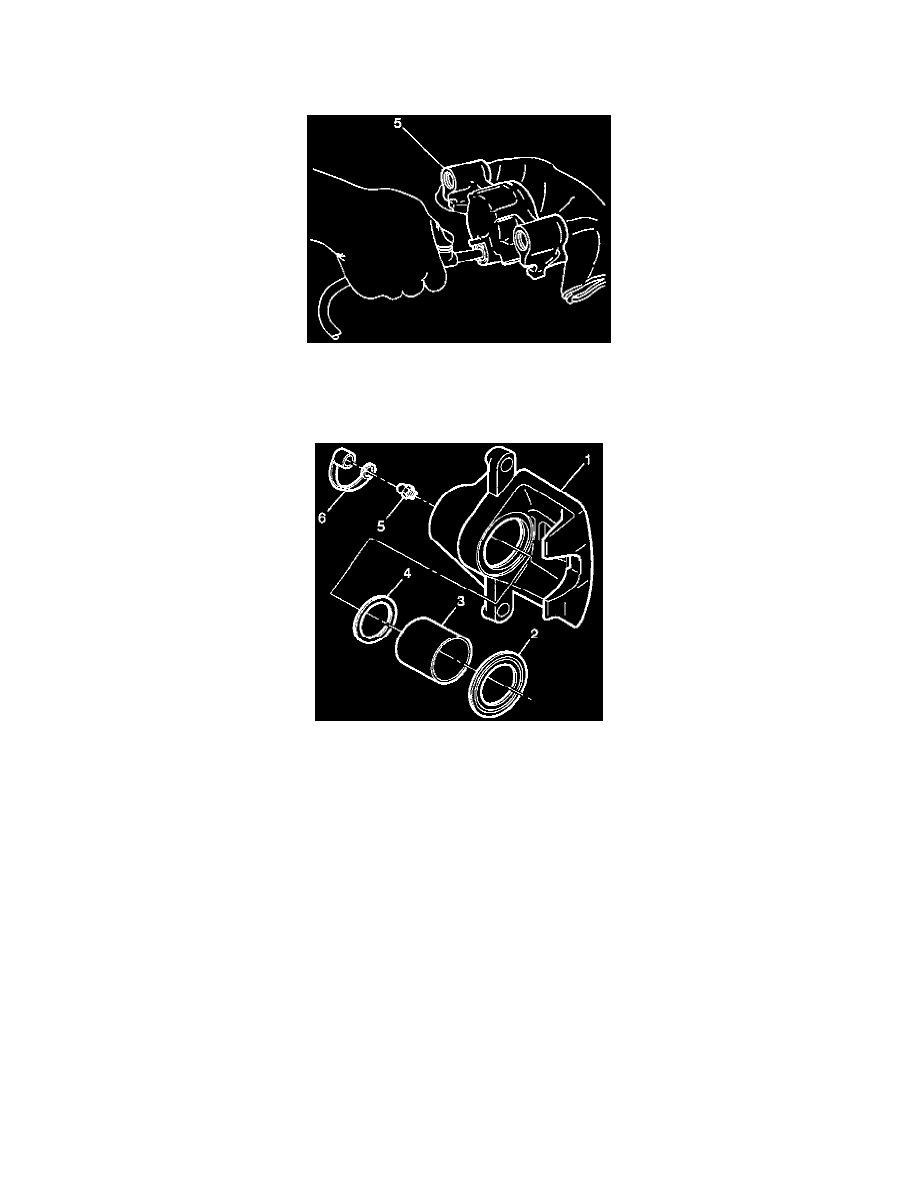
Brake Caliper Overhaul (Without B9Q/V4U)
1. Remove the caliper from vehicle.
CAUTION: Do not place your fingers in front of the piston in order to catch or protect the piston while applying compressed air. This could result
in serious injury.
2. Remove the piston by directing low pressure compressed air into the caliper inlet hole.
3. IMPORTANT: Care must be used when removing the piston boot and seal from the caliper. Use a small plastic or wood tool for removal. Do not
use a metal tool because it may damage the caliper bore or seal groove.
4. Remove the piston boot from the caliper.
5. Remove the piston seal from the caliper.
6. Remove the bleeder valve and cap from the caliper.
7. Clean all of the parts. Use clean, denatured alcohol. Dry all of the parts with unlubricated, low pressure compressed air. Blow out all of the
passages in the caliper body and the bleeder valve.
8. Inspect all of the parts as follows.
^
Piston - Inspect for scoring, nicks, cracks, wear, or corrosion. Replace the piston if any damage is found.
^
Caliper Bore - Inspect for scoring, nicks, cracks, wear, or corrosion. Use crocus cloth to polish out light corrosion. Otherwise, replace the
caliper. Do not hone the caliper bore.
^
Seal groove in the caliper bore for nicks or burrs. If found, replace the caliper.
9. Install the bleeder valve cap and bleeder valve into the caliper.
10. Install the new piston seal. Lubricate the seal with clean brake fluid before installing.