
DeVille DHS V8-4.6L VIN Y (2000)
Trunk / Liftgate Striker: Service and Repair
Rear Compartment Lid Latch Striker Replacement
Removal Procedure
1. Open the rear compartment lid.
2. Remove the rear compartment sill plate. Refer to Rear Compartment Sill Trim Plate Replacement (See: Interior Moulding / Trim/Trim
Panel/Service and Repair/Rear Compartment Sill Trim Plate Replacement) .
3. Remove the rear bumper fascia. Refer to Rear Bumper Fascia Replacement (See: Bumper/Rear Bumper/Rear Bumper Cover / Fascia/Service and
Repair) in Bumpers.
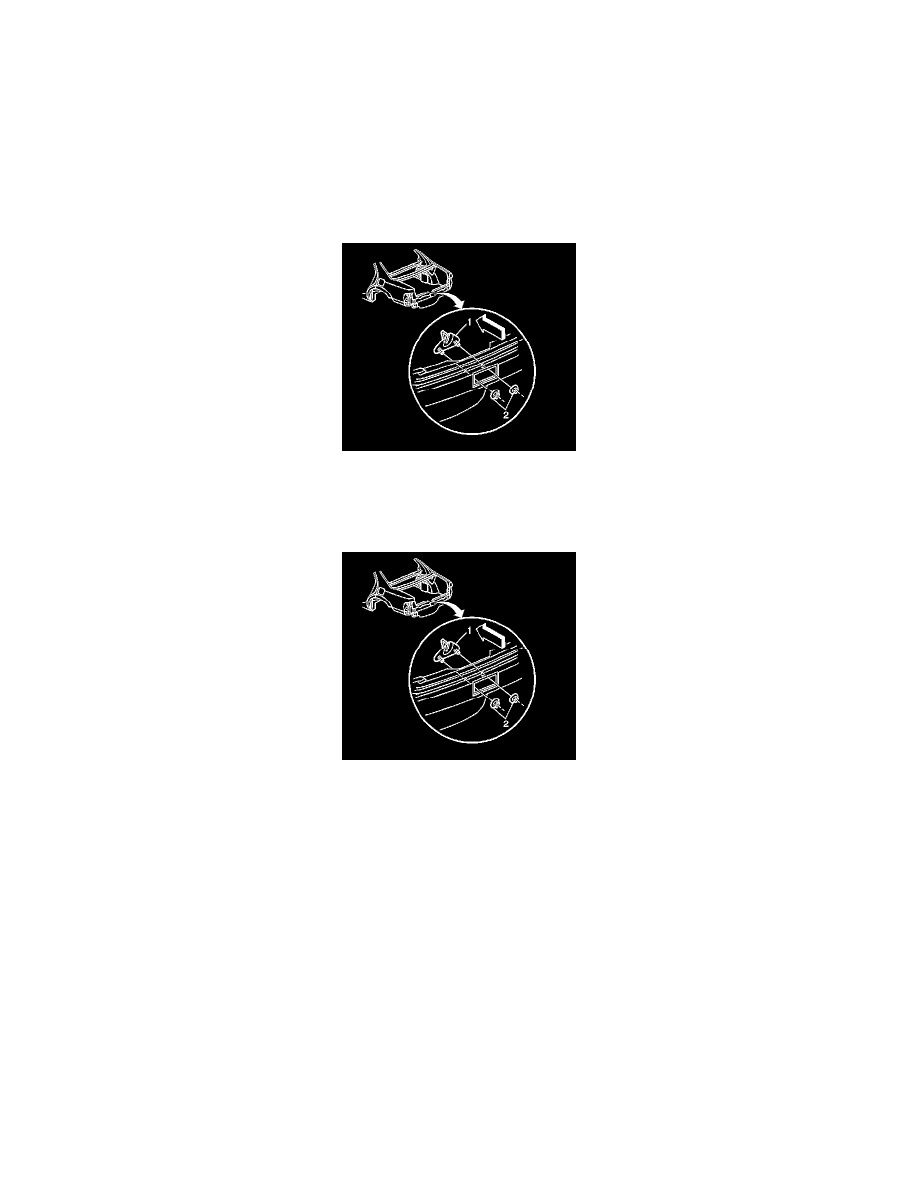
4. Remove the fasteners (2) securing the rear compartment lock striker (1) to the vehicle.
5. Remove the rear compartment lock striker (1) from the vehicle.
Installation Procedure
1. Install the rear compartment lock striker (1) to the vehicle.
2. Install the fasteners (2) finger tight in order to retain the rear compartment latch striker (1) to the vehicle.
3. Carefully close the rear compartment lid.
Notice: Refer to Fastener Notice in Cautions and Notices.
4. Hold the rear compartment lid at correct height and tighten the fasteners (2) in order to secure the rear compartment latch striker (1) to the vehicle.
Tighten the fasteners to 12 N.m (92 lb in).
5. Open the rear compartment lid.
6. Install the rear bumper fascia. Refer to Rear Bumper Fascia Replacement (See: Bumper/Rear Bumper/Rear Bumper Cover / Fascia/Service and
Repair) in Bumpers.
7. Install the rear compartment sill plate. Refer to Rear Compartment Sill Trim Plate Replacement (See: Interior Moulding / Trim/Trim
Panel/Service and Repair/Rear Compartment Sill Trim Plate Replacement) .
8. Close the rear compartment lid.