
DeVille DHS V8-4.6L VIN Y (2000)
REMOVAL PROCEDURE
CAUTION:
^
Refer to Caution - Pretensioner handling in Service Precautions.
^
Refer to Inflator Module Handling and Storage Caution in Service Precautions.
1. Disable the SIR system. Refer to Disabling the SIR System.
2. Disconnect the pretensioner 4-way electrical connector from the 2-way side air bag connector.
3. Disconnect the 2-way seat belt switch electrical connector.
4. Remove the passenger seat.
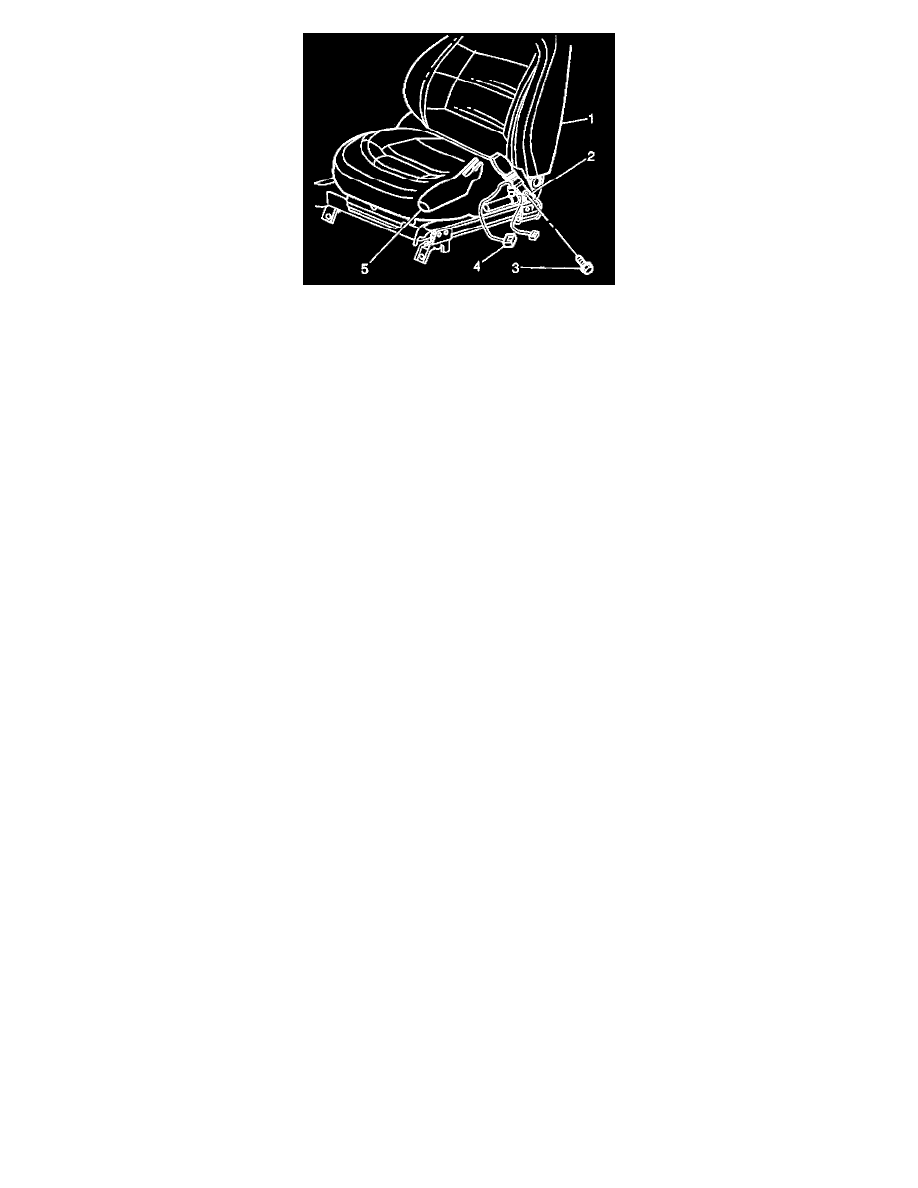
5. Remove the pretensioner trim cover (5) by pulling up on the front of the cover and then pulling forward.
6. Remove the pretensioner fastener (3) and remove pretensioner (2) from seat (1).
INSTALLATION PROCEDURE
1. Install the pretensioner (2) to the seat (1). Notice that the pretensioner has a tab that fits into the seat in order to insure that the pretensioner is in
the proper position.
NOTE: Refer to Fastener Notice in Service Precautions.
2. Install the fastener (3) while holding pretensioner in place.
Tighten
Tighten the nut to 41 N.m (30 lb ft).
3. Install the pretensioner trim cover by engaging the rear, then pushing down on the front.
4. Install the passenger seat back into vehicle.
5. Carefully route the pretensioner pigtail harness (4) and seat belt wiring harness under the seat.
6. Connect the pretensioner 4-way electrical connector to the 2-way side air bag connector.
7. Connect the 2-way seat belt switch electrical connector.
8. Enable the SIR system. Refer to Enabling the SIR System.