
DeVille DHS V8-4.6L VIN Y (2000)
Control Arm Bushing: Service and Repair
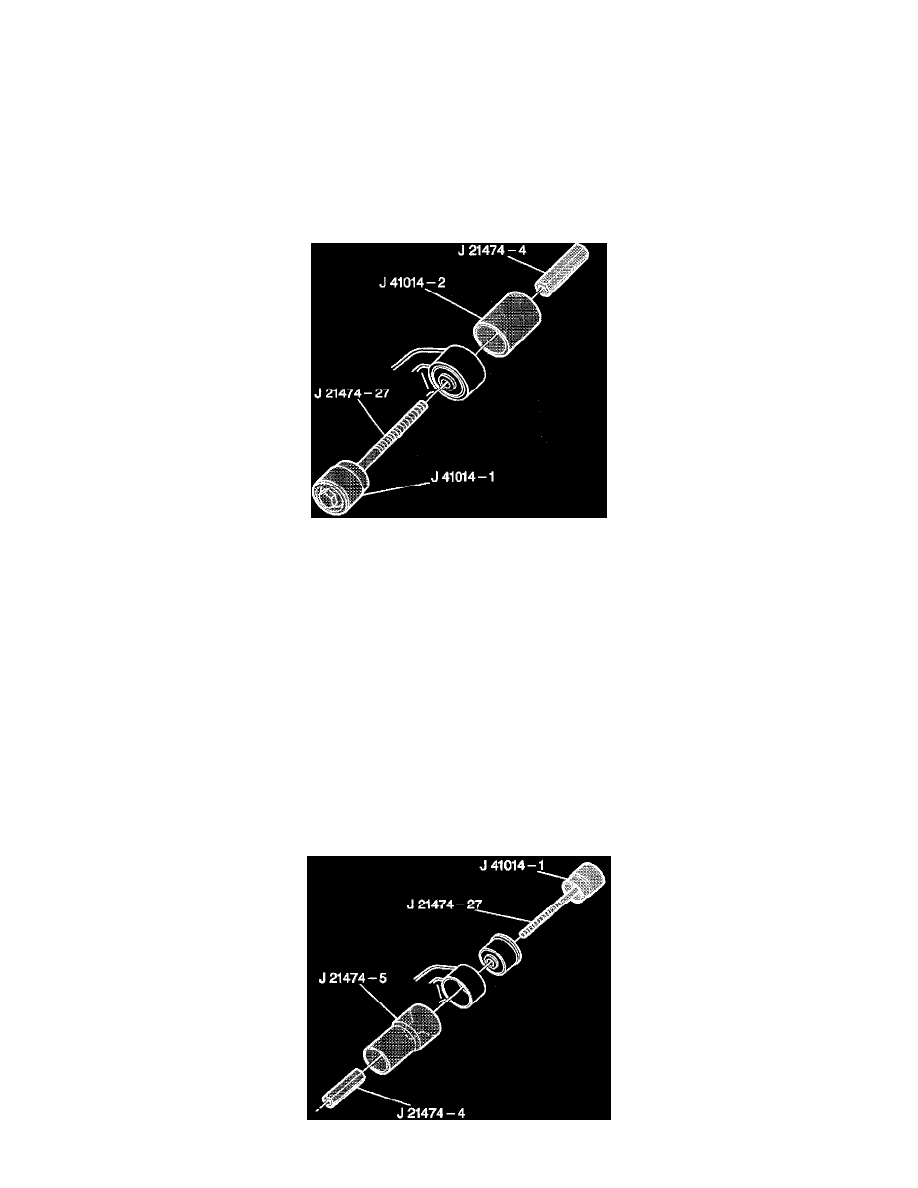
Removal Procedure
-
Tools Required
-
J21474-4 Long Nut
-
J21474-27 Long Bolt with Thrust Bearing
-
J41014-1 Bushing Remover
-
J21474-01 Control Arm Bushing Service Kit
1. Remove the control arm from the vehicle. Refer to Rear Axle Lower Control Arm Replacement (FE1, FE3) or Rear Axle Lower Control Arm
Replacement (FE7)
2. Remove the bushing from control arm using tools as follows:
-
Assemble the long bolt J21474-27 with the thrust bearing through the bushing remover J41014-1 through the bushing receiver J41014 over the
bushing against the control arm.
-
Lubricate the bolt threads with high pressure lubricant.
-
Install the nut J21474-4 and begin tightening the nut.
3. Tighten the nut until the bushing is driven out of the control arm.
4. Disassemble the tools.
5. Remove1he bushing.
Installation Procedure
-
Tools Required
-
J21474-4 Long Nut
-
J21474-5 Bushing Receiver
-
J21474-27 Long Bolt with Thrust Bearing
-
J41014-1 Bushing Remover
-
J21474-01 Control Arm Bushing Service Kit