
DeVille DHS V8-4.6L VIN Y (2000)
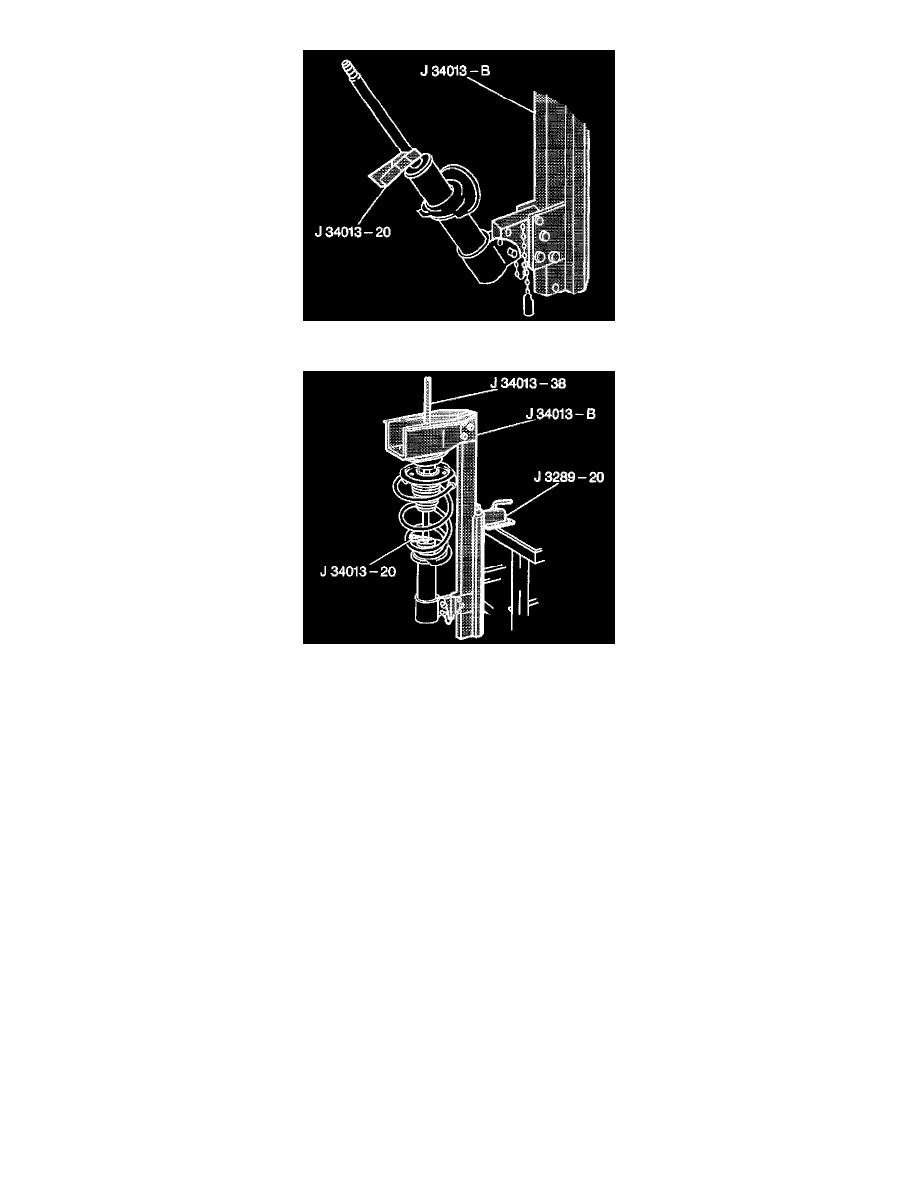
1. Install the J34013-B and J34013-20 clamp on the strut shaft in the J34013-20 strut compressor lower adapter.
2. Install the spring over the strut in the correct position, and move the assembly upright in the strut compressor.
3. Install the locking pin.
Important:
^
The tab on the upper spring seat must face in from the centerline of the vehicle, or when mounted in the strut compressor, the spring seat must face
the same direction as the steering knuckle mounting flange.
^
If the bearing had been removed from the upper spring seat, the bearing must be installed into the upper spring seat in the same orientation as it
had been. The bearing must be installed firmly in the spring seat before attaching the strut mount.
4. Install J34013-38 into the strut to guide the strut shaft.
5. Turn the compressor screw clockwise while guiding the strut shaft to center in the assembly.
6. Continue turning the compressor forcing screw on the strut compressor until the strut shaft threads are visible through the top of the strut assembly.
7. Install the washer and remove the clamp J34013-20 from the strut shaft.
Tighten the strut mount nut to 75 Nm (55 ft. lbs.).
8. Remove the strut from the strut compressor.
9. Install strut to vehicle. Refer to Strut Assembly Replacement (FE1, FE3) or Strut Assembly Replacement (FE7).