
DeVille DTS V8-4.6L VIN 9 (2002)
Tighten the bolts (5) to 2 N.m (18 lb in).
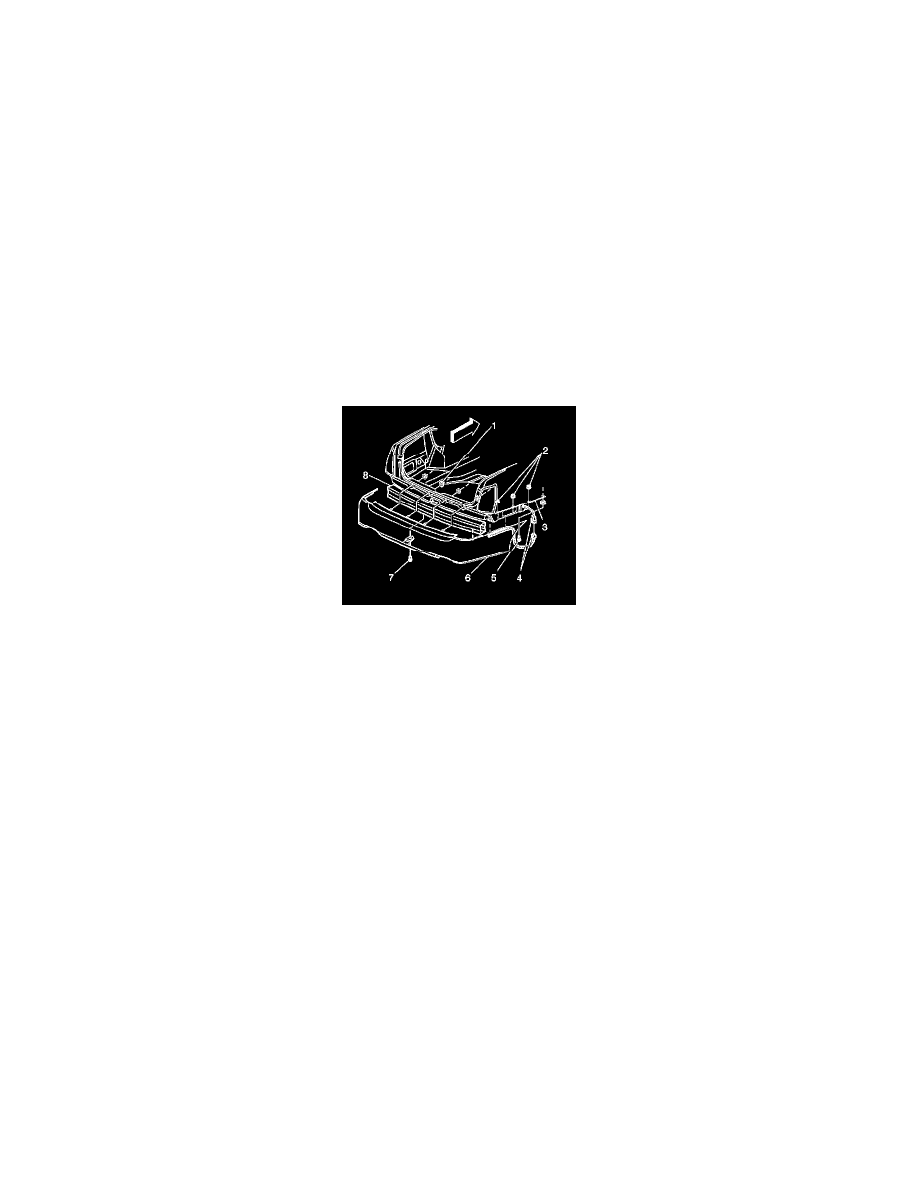
5. Install the nuts (1) in order to secure the rear bumper fascia (6) to the vehicle.
Tighten the nuts (1) to 9 N.m (80 lb in).
6. Install the nuts (2) in order to secure the rear bumper fascia (6) to the rear quarter panels (3).
Tighten the nuts (2) to 9 N.m (80 lb in).
7. Install the rear compartment side trim panels. Refer to Compartment Side Trim Replacement - LH Rear (See: Doors, Hood and Trunk/Trunk /
Liftgate/Trunk / Liftgate Interior Trim Panel/Service and Repair/Compartment Side Trim Replacement - LH Rear) and Compartment Side Trim
Replacement - RH Rear (See: Doors, Hood and Trunk/Trunk / Liftgate/Trunk / Liftgate Interior Trim Panel/Service and Repair/Compartment
Side Trim Replacement - RH Rear) in Body Rear End.
8. Install the rear compartment sill plate. Refer to Compartment Sill Plate Replacement - Rear (See: Doors, Hood and Trunk/Trunk / Liftgate/Trunk /
Liftgate Interior Trim Panel/Service and Repair/Compartment Sill Plate Replacement - Rear) in Body Rear End.
9. Close the rear compartment lid.
10. Raise and support the vehicle. Refer to Lifting and Jacking the Vehicle in General Information.
11. Connect the ultrasonic rear park assist harness to the body main harness (4).
12. Install the rear fascia extensions. Refer to Fascia Extension Replacement - Rear (See: Fascia Extension Replacement - Rear) in Bumpers.
13. Install the push in retainer (7) in order to secure the rear bumper fascia (6) to the rear bumper impact bar (8).
14. Lower the vehicle.