
DeVille DTS V8-4.6L VIN 9 (2002)
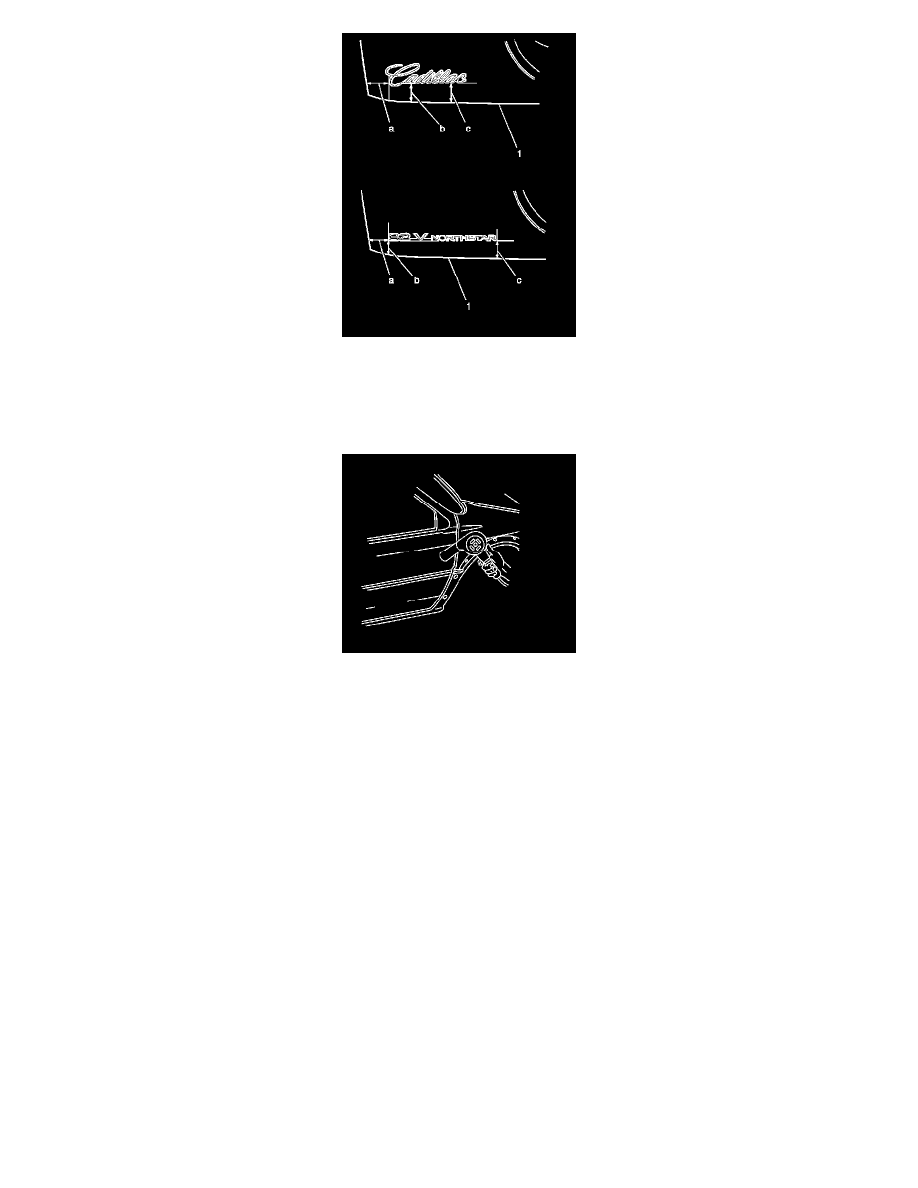
2. If the location of the emblem/nameplate has not been marked apply tape and use the following dimensions:
*
35 mm (1.38 in) (a) from the left vertical edge of the rear compartment lid
*
71 mm (2.80 in) (b) from the horizontal edge (1) of the rear compartment lid
*
84 mm (3.31 in) (c) from the horizontal edge (1) of the rear compartment lid
3. Heat the mounting surface to approximately 27-41°C (80-105°F) using the J 25070 , if necessary.
4. Ensure that the temperature of the emblem/nameplate is approximately 29-32°C (85-90°F).
Important: Do not touch the adhesive backing of the emblem/nameplate.
5. Remove the protective liner from the back of the emblem/nameplate.
6. Position the emblem/nameplate to the location marks and press the emblem/nameplate to the mounting surface.
7. Apply equal pressure along the emblem/nameplate to uniformly bond the item to the mounting surface.
8. Inspect the emblem/nameplate for bonding.
Hand roll loose ends.
9. Remove the tape from the mounting surface.
Emblem/Nameplate Replacement - Rear Compartment Lid (Deville)
Emblem/Nameplate Replacement - Rear Compartment Lid (Deville)
Tools Required
J 25070 Heat Gun
Removal Procedure
Important: Apply the tape for protection and alignment marks for alignment of the new emblem/nameplate.
1. Apply the tape to the area around the emblem/nameplate.